How to Stop Auto Renewal or Cancel an Office 365 Subscription

Office 365 is not for everyone. Some people will be reluctant to pay a monthly subscription to an office suite, especially since there are many free alternatives.

And even if you want to use Microsoft’s famous suite, you might decide that buying the software with a one-time payment for how you use it makes more financial sense.

But just because you’ve signed up once for Office 365 doesn’t mean you’re stuck with the service forever. You can easily cancel your subscription. Let’s see how you can cancel your service and what happens to the applications on your device. read more

How to Add Emoji and Emoticons in Slack

Can you remember a technological life without Emoji? We can’t either. Emojis are useful for many reasons, especially on Slack. Their very existence can change the way a message is delivered.

Slack also allows you to download and use your own emojis. Whether they’re yours or your favourite emojis, they give your workspace that extra something.

Custom emojis are also very easy to use. You don’t have to be a computer genius to know how to download, use or even delete them.

How to Add a Custom Emoji to Slack

  • To add an emoji, you first need an emoji accessible on your computer. The ideal size is 128 x 128 pixels. If you offer another format, Slack will compress it to 128 x 128.

Note: Remember to make sure that the emoji you download is licensed for commercial use if you use Slack for your business.

  • Once you have an emoji, click on the arrow next to your workspace name at the top of the left sidebar.
  • Click on “Customize Slack” in the menu that appears.
  • This opens the Customize Workspace page with several tabs. We’re interested in the Emoji tab, where you need to click “Add Custom Emoji”.
  • Click on “Upload Image” and select your computer’s emoji.
  • Choose the name you want to give to your emoji. Enter this name to search for it in the emoji selector or to add it directly to a message with a : (colon).
  • Click “Save” and you’re done.
  • Your emoji will appear in the list of custom emoji. Everyone in your workspace can now use it in a message or as a reply.
  • You can delete an emoji you’ve added (or any custom emoji if you’re an administrator) by clicking the “x” to the right of the emoji.
  • read more

    How to Enable or Disable Soft Disconnect from a Network in Windows 10

    Starting with Windows 10 Build 17763.404, Microsoft has added a new Group Policy setting called Enable Windows to allow a computer to be gradually disconnected from a network. This setting determines how Windows will disconnect a computer from a network when it determines that the computer should no longer be connected to the network.

    If this policy setting is enabled or not configured, Windows disconnects a computer from a network if it determines that you no longer want the computer to be connected to the network.

    If this policy setting is off, Windows immediately disconnects a computer from a network if it determines that you no longer want the computer connected to a network.

    Soft disconnect allows you to:

  • When Windows determines that you no longer want to connect to a network, it does not disconnect immediately. Abrupt disconnections degrade the user experience without any significant benefit and are avoided if possible.
  • When Windows decides to disconnect an interface, it notifies the TCP stack that the network should no longer be used. Existing TCP sessions will continue without interruption, but new TCP sessions will only use that interface if they are explicitly linked or if no other interface reaches the desired destination.
  • This message to the TCP stack generates a change in the state of the network. Network applications should be aware of these events and proactively move their connections to the new network whenever possible.
  • Windows then checks the traffic on the interface every thirty seconds. If the traffic is above a certain threshold, no further action is taken. This means that the interface can still be used actively, for example by transferring files or making a VoIP call, to avoid interference.
  • If traffic falls below this threshold, the interface is disconnected. Applications that maintain inactive connections for long periods of time, such as a mail client, can be disconnected and must re-establish their connections via another interface.
  • read more

    What is About:Blank? How to Get Rid of it?

    You are probably quite familiar with your browser’s address bar, the text box that contains the URL of the web page you are on, but you may have been surprised to see something like :blank there instead of a real web page address.

    Common sense has probably already helped to make sure that the empty part of about:blank is clearly related to the fact that you are viewing a completely empty page in your browser.

    About:blank is a special page in most browsers (Internet Explorer, Microsoft Edge, Firefox or Google Chrome) that does nothing more than display a blank page. Although most popular web browsers have a default web page to which the browser redirects you on startup, corrupted profile data can instead cause your web browser to display a blank page with the subject “about:blank” in the URL bar.

    About:blank is not really “about” anything. The word “about:” is a keyword that some browsers use to enable certain features or display standard pages.

    About:blank is not malware, but…

    Since I keep hearing from people who suspect otherwise, I want to be particularly clear:

    about:blank is not malware…

    The problem is that IE may choose to display about:blank because of malware.

    Again, about:blank is not malware; at worst, it is a symptom of malware. Malware sometimes breaks things and IE can’t display a page, in which case it displays about:blank.

    The solution in these cases is to run up-to-date scans for malware.

    How to Stop Seeing the About:Blank Error?

    Although about:blank is not malicious in itself, the main cause for concern when you see an about:blank page is that it may indicate that your computer is infected with something malicious. This would mainly happen outside of normal browsing. So don’t worry if you see the strange about:blank page in Google Chrome, for example. However, if you see this several times without changing your behaviour, it could be a sign that you have been hacked or that a hacker has control of the device.

    There are malware programs that use these “near-empty” pages to flood a computer system with annoying pop-ups, but these alone will not damage your PC, but rather distract you. In this case, it is best to run anti-virus software, adware or spyware. This should solve the problem and allow your computer to quickly return to normal use. Don’t forget to reset your browser’s URL if it has also been changed to something like a blank.

    As mentioned above, Chrome has a well-known problem that sometimes makes the weird “About:Blank” page appear instead of doing something useful. This is caused by a corrupted page cache, which causes the browser to try to access the “About:Blank” page instead of the page it is supposed to get. Fortunately, this corruption is easy to fix.

    Other Causes of About:Blank

    In some cases, incomplete removal of malware may result in About:Blank pages or pop-up windows with About:Blank. In this case, the active part of the malware has been removed, but the embedded browser instruction remains.

    This instruction tells the browser to open these pop-up windows, but since the main malware application has disappeared, the pop-up windows are never filled with new links and hacked content. So, although it’s not very malicious, it can certainly be very annoying to deal with.

    But the solution to this problem is quite simple. You should perform a complete malware and antivirus scan to remove all traces of malware and antivirus software from your system. The worst is probably over, but your previous scan didn’t cover everything.

    https://superuser.com/questions/1104494/what-is-aboutblank-for

    How Permanently Delete your Microsoft Account

    Even before Windows 10, the ability to create a Microsoft account was always within reach.

    This account allows users to access all Microsoft content, purchase Microsoft products, Xbox-related products, and more.

    However, as with any account, if you think you won’t be using it anymore, it may be time to close it for good. This is especially true for a Microsoft account, since a lot of sensitive data is stored there anyway.

    The problem is that closing and deleting a Microsoft account is not that easy. That’s why we’ve created this step-by-step guide to show you exactly how to close and permanently delete your Microsoft account.

    How do I permanently delete my Microsoft account?

    Things to do before you delete your Microsoft account

    Before you get rid of a Microsoft account completely, you may need to work out some details.

    1. Cancel subscriptions : If you subscribe to other services with your Microsoft Account ID, cancel those subscriptions now. Otherwise, you will no longer be able to access these services after you cancel.

    2. Set up automatic e-mail forwarding: If you use an e-mail address that ends with hotmail.com, outlook.com, live.com, or msn.com, your e-mail will no longer be available after the 60-day permanent account deletion wait. You can manually send messages to notify people that the account is being deleted, or you can set up automatic vacation replies.

    3. Spend money: Once your Microsoft account is deleted, so is all the money associated with it. Before you delete your account, you spend the remaining moola on items that you can keep after the account is deleted. The money that disappears includes Skype Credit.

    4 Back up your items: When using a Microsoft account you may have been tempted to save data such as photos in OneDrive or emails in Outlook. Once the account is deleted, this data will no longer be accessible unless you save it in a different location that is not associated with your account. You should also keep in mind that games purchased through your Microsoft account will still be playable, but you will lose the progress of saved games, your Gamerscore and your Gamertag. If you use an Xbox Music Pass, this music will no longer be accessible.

    5. Edit sub-accounts : Child accounts will remain open even if you delete your account, but they will need another parent account to give their permission when you try to log in to a PC running Windows 8 or later, a Windows phone, or an Xbox.

    6. Disable reset protection: If you have reset protection enabled on any of your devices, you must disable it before deleting your account. If you do not do this, you may not be able to use the device once the account is deleted.

    Permanently delete a Microsoft account

    The first step to delete your Microsoft account is to log out of your current account and create a local account on your Windows 10 PC. Log in to this local account, click the Start button, and then start the Settings application.

    Then click on the Accounts option, and then click on the first option, which is “Your Account”. Select the Microsoft account you wish to delete. Click Delete, then click Yes to confirm.

    Your Microsoft account is now deleted from your Windows 10 computer, but that’s not all. You must now close the account by going to the Microsoft site.

    When you’re done, permanently close your Microsoft account by going to this page on the Microsoft Web site. You must log in before you can continue.

    After you have logged in, Microsoft needs to know if you are logged in, so follow the instructions to leave this area. It’s very simple: either Microsoft sends you a code by e-mail or the company does it by SMS.

    This code is then used to determine if you are the owner of the account.

    Once the account closure page is displayed, check all the boxes and then click “Mark account for closure”. Remember that it takes 60 days for Microsoft to completely close your account. So if you feel you need to change your mind, do so before the 60 days are up.

    Delete the account locally

  • The first step in this process is to delete the Microsoft account from your local computer.
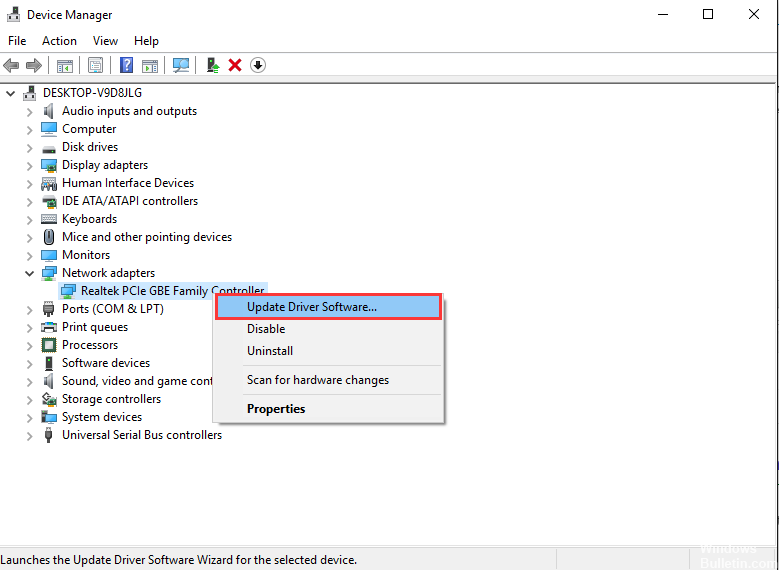
  • To do this, first enter your settings and click on the “Accounts” section.
  • At the bottom of the “Your Account” tab, you will find the option to delete the Microsoft account, which is highlighted here.
  • read more

    How to Fix DRIVER_VERIFIER_DMA_VIOLATION in Windows 10

    Driver Verifier is a utility integrated into the Windows 10 operating system that is responsible for ensuring driver integrity. It detects and suspects the behaviour of these drivers. If it detects the signature or activity of the driver as suspicious at the time of execution, it stops the suspected action by triggering a Blue Screen of Death error. One of these errors is DRIVER CHECK DMA VIOLATION. It is common for it to occur on Windows 7, Windows 8.1 and Windows 10. The mistake says–

    Your PC ran into a problem that it couldn’t handle, and now it needs to restart.

    If you’d like to know more, you can serach online later the this error: DRIVER_VERIFIER_DMA_VIOLATION

    The error code is 0xe6 and can be corrected with a few simple methods.

    This error check can only be performed if the driver checker has been instructed to check one or more drivers. If you did not intend to use Driver Verifier, you must disable it. You may also consider removing the driver that caused this problem.

    How to Fix DRIVER_VERIFIER_DMA_VIOLATION in Windows 10

    Update your drivers and install the latest Windows 10 updates.

    Update-Drivers

    Every PC needs drivers to work properly with the hardware, and if your drivers are obsolete or simply incompatible with Windows 10, you will probably get a Blue Screen of Death error.

    To solve these problems, it is strongly recommended to download and install the latest drivers, and you can do so by following these steps:

  • Press the Windows + X key on your keyboard to open the Power User menu and select Device Manager from the list.
  • When the Device Manager opens, locate the driver you want to update, right-click it and select Update Driver Software.
  • Select Automatically check for driver update. Windows 10 will now download and install the best driver for your PC.
  • read more

    How to Install Google Chrome Themes in Microsoft Edge Chromium

    Microsoft recently released the new Microsoft Edge Browser powered by Chromium for public preview and testing. We have already talked about installing Chrome Web Store extensions on Microsoft Edge, synchronizing browser data on Microsoft Edge, enabling dark mode on Microsoft Edge, etc. Today, you will learn how to install Google Chrome browser themes on the new Microsoft Edge browser with the Chromium engine. This is a bit tricky because it uses several extensions of the Chrome online store.

    This article explains how to install themes and extensions into Edge Chromium from the Chrome Online Store or other third-party sources.

    Installing Chrome Themes on Edge Chromium

    As for Edge Chromium, all the extensions and chromium issues work there. But any source other than the Windows store, such as the Chrome online store, is considered a third party source. Therefore, you need to enable the setting in Edge Chromium that allows you to install themes and extensions from other sources.

  • To install the theme from the Chrome Store, users must install the Get CRX utility. First, open the
  • Microsoft Edge Chromium browser, click the 3-point icon and select Extensions .
  • Next, we will enable the Allow extensions from stores option to allow the browser to install extensions from the Chrome Store.
  • In the web browser, we go to the link below to install the Get CRX utility in the Edge Chromium browser.
  • Download the Get CRX utility.
  • Open the Chrome Store and locate the desired theme in the Edge Chromium browser, click on the content of the theme. Right-click on the white background area and select Get CRX of these extensions .
  • read more

    What Are XPI Files and How to Open One?

    The cross-platform installer (XPI) is a ZIP file used to install packages with XPInstall technology. XPI modules (called “bundles”) are used to install a variety of software, including plug-ins, extensions, themes and Thunderbird dictionaries.

    An XPI contains both an installation guide (install.js or install.rdf) and the software to be installed, which itself is often packaged as a JAR file. When downloaded or placed in an extension manager, XPInstall automatically interacts with the installation instructions contained in the XPI and installs the included software.

    XPI archives only support files that are stored uncompressed or compressed using the “Deflate” method.

    An XPI file is a compressed installation archive used by various Mozilla applications including Firefox, Thunderbird, and SeaMonkey. It contains software, such as a web browser plugin, extension or theme. XPI files also contain an install.js or install.rdf file, which contains installation instructions.

    Some versions of Firefox allow you to install XPI files by simply dragging and dropping them onto an open web browser window. Mozilla software uses a component called XPInstall (which contains the Mozilla installation script) to install XPI packages.

    How do I open an XPI file?

    To open an XPI file, you need appropriate software such as the Mozilla/Firefox browser from Mozilla. Without the appropriate software, you will receive a Windows message “How do you want to open this file? (Windows 10) or “Windows cannot open this file” (Windows 7) or a similar message for Mac/iPhone/Android. If you cannot open your XPI file properly, try opening the file by right-clicking the mouse or pressing and holding down the key. Then click on “Open with” and select an application.

    To convert an XPI file

    There are file types similar to XPI that are used by other Web browsers to add features and capabilities to a browser, but they cannot be easily converted to and from other formats for use in another browser.

    For example, while files such as CRX (Chrome and Opera), SAFARIEXTZ (Safari) and EXE (Internet Explorer) can all be used as add-ons for their respective browsers, none of them can be used in Firefox, and Mozilla’s XPI file type cannot be used in any of these other browsers.

    However, there is an online tool called Add-on Converter for SeaMonkey that attempts to convert an XPI file compatible with Firefox or Thunderbird to an XPI file that works with SeaMonkey.

    Creating the .xpi file

    You can use any method to create the .zip file which is renamed to .xpi. Note the requirement that the only supported compression method is “deflate”, but files can also be added to the archive uncompressed. Your top-level files (for example, what you got from manifest.json (WebExtensions), or anything else: chrome.manifest and install.rdf) must be in the root directory of the archive, not in a subdirectory.

    https://developer.mozilla.org/en-US/docs/Mozilla/XPI

    How to Change a File Extension in Windows 10

    This article describes how to change the extension of a file in Windows.

    What is a File Extension?

    In Windows, a file extension tells your computer what type of application to use to open a file. The file extension is a three-letter code that appears at the end of a file’s name, even though it is sometimes hidden (more information about this in a minute).

    For example, if a file is named mythesis.doc, .doc is the file extension, and it tells Windows that the file was created using Microsoft Word. If a file is named mythesis.xls, the extension is .xls, which tells Microsoft Windows that the file was created using Excel.

    So where are these file extensions located?

    Windows hides all file extensions by default. The idea is that most people don’t want to bother with extensions, because changing the extension of a file can cause problems (if you change it to the wrong one), and because Windows usually deals with extensions behind the scenes. However, there may be times when you need to see file extensions, and you can do so by following these instructions.

    How to Change a File Extension in Windows 10

    NOTE: You should only change a file extension if you are sure it is the right one. Test the file thoroughly after the change. If it doesn’t work, you can easily change the file extension again – just remember what it was!

    Let’s say you have a RAW photo that takes up too much space on your website or computer and you want to edit it or convert it to a smaller file, such as a JPG or PNG.

    You can do this by opening the RAW photo in an image editing program and changing the file extension in the Save As or Export As menu.

    You can also do this by right-clicking the unopened file and clicking the “Rename” option. Just change the file extension of the file format you want and your computer will do the conversion work for you.

    Using the Command Line

    For those of you who are familiar with the command line, there is a very simple command that allows you to perform very simple file renaming tasks. There are two commands you can use at the command prompt: Rename and Rename. Both do exactly the same thing, so it’s simply a matter of preference as to which one you use.

    If you have a folder containing a number of JPGs and you want to change the file extension to, say, PNG, you need to type the following command :

    ren *.jpg *.png

    As you can see above, the command changed all files in this directory with a JPG file extension to those with a PNG file extension.

    To do this, under Windows 10, you must first force the system to show you the file extensions next to the file name.

  • Open the file explorer by pressing the Windows key and the “E” key at the same time. You can also double-click the “This PC” icon on your desktop.
  • Click on the “View” tab in the top menu.
  • The ribbon at the top of the window should display the available viewing options.
  • Locate the “File Name Extensions” option on the ribbon and check the appropriate box.
  • This allows you to see the extension of each file at the end of its name and to change it by renaming the file.
  • read more

    What Are 3GP Files and How to Open Them?

    Your computer didn’t open a 3GP file? We’ll explain what 3GP files are and recommend software that we know can open or convert your 3GP files.

    What is a 3GP file?

    A 3GP file is a multimedia file stored in an audio and video container format developed by the 3rd Generation Partnership Project (3GPP). It stores video and audio streams that are transmitted between 3G mobile phones and over the Internet.

    3GP is a media container format based on the ISO media file format. It stores video streams in H.263 or H.264 format and audio streams in AMR-WB, AMR-WB+, AMR-NB, HE-AAC v1, AAC-LC or enhanced aacPlus format.

    3GP files are commonly used by 3G mobile phones that support video recording, but can also be played on some 2G and 4G phones. When video files are transferred to a computer, you can open them with various applications such as Microsoft Movies & TV, Apple QuickTime Player or VideoLAN VLC Media Player.

    Opening a 3GP or 3G2 file

    3GP and 3G2 files can be played on many different 3G mobile phones without the need for a special application. Although there may be some limitations, 2G and 4G mobile devices are almost always able to play 3GP/3G2 files natively.

    You can also open both media files on a computer. Commercial programs will of course work, but there are also many free 3GP/3G2 players available. For example, you can use software such as Apple’s free QuickTime Media Player, the free VLC Media Player or the MPlayer program.

    You can also open 3G2 and 3GP files with Microsoft’s Windows Media Player, which is included in Windows. However, you may need to install a codec to view them properly, such as the free MPEG-4 FFDShow video decoder.

    Conclusion

    This type of multimedia file was created by the 3GPP 3rd Generation Partnership Project Group, hence its name – occasionally this type of file may have the extension 3GPP. Essentially a video container format, 3GP was created as a space-saving alternative to other file types. They should consume less bandwidth and data when shared, especially between mobile devices.

    https://www.quora.com/How-are-mp4-and-3gp-files-different