Updated April 2024: Stop getting error messages and slow down your system with our optimization tool. Get it now at this link
- Download and install the repair tool here.
- Let it scan your computer.
- The tool will then repair your computer.
If you connect a USB stick, SD card or hard disk to your Windows 10 PC and you find that Windows cannot repair the disk, it means that the file system on the disk is damaged and that ChkDsk cannot repair it. You can also see this message when you try to run ChkDsk to repair the file system.
The complete error is as follows:
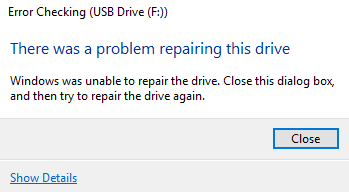
Error check – example of a hard disk drive
There was a problem repairing this drive. Windows was able to repair the drive. Close this dialogue box, and then try to repair the drive again.
This is an error that can occur unexpectedly on your external and internal hard drives.
Using Windows Disk Management

If you receive the error message “Windows could not complete formatting”, you can first try to use the Windows disk management tool to solve this problem. All you have to do is follow this path:
Step 1: Right-click the My Computer icon on the desktop and select the Manage option.
Step 2: Click on “Disk Management” to open Windows Disk Management.
Step 3: Select the Micro SD card, USB stick or flash drive you want to format, right click and press “Format”. If there are partitions on the drive, you must first delete them all.
Run CHKDSK from the command line
While some users reported the error themselves after the CHKDSK analysis, others transmitted the message when repairing a drive with built-in tools. If you are one of these, you can try to perform a CHKDSK scan first. The scan checks the hard disk for defective sectors and repairs them if possible.
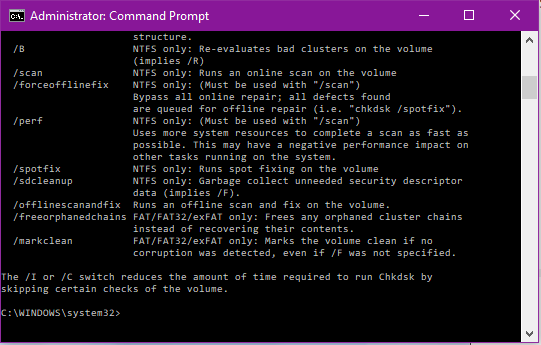
You must run CHKDSK from the command line. Open CMD and execute the following command:
chkdsk x : /f /r
This is’x’ the disk letter.
CHKDSK Windows 10 with Elevated Command Prompt.
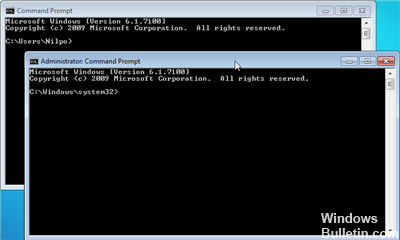
CHKDSK Windows 10 with the extended prompt performs a number of functions. Although the execution may take some time, it will avoid damaging the hard disk and losing data in the long term. It is recommended to run it when Windows stops abnormally or when the hard disk drive is running abnormally.
Step 1: Type cmd in the Windows 10 Cortana search field. Right-click on the best match and select Run as administrator.
In the prompt that appears, type CHKDSK * : /f (* is the letter of the specific drive you want to scan and repair), then press Enter. This CHKDSK Windows 10 command checks for errors in your computer’s drive and tries to correct the errors it finds.
Here I use CHKDSK e : /f as an example (e represents the letter of the drive I want to scan). The image below shows that there is no file system error with the partition. If hard disk errors are detected, CHKDSK will help you to correct them automatically.
April 2024 Update:
You can now prevent PC problems by using this tool, such as protecting you against file loss and malware. Additionally it is a great way to optimize your computer for maximum performance. The program fixes common errors that might occur on Windows systems with ease - no need for hours of troubleshooting when you have the perfect solution at your fingertips:
- Step 1 : Download PC Repair & Optimizer Tool (Windows 10, 8, 7, XP, Vista – Microsoft Gold Certified).
- Step 2 : Click “Start Scan” to find Windows registry issues that could be causing PC problems.
- Step 3 : Click “Repair All” to fix all issues.

Run Startup Repair
Windows has another integrated recovery tool that you can use to analyze and resolve problems that may prevent Windows 10 from loading correctly.
- On the Select Option screen, click Troubleshooting > Advanced Options.
- Under Advanced Options, select Start – Repair.
Run the System File Checker tool
- In Administrator: Command prompt, type sfc /scannow and press nter.
- Wait until the scanning and output command line ends at the end.
- Restart your PC and check for improvements.
Troubleshooting hardware and devices

To open and troubleshoot hardware and peripherals:
- Click on the Start button.
- Click on Control Panel to open.
- In the search box located in the upper right corner of the Control Panel window, type troubleshooting. Click on Troubleshooting, if displayed.
- Under Hardware and Sound, click Configure Device. You may be prompted to enter an administrator password or a confirmation, password or confirmation. The Hardware and Device Troubleshooting window opens.
- Select Next to start troubleshooting.
- If a problem is detected, you will be prompted to “Apply this correction”. This may vary depending on what is found.
Expert Tip: This repair tool scans the repositories and replaces corrupt or missing files if none of these methods have worked. It works well in most cases where the problem is due to system corruption. This tool will also optimize your system to maximize performance. It can be downloaded by Clicking Here

CCNA, Web Developer, PC Troubleshooter
I am a computer enthusiast and a practicing IT Professional. I have years of experience behind me in computer programming, hardware troubleshooting and repair. I specialise in Web Development and Database Design. I also have a CCNA certification for Network Design and Troubleshooting.