Updated April 2024: Stop getting error messages and slow down your system with our optimization tool. Get it now at this link
- Download and install the repair tool here.
- Let it scan your computer.
- The tool will then repair your computer.
There is no official stand-alone timer application for Windows 10, but you can use the timer in the Alarms & Clock application to track the time. If you have left something in the oven because you are absorbed in a video game, or if you are watching cat videos again at intervals even though you promised to go to bed in 10 minutes, the Windows 10 timer can help. It’s easy to use and a useful tool if you don’t want to burn your kitchen or spoil your good sleep. This tutorial will tell you everything you need to know about it, so let’s get started:

The features presented are available in the Windows Update November 10, 2019 or later. If you are using an older version of Windows 10, you may not have access to all features. Check your version of Windows 10 and get the latest Windows 10 update that is available, if necessary.
How to Add a Timer on a Windows 10 PC
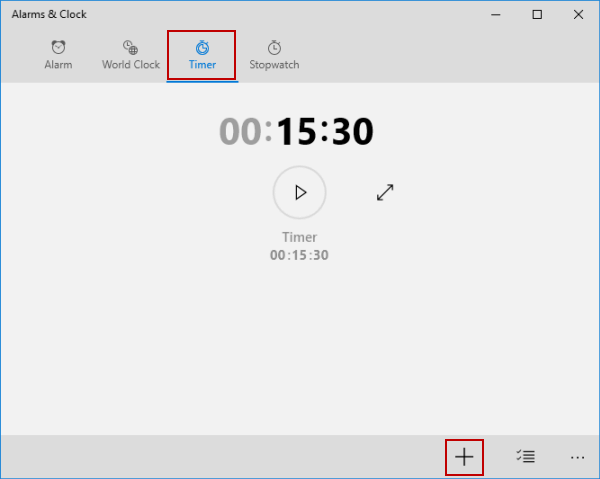
- Start the Alarms and Clock application.
- Click on “Timer”.
- Click the “+” button in the lower right corner to add a new timer.
Applies to all versions of Windows 10
April 2024 Update:
You can now prevent PC problems by using this tool, such as protecting you against file loss and malware. Additionally it is a great way to optimize your computer for maximum performance. The program fixes common errors that might occur on Windows systems with ease - no need for hours of troubleshooting when you have the perfect solution at your fingertips:
- Step 1 : Download PC Repair & Optimizer Tool (Windows 10, 8, 7, XP, Vista – Microsoft Gold Certified).
- Step 2 : Click “Start Scan” to find Windows registry issues that could be causing PC problems.
- Step 3 : Click “Repair All” to fix all issues.

Click the Timer button in the tab bar at the top of the application. From this screen, you can set multiple timers and save them for later use. The timers are not deleted until you delete them manually. This means that you can set frequently used timers once and then use them again several times. This is ideal for a kitchen PC, where you can preset timers for your favourite recipes.
To add a new timer, click the “+” button at the bottom of the application. Use the rotating menus to select the number of hours, minutes and seconds of time. You can assign an optional name to identify the timer in the application.
Once you have set the timer, click the “Play” button in the lower right corner (triangle icon) to save it. The timer will start immediately. When the countdown expires, you will receive an alarm notification. With modern hardware, this should also sound when the PC is asleep. If this is not the case, you will see a yellow warning in the application.
Deleting a Timer in Windows 10

- Access Alarms & Clock from the Start menu.
- Open Timer and click on the Manage icon in the lower right corner.
- Click the Delete icon in front of a timer and press the Done button (i.e. the checkmark icon).
Conclusion
If the idea of your computer reminding you to do things appeals to you, Windows 10 offers a stock application that can do just that. Even better, thanks to the Start menu and shortcuts in Cortana, you don’t even need to open the application to get the most out of it. Now you know quick and easy ways to create timers.
Translated with www.DeepL.com/Translator (free version)
https://support.microsoft.com/en-us/help/4026379/windows-10-how-to-use-alarms-clock-app
Expert Tip: This repair tool scans the repositories and replaces corrupt or missing files if none of these methods have worked. It works well in most cases where the problem is due to system corruption. This tool will also optimize your system to maximize performance. It can be downloaded by Clicking Here

CCNA, Web Developer, PC Troubleshooter
I am a computer enthusiast and a practicing IT Professional. I have years of experience behind me in computer programming, hardware troubleshooting and repair. I specialise in Web Development and Database Design. I also have a CCNA certification for Network Design and Troubleshooting.