Updated April 2024: Stop getting error messages and slow down your system with our optimization tool. Get it now at this link
- Download and install the repair tool here.
- Let it scan your computer.
- The tool will then repair your computer.
A webcam can be a useful tool in a small business, especially if you connect to customers or employees via video conferencing software such as Skype or Google Hangouts. But if your laptop’s internal webcam no longer works or has been replaced by a better quality external webcam, you can tell your computer which one to use for a particular application.

Many modern laptops have an integrated webcam that you can use to record videos or participate in video chats. Most of the built-in webcams are of good quality, but if you want advanced features such as panning, automatic tracking and better video resolution, an external webcam is the best choice. Adding a second webcam to your laptop is quite simple, but operating the secondary camera with chat and video recording is a little more difficult. For the second webcam to work with many software applications, you must disable the laptop’s built-in webcam.
How can I change the default camera in Windows 10?

If the webcam is listed under Devices and Printers, please follow the steps below.
a. Press the Windows + X button.
b. Select Control Panel.
c. Click on Devices and Printers.
d. Check that the Logitech webcam is listed.
e. Right-click on the Logitech webcam.
f. Click on Set this device as default.
April 2024 Update:
You can now prevent PC problems by using this tool, such as protecting you against file loss and malware. Additionally it is a great way to optimize your computer for maximum performance. The program fixes common errors that might occur on Windows systems with ease - no need for hours of troubleshooting when you have the perfect solution at your fingertips:
- Step 1 : Download PC Repair & Optimizer Tool (Windows 10, 8, 7, XP, Vista – Microsoft Gold Certified).
- Step 2 : Click “Start Scan” to find Windows registry issues that could be causing PC problems.
- Step 3 : Click “Repair All” to fix all issues.

Disabling another camera
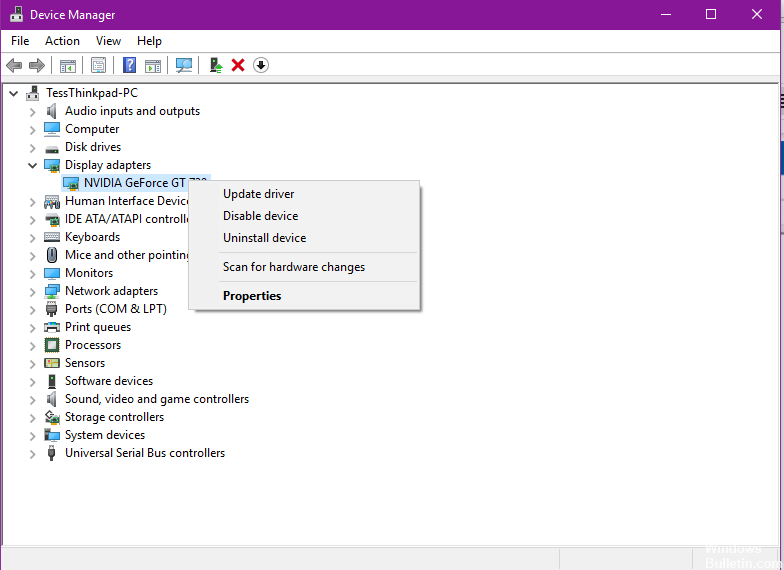
One of the most common bypass solutions when selecting a standard camera is to disable the other camera. This forces Windows to use the camera you want to use every time you are prompted to do so. To disable the other cameras:
- Simultaneously press the “Windows” + “X” keys and select “Device Manager” from the list.
- Double-click on the Imaging Devices drop-down list.
- Right-click on the name of the internal webcam and select Disable.
- Try using an application and see if the problem persists.
Select the default driver
Another common way to solve this problem is to select the default device. This allows you to configure Windows to open a third-party camera instead of the default internal camera. To do that:
- Press “Windows” + “S” to open the search option and type “Control Panel”.
- Select the first option and click on “View Devices and Printers” under the “Hardware and Sound” option.
- Make sure the webcam is on it.
- If so, right-click on the webcam and select Set this device as the default device.
- Check if the problem persists.
CONCLUSION
You now know how to change a lot of what Windows 10 does when you reinstall it. Take the time to run your computer the way you want, and you will be much more productive. Don’t forget to check these settings after major updates of Windows 10 as they may change from time to time.
https://community.logitech.com/s/question/0D55A000070XHHKSA4/how-to-make-webcam-my-default-webcam
Expert Tip: This repair tool scans the repositories and replaces corrupt or missing files if none of these methods have worked. It works well in most cases where the problem is due to system corruption. This tool will also optimize your system to maximize performance. It can be downloaded by Clicking Here

CCNA, Web Developer, PC Troubleshooter
I am a computer enthusiast and a practicing IT Professional. I have years of experience behind me in computer programming, hardware troubleshooting and repair. I specialise in Web Development and Database Design. I also have a CCNA certification for Network Design and Troubleshooting.