Updated April 2024: Stop getting error messages and slow down your system with our optimization tool. Get it now at this link
- Download and install the repair tool here.
- Let it scan your computer.
- The tool will then repair your computer.
Automatic activation is enabled by default on Windows. If this option is enabled, Windows automatically mounts the file system for a new volume (floppy disk or disk) when it is added (connected) to the system and then assigns a drive letter to the volume.

Disabling automatic mounting prevents Windows from automatically creating and mapping drive letters for new base volumes (disks or drives) that are added (mapped) to the system.
All previously mounted hard disks or drives to which a drive letter has been assigned will always be mounted with their previous drive letter if they are mounted by default, even after disabling automatic activation.
To disable automatic activation of new drives under Windows 10, do the following.
Automatic activation activation with DiskPart
- Open a new command prompt as an administrator.
- Enter the diskpart command.
- Type automount in diskpart and press Enter. The current status of the characteristic is displayed. In my case, it is activated.
- To deactivate the automout, execute the command to deactivate the automout in diskpart.
- It’s over for you. The automatic mounting function is now disabled.
To reactivate it later, run diskpart as described above and enter the activation of automatic mounting.
April 2024 Update:
You can now prevent PC problems by using this tool, such as protecting you against file loss and malware. Additionally it is a great way to optimize your computer for maximum performance. The program fixes common errors that might occur on Windows systems with ease - no need for hours of troubleshooting when you have the perfect solution at your fingertips:
- Step 1 : Download PC Repair & Optimizer Tool (Windows 10, 8, 7, XP, Vista – Microsoft Gold Certified).
- Step 2 : Click “Start Scan” to find Windows registry issues that could be causing PC problems.
- Step 3 : Click “Repair All” to fix all issues.

Automount scrub
“Automount scrub” is the order for cleaning the house. It takes drive letters, mounted folder paths, mounted folder directories and registry settings that the host no longer sees, and deletes them from the host. This way, when the inverter is wound up (for example, during the next backup cycle), it will not remember the inverter and will try to wind it up.
If you change your mind later, repeat the above steps and type automount enable.
But, wait, there’s more! If you disable automatic activation, Windows will ignore drives that have already been mounted, which means that if you have a drive that was already mounted, Windows will always recognize that drive. The Scrub option allows you to erase all previously attached discs, so it is no longer a problem.
If the Command Prompt or PowerShell is still open, simply type Automount Scrub.
You will be notified that all discs have been cleaned and that automatic mounting is on or off.
Enable automatic activation with the mountvol command.
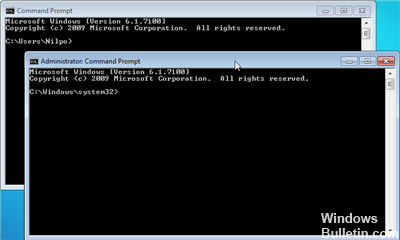
1. open elevated command prompt.
2. Type mountvol /e in the high prompt and press Enter. (see screenshot below)
3. Close the raised prompt.
4. Restart the computer to apply it.
Expert Tip: This repair tool scans the repositories and replaces corrupt or missing files if none of these methods have worked. It works well in most cases where the problem is due to system corruption. This tool will also optimize your system to maximize performance. It can be downloaded by Clicking Here

CCNA, Web Developer, PC Troubleshooter
I am a computer enthusiast and a practicing IT Professional. I have years of experience behind me in computer programming, hardware troubleshooting and repair. I specialise in Web Development and Database Design. I also have a CCNA certification for Network Design and Troubleshooting.