Updated April 2024: Stop getting error messages and slow down your system with our optimization tool. Get it now at this link
- Download and install the repair tool here.
- Let it scan your computer.
- The tool will then repair your computer.
The File Explorer is the ultimate tool for browsing files stored on a Windows 10 computer. It offers a high level of customization for writing and performing operations on a file. A user can classify scanned files and folders by name, type, date, size, etc. Files that share a common attribute can also be grouped using the grouping function. But this function does not always help users. These functions can therefore be activated and deactivated. In this article, we will see how to disable file grouping in Windows 10 File Explorer.
The Windows 10 File Explorer has five folder templates: General Items, Documents, Images, Music and Videos. When you see the Customize a Library or Folder tab, you see these templates. This increases flexibility when displaying your personal information.
For example, even if you prefer the List view for documents, you can display your music library in the Details view, and you want your image and video libraries to appear in icon-based views such as medium, large or very large icons. That’s why Explorer saves its settings for each folder template individually.
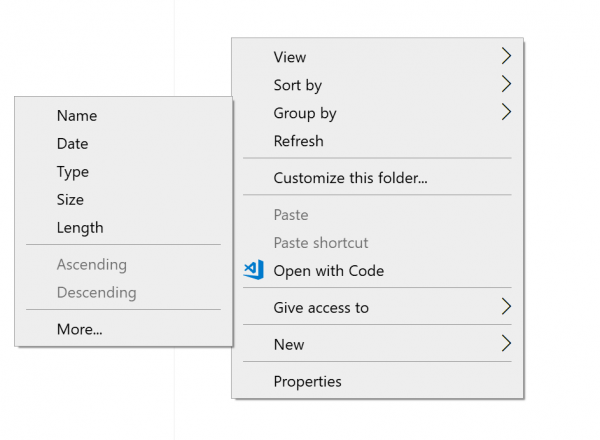
In addition to view templates, you can change the sort and grouping options. They will help you reorganize your files according to various details such as name, size, modification date, etc. By default, files and folders are sorted by name in ascending order. Here’s how to change it.
To disable file grouping in Explorer on Windows 10
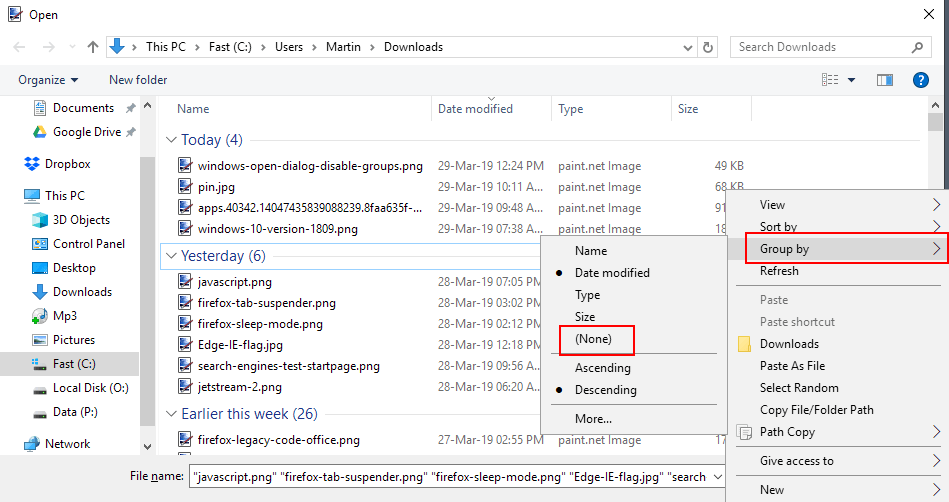
Simply right-click on an empty field in the file list, for example, right-clicking to select Group By > (None) from the context menu to disable automatic file grouping in open dialogs.
Windows disables grouping immediately after not selecting any. You can browse a list of files again as before.
April 2024 Update:
You can now prevent PC problems by using this tool, such as protecting you against file loss and malware. Additionally it is a great way to optimize your computer for maximum performance. The program fixes common errors that might occur on Windows systems with ease - no need for hours of troubleshooting when you have the perfect solution at your fingertips:
- Step 1 : Download PC Repair & Optimizer Tool (Windows 10, 8, 7, XP, Vista – Microsoft Gold Certified).
- Step 2 : Click “Start Scan” to find Windows registry issues that could be causing PC problems.
- Step 3 : Click “Repair All” to fix all issues.

The context menu displays other options that may be useful to you, such as changing the sort order or view options. However, they are directly accessible in the open dialog window.
It is not clear whether Microsoft is currently testing the change on selected systems or whether this will be the new standard for all users when Windows 10 version 1809 is available.
Disable or enable file grouping for all folders
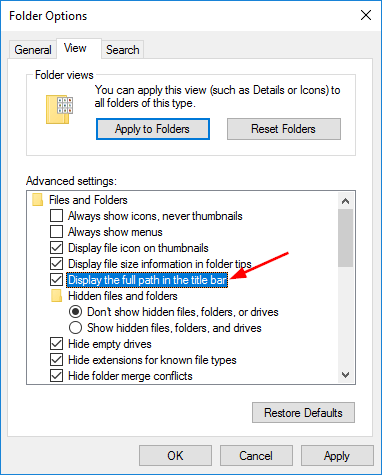
To disable file grouping for all folders, you must first follow the steps above for a folder to have the view you want. When this folder is open, click View > Options. Click the View tab, then click Apply to all folders.
To enable file grouping for all folders, click Reset Folder on the same View tab. Be careful not to accidentally click Restore Default Settings as this will restore all the settings in the view.
Using the registry editor
1. Click on Start, type regedit in the search box, then press Enter.
2. navigate to the next location HKEY_CURRENT_USER\Software\Classes\Local Settings\Software\Microsoft\Windows\Shell
3. In the left pane, right-click the BagMRU and Bags keys one at a time and click Remove.

4. click Yes to delete.
5. navigate to the next location HKEY_CURRENT_USER\Software\Microsoft\Windows\Shell
6. In the left pane, right-click the BagMRU and Bags keys one at a time and click Remove.
7. Click Yes to delete.
Close the registry editor. Log out and continue to apply the changes.
CONCLUSION
Now that you’re back to a fresh start, you can further customize folder views and, while you’re at it, configure folder options to take even more advantage of the file explorer and all its small optimizations that you may not have known.
Expert Tip: This repair tool scans the repositories and replaces corrupt or missing files if none of these methods have worked. It works well in most cases where the problem is due to system corruption. This tool will also optimize your system to maximize performance. It can be downloaded by Clicking Here

CCNA, Web Developer, PC Troubleshooter
I am a computer enthusiast and a practicing IT Professional. I have years of experience behind me in computer programming, hardware troubleshooting and repair. I specialise in Web Development and Database Design. I also have a CCNA certification for Network Design and Troubleshooting.