Updated April 2024: Stop getting error messages and slow down your system with our optimization tool. Get it now at this link
- Download and install the repair tool here.
- Let it scan your computer.
- The tool will then repair your computer.
In Windows, many very annoying audio recording problems can occur. Many users have asked us questions after being more and more bored that their microphone automatically adjusts itself without user intervention. Most of the users concerned report that the microphone level increases or decreases without any triggers being visible. It is reported that the problem occurs with multiple applications (integrated or third party).
If you are currently having difficulty solving this problem, this article proposes several steps to do so. Below is a set of methods that other users have successfully used in a similar scenario to solve the microphone problem under Windows 10. Each of the possible corrections listed below is validated by at least one user concerned.
For best results, we recommend that you follow the methods in the order in which they are presented, as we have ranked them according to their effectiveness and severity. One of them is obliged to solve the problem, whoever the author is.
Using Audio Troubleshooting

You can try Window’s problem-solving software. Microsoft has integrated a troubleshooter for various system-related problems in Windows, and the troubleshooter for audio and recording problems is one of them. Here’s what you need to do to perform Windows audio troubleshooting:
Go to Search, enter Troubleshooting and open Troubleshooting.
In the Troubleshooting window, in the left pane, go to Hardware and Devices and click Run Troubleshooting.
Follow the instructions on the screen and let the wizard scan your computer.
April 2024 Update:
You can now prevent PC problems by using this tool, such as protecting you against file loss and malware. Additionally it is a great way to optimize your computer for maximum performance. The program fixes common errors that might occur on Windows systems with ease - no need for hours of troubleshooting when you have the perfect solution at your fingertips:
- Step 1 : Download PC Repair & Optimizer Tool (Windows 10, 8, 7, XP, Vista – Microsoft Gold Certified).
- Step 2 : Click “Start Scan” to find Windows registry issues that could be causing PC problems.
- Step 3 : Click “Repair All” to fix all issues.

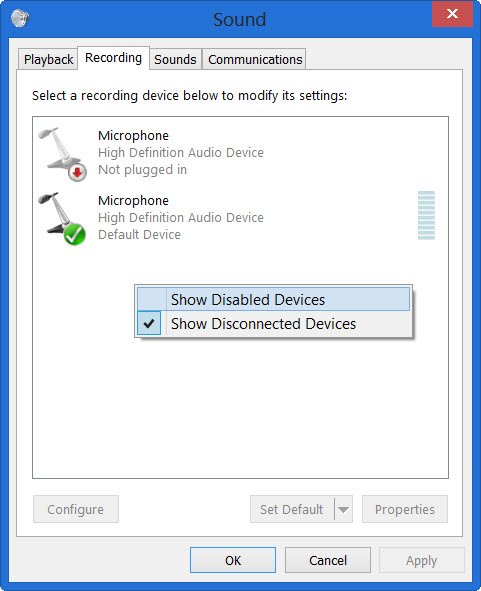
Check the settings in the Communication tab
- Right-click on the speaker icon at the bottom right of your computer. (Date / close time)
- Select “Recording devices” in the pop-up options.
- The pop-up window of the Sound Control is displayed in the Recording tab.
- Select the Communication tab.
- For the question “When Windows detects a communication activity:”, answer “Do nothing.
- Select “Apply”.
- Check if your microphone no longer adjusts automatically.
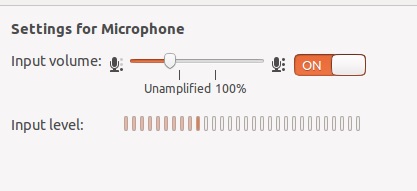
Switch on the microphone amplifier manually.
- Type “Sound” in the search field and select Sound (Control Panel) from the list.
- Select the Recording tab.
- Right-click (or press and hold) on the active microphone input device and select Properties.
- Select the Levels tab.
- Manually drag the microphone amplifier to a higher level and click Apply.
Check the drivers of your microphone.
- Type “Device Manager” in the search field and select it from the list.
- Develop sound, video and game controllers.
- Right-click (or press and hold) on your microphone device and select Update Software Driver.
- Select Automatically check for driver update. This option searches the Internet for the correct version of the driver or determines if you have already installed the most recent driver. You may be asked to restart your computer to install the driver.
Use the registry editor

- First, close your browser or other programs that use your microphone.
- Open Regedit Navigate to[HKEY_CURRENT_USER\Software\Google\Google Talk Plugin].
- In this section, it should have a string value called “audio flags” with a value of 3.
- Change this value to appear as “Audio Flags”= “1” or as shown in the image below.
- Once you have done all this, you can open your browser and start Googletalk/Hangouts. I noticed that if I open the Hangouts Settings tab to adjust all settings, this setting will be reset. So be ready to start again when you do (then reset your browser).
Expert Tip: This repair tool scans the repositories and replaces corrupt or missing files if none of these methods have worked. It works well in most cases where the problem is due to system corruption. This tool will also optimize your system to maximize performance. It can be downloaded by Clicking Here

CCNA, Web Developer, PC Troubleshooter
I am a computer enthusiast and a practicing IT Professional. I have years of experience behind me in computer programming, hardware troubleshooting and repair. I specialise in Web Development and Database Design. I also have a CCNA certification for Network Design and Troubleshooting.