Updated April 2024: Stop getting error messages and slow down your system with our optimization tool. Get it now at this link
- Download and install the repair tool here.
- Let it scan your computer.
- The tool will then repair your computer.
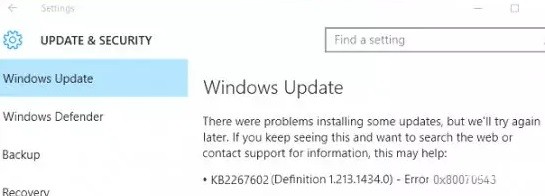
Every time you try to update Windows, you encounter the error 0x80070543; you are in the right place, because today we will fix this error. Although error 0x80070543 does not have much information related to it, and many users only assume its cause. Nevertheless, here at windowsbulletin, we will list some methods aimed at fixing this particular problem.
What causes error 0x80070543
Although the exact causes of Windows 10 update error 0x80070543 are unknown, here are some of the possible explanations:
- Damaged system files: System files may be damaged or missing due to any system-level changes, such as an incorrect shutdown.
- Damaged system components: Components such as drivers and services may be damaged or missing, which can lead to various problems, including the 0x80070543 error.
- Incomplete installation or removal of some programs: Some programs may not be installed or uninstalled properly, which can lead to errors.
- Power outages that cause your computer to shut down in the middle of an update: This can also damage system files and give you an error 0x80070543.
Windows 10 should be updated regularly to ensure that it runs smoothly. However, if updates can’t be installed, your computer becomes vulnerable to intruders and everything starts to load slowly. Various other errors can also occur, making it difficult to use your computer.
How to resolve error 0x80070543
Launch DISM (Deployment Image Servicing and Management)

This tool can be used to repair and fix a number of different issues with your system, and it’s important to know how to use it. Here are the steps you need to follow:
- First, you need to open the Command Prompt as an administrator. To do this, search for “Command Prompt” in the Start menu and then right-click on the result and select “Run as administrator.”
- Once the Command Prompt is open, type in the following command and hit Enter: Dism /Online /Cleanup-Image /ScanHealth
- This will scan your system for any issues that could be causing problems. If no errors are found, you can proceed to the next step. If errors are found, you’ll need to fix them before continuing.
- To actually fix the problems that were found in the previous step, you need to run the following command: Dism /Online /Cleanup-Image /RestoreHealth
- Once that’s finished running, you should reboot your system and then check to see if the updates will install properly.
April 2024 Update:
You can now prevent PC problems by using this tool, such as protecting you against file loss and malware. Additionally it is a great way to optimize your computer for maximum performance. The program fixes common errors that might occur on Windows systems with ease - no need for hours of troubleshooting when you have the perfect solution at your fingertips:
- Step 1 : Download PC Repair & Optimizer Tool (Windows 10, 8, 7, XP, Vista – Microsoft Gold Certified).
- Step 2 : Click “Start Scan” to find Windows registry issues that could be causing PC problems.
- Step 3 : Click “Repair All” to fix all issues.

Execute the Windows update troubleshooter
The Windows Update troubleshooter is a built-in tool that can help you identify and fix problems with updating Windows 10. Here’s how to use it:
- Press the Windows key + I to open the Settings app, then click Update & Security.
- Click on Troubleshoot from the left side of the window.
- Scroll down to the bottom of the list and click on Windows Update.
- Click Run the troubleshooter.
- The troubleshooter will now scan for problems and try to fix them automatically.
- Once it’s finished, restart your computer and check for updates again. Hopefully, this will fix any problems you were having.
Run a system file check
Microsoft’s System File Checker is a handy tool that can help you fix corrupt files on your Windows 10 computer. If you’re having trouble with your PC, running an SFC scan could help fix the problem. Here’s how to do it:
- Type ‘Command Prompt’ into the search box on the taskbar and select the ‘Command Prompt’ app from the results.
- In the Command Prompt window, type ‘sfc /scannow’ and press Enter.
- The scan will take a few minutes to complete. Once it’s done, restart your PC and see if the problem has been fixed.
If you’re still having trouble with your PC after running an SFC scan, you can try running a BITS (Background Intelligent Transfer Service) troubleshooter.
Start the BITS (Background Intelligent Transfer Service) troubleshooter
The Background Intelligent Transfer Service (BITS) is a handy tool that helps you to download files in the background while you continue to work on your computer. However, if you’re having trouble with BITS, there is a troubleshooter available to help you fix the problem. Here’s how to run the BITS troubleshooter on Windows 10:
- Go to the Start Menu and search for “troubleshoot.”
- Select “Troubleshoot” from the list of results.
- Under “Get up and running,” select “Background Intelligent Transfer Service.”
- Click “Run the troubleshooter.”
- Follow the on-screen instructions to complete the troubleshooting process.
By following these simple steps, you can run the BITS troubleshooter on Windows 10 and fix any problems you may be having with the service.
Perform a Windows Update in a clean startup state
- Click the Start menu and type “msconfig” into the Search bar. Press Enter.
- In the System Configuration window that opens, go to the “Boot” tab.
- Check the box next to “Safe Mode” and click “OK.”
- Restart your computer.
- Once your computer has restarted, open the Start menu and type “Windows Update” into the Search bar. Press Enter.
- The Windows Update window will open. Click “Check for updates.”
- Windows will now check for any available updates and install them automatically.
Expert Tip: This repair tool scans the repositories and replaces corrupt or missing files if none of these methods have worked. It works well in most cases where the problem is due to system corruption. This tool will also optimize your system to maximize performance. It can be downloaded by Clicking Here
Frequently Asked Questions
What is Error 0x80070543?
The Error 0x80070543 is an error that can occur when you try to install updates on your Windows 10 PC.
How can I fix the Error 0x80070543?
There are a few things you can do to try and fix the Error 0x80070543, such as running the Windows Update troubleshooter or performing a clean startup.
Why does error 0x80070543 occur?
There are a few reasons why the Error 0x80070543 might occur, such as corrupt files, incomplete installation or removal of some programs, damaged system components, and a problem with the Background Intelligent Transfer Service.
