Updated April 2024: Stop getting error messages and slow down your system with our optimization tool. Get it now at this link
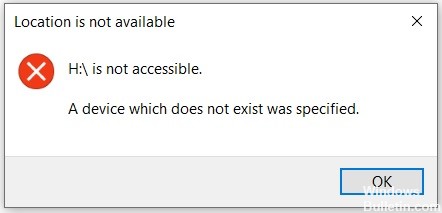
If you try to open a disk in File Explorer or open Disk Manager on a Windows 11/10 device to initialize the disk, but get an error message “Specified non-existent device”, this article will help you.
If you encounter this problem, you will get the following full error message;
The driver is unavailable.
A non-existent device is specified.
Affected PC users may also find that the problematic drive appears as unknown in Device Manager, but still works correctly when you click on the properties.
What causes the “Invalid Device Specified” message?

- Not enough permissions on the drive: It turns out that in some cases, the problem can arise from disk permissions. This happens when your user account does not have full permissions for the disk and therefore the disk is inaccessible, which is also indicated in the error message.
- Incorrect drive letter: In some cases, the error message may be caused by the drive letter assigned to it by the operating system. This happens when the drive letter does not match the drive letter specified in Disk Manager, which results in an error message.
- Faulty USB connection: In most cases, the problem may be related to the USB port the drive is connected to. If the port being used is faulty, the drive will not function properly and an error message will be displayed.
- Outdated BIOS and chipset drivers: It turns out that the error message may also be caused by outdated BIOS and chipset drivers on your motherboard.
- Motherboard header: If you are using an internal hard drive, a faulty or erroneous motherboard header may be causing the problem.
How do I solve the problem with the “Non-existent device was specified” error?
You can now prevent PC problems by using this tool, such as protecting you against file loss and malware. Additionally it is a great way to optimize your computer for maximum performance.
The program fixes common errors that might occur on Windows systems with ease - no need for hours of troubleshooting when you have the perfect solution at your fingertips:
April 2024 Update:


Modify the drive letter
- Enter the term Disk Management in the search box next to the Start menu.
- Double-click on the top result “Create and format disk”.
- In the Disk Management window that opens, right-click on the desired disk.
- Select ‘Edit drive letters and paths’.
- In the window that opens, click Edit.
- In the window that appears, check the Assign the next letter option.
- In the corresponding drop-down list, select the letter that is not already in use.
- Click the Ok button.
- Right-click on the driver again and select Mark partition as active.
- Reboot the system.
Make sure you have permission to access the disk
- Open a Windows Explorer window by pressing Windows+E.
- Now right-click on the device driver.
- Select Properties.
- In the Properties window, click the Security tab.
- Click the Edit button.
- Now click on the desired user account.
- In the Permissions section, activate the Full Controls option.
- Now click on the Apply button and then on the OK button.
Updating the motherboard driver
- Open the Run dialog box by pressing Windows+R.
- Type msinfo32 and press Enter.
- Check the BIOS version/date.
- Make sure that it is up to date.
- If you find that the motherboard driver has not been updated, check the manufacturer’s website.
- There you will find the necessary instructions and driver updates.
- Follow the instructions carefully and complete the driver update process.
Uninstall the system and restart it
- In the search box next to the Start menu, type the term Disk Management.
- Double-click on the top result “Create and format disk”.
- In the Disk Manager window that opens, right-click at the bottom.
- Select Properties.
- In the Properties window that opens, click the Drivers tab.
- Click the Uninstall Device button.
- Now remove the device and reconnect it.
Expert Tip: This repair tool scans the repositories and replaces corrupt or missing files if none of these methods have worked. It works well in most cases where the problem is due to system corruption. This tool will also optimize your system to maximize performance. It can be downloaded by Clicking Here
Frequently Asked Questions
What causes the “Invalid device specified” error?
It turns out that in some cases the problem may be related to disk permissions. This happens when your user account does not have full rights to the disk and therefore the disk is inaccessible, which is also indicated in the error message. Also, the error message may be caused by the drive letter assigned to it by the operating system. This happens when the drive letter does not match the drive letter specified in the Disk Management utility, resulting in an error message.
How do I correct the “A non-existent device was specified” message?
- Type the term Disk Management in the search box next to the Start menu.
- Double-click on the top result "Create and format disk".
- In the Disk Manager window that opens, right-click in the lower area.
- Select Properties.
- In the Properties window that opens, click the Drivers tab.
- Click the Uninstall Device button.
- Now uninstall the device and plug it back in.
How do I change my drive letter?
- Enter the term Disk Management in the search box next to the Start menu.
- Double-click on the top result "Create and Format Disk".
- In the Disk Manager window that opens, right-click on the desired drive.
- Select Edit disk letters and paths.
- In the window that appears, click Edit.
- In the window that appears, check the Assign the next letter option.
- In the corresponding drop-down list, select the letter that is not already in use.
- Click the Ok button.
- Right-click on the driver again and select Mark partition as active.
- Reboot the system.
