Updated April 2024: Stop getting error messages and slow down your system with our optimization tool. Get it now at this link
Drivers are an important part of your PC. They help make physical hardware and components usable by software. But there can be problems with drivers. One of them has to do with the network adapter. Sometimes Windows can’t find a driver for your adapter.
There are several solutions to this problem. How can you use them effectively? Are there also drawbacks? This guide will help you navigate all the important points.
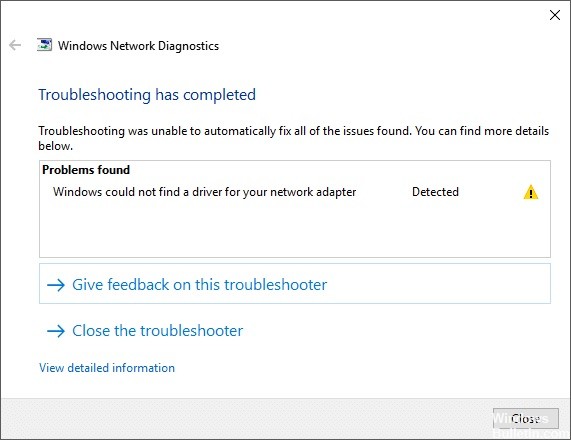
What causes the error message ‘Windows could not find a driver for your network adapter’?
The error message does not mean that the system does not have a network adapter driver installed, but simply that Windows cannot communicate with the network adapter. This is due to damaged, outdated or incompatible network drivers.
How can you fix the “Windows could not find a driver for your network adapter” error message?
You can now prevent PC problems by using this tool, such as protecting you against file loss and malware. Additionally it is a great way to optimize your computer for maximum performance.
The program fixes common errors that might occur on Windows systems with ease - no need for hours of troubleshooting when you have the perfect solution at your fingertips:
April 2024 Update:

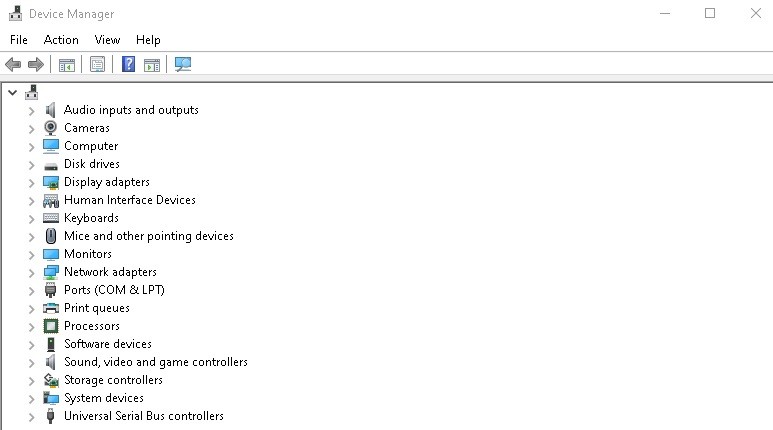
Update your network drivers
- Find the Device Manager on the Windows 10 taskbar and open it.
- Now, right-click and update your network adapter.
Check the power management of the network adapter
- Press Win + R to open the Run window, and type devmgmt.MSC.
- Press Enter to open the Device Manager window.
- Expand the list of network adapters and right-click on your adapter. Select Properties.
- Click the Power Management tab and uncheck the “Allow your computer to turn off this device to save power” box.
- Click OK to save your settings.
Reinstall the network adapter
- Find Device Manager in the Windows 10 search bar and click on the search result to open Device Manager.
- Now expand Network Adapters and find the network adapter that you are connected to over the Internet.
- Right-click on the network adapter and click Uninstall.
- Now click on Actions and search for hardware changes.
Expert Tip: This repair tool scans the repositories and replaces corrupt or missing files if none of these methods have worked. It works well in most cases where the problem is due to system corruption. This tool will also optimize your system to maximize performance. It can be downloaded by Clicking Here
Frequently Asked Questions
How do I solve a problem when Windows can’t find a driver for my network adapter?
- Update the network adapter driver.
- Uninstall the network adapter driver and reinstall it.
- Perform hardware and device troubleshooting.
- Run the network adapter troubleshooting again.
- Perform a system restore.
How do I reinstall the network adapter?
- Find Device Manager in the Windows 10 search box and click on the search result to open Device Manager.
- Now expand Network Adapters and find the network adapter that you are connected to over the Internet.
- Right-click on the network adapter and click Uninstall.
- Now click on Actions and search for hardware changes.
Why does the “Windows could not find a driver for your network adapter” error occur?
This error means that Windows cannot communicate with the network adapter. This happens because of corrupt, outdated, or incompatible network drivers.
