Updated April 2024: Stop getting error messages and slow down your system with our optimization tool. Get it now at this link
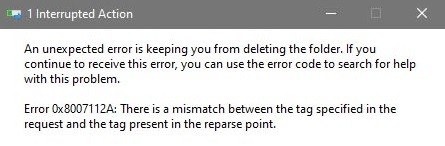
Deleting or moving folders is a fairly common operation for a computer user. However, this operation can be interrupted by a certain error. Today, we are going to talk about error 0x8007112A, which does not allow you to delete or move folders on Windows PC.
What causes error 0x8007112a on Windows PC?

- Folder authorization problem: Administrative issues, such as permissions or denial of access to a folder, can prevent you from moving or deleting files.
- Faulty update: Updates play a role in the functioning of your program, software, or device. Sometimes the problem is caused by a faulty update that affects functionality and prevents you from moving or deleting needed files.
- Corrupted system files: The appearance of a corrupted file in the system is also one of the reasons why you cannot delete or move files.
How to fix error 0x8007112a on a Windows PC?
You can now prevent PC problems by using this tool, such as protecting you against file loss and malware. Additionally it is a great way to optimize your computer for maximum performance.
The program fixes common errors that might occur on Windows systems with ease - no need for hours of troubleshooting when you have the perfect solution at your fingertips:
April 2024 Update:

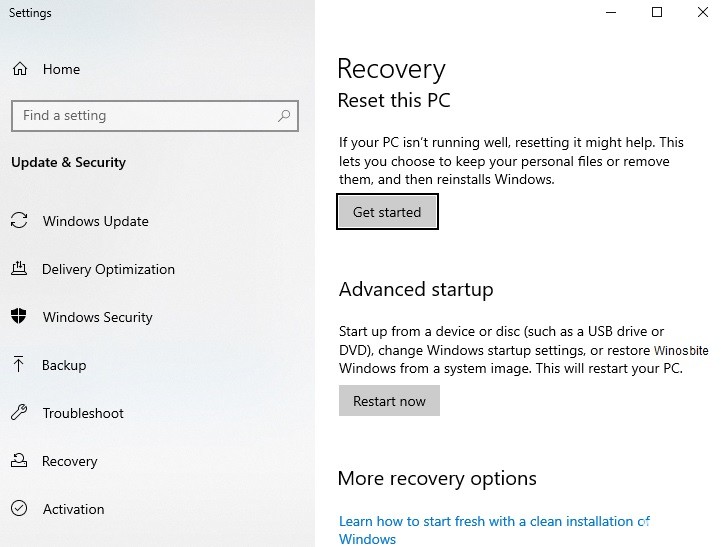
Use a Windows PC reset
- Find System Restore and open it.
- In the window that opens, click on System Restore.
- Activate the Select another restore point option in the Restore system files and settings window.
- Select the desired restore point and click Next.
- For Windows 10 users, simply find the word “Reset” and click “First Steps” under the “Reset this PC” option.
Launch the Troubleshooter file and folder
- Activate the Run dialog box by pressing the Windows + R keys.
- Type “ms-settings: troubleshoot” and press Enter to open the Troubleshooting tab.
- Find the “Shared Folders” section in the menu and click “Run Troubleshooter”.
- Enter the location of the problem folder and click Next.
- Reboot the system and check again.
Perform an SFC scan
- Press the Windows + R key combination to open the Run dialog box.
- Then type “cmd” and press Ctrl+Shift+Enter to open an administrator window.
- Enter the following command: sfc /scannow
- Select Enter.
- Reboot the system
Run a DISM scan
- Locate the command line and right-click it.
- Select Run as administrator
- Enter the following command: Dism/Online/Cleanup-image/CheckHealth
- Write any corrupted files and check the log files in C:WindowsLogsDISM.log
- Enter the following command: Dism/Online/Cleanup-image/RestoreHealth
- Reboot the system and check again
Expert Tip: This repair tool scans the repositories and replaces corrupt or missing files if none of these methods have worked. It works well in most cases where the problem is due to system corruption. This tool will also optimize your system to maximize performance. It can be downloaded by Clicking Here
