Updated April 2024: Stop getting error messages and slow down your system with our optimization tool. Get it now at this link
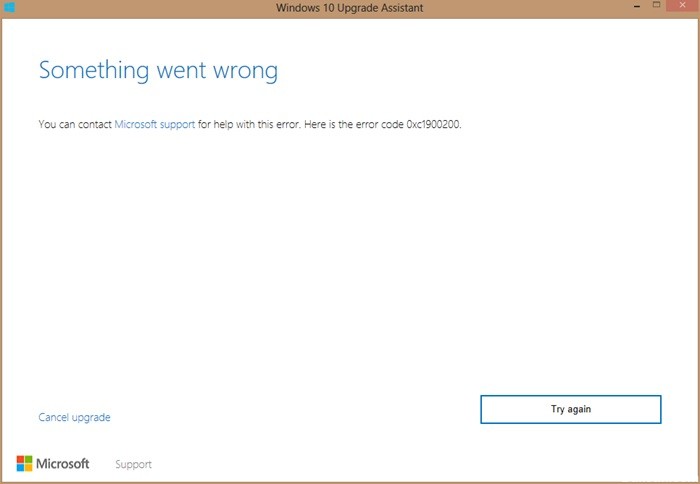
Windows 10 is undoubtedly the most popular version of the Windows operating system in recent times, and as a result, many users want to upgrade their operating system. You may also want to upgrade to the licensed version when the free period ends. However, many users complain that they encounter an error code: 0xc1900200 when trying to upgrade to Windows 10. This prevents them from upgrading to Windows 10.
But fortunately, this error can be fixed and you can successfully upgrade to Windows 10. Let’s take a look at how.
What causes Windows Update Error 0xc1900200?

- A corrupted system file.
- Faulty Windows update component.
- Minimum requirements are not met.
- Not enough reserved partition space.
How to repair Windows Update Error 0xc1900200?
You can now prevent PC problems by using this tool, such as protecting you against file loss and malware. Additionally it is a great way to optimize your computer for maximum performance.
The program fixes common errors that might occur on Windows systems with ease - no need for hours of troubleshooting when you have the perfect solution at your fingertips:
April 2024 Update:


Launch the system file checker
- Type cmd in the Windows search bar.
- Right-click on the most appropriate command line and select Run as administrator.
- Type sfc /scannow at the command prompt window and press Enter. (Note the space between “sfc” and “/”).
- Wait for the scanning and recovery process to complete.
- Exit the command line.
Start the DISM scan
- Type cmd in the Windows search bar.
- Right-click on the most appropriate command line and select Run as administrator.
- At the command prompt, copy and paste the following command and press Enter after each command.
DISM /Online /Cleanup-Image /RestoreHealth - Wait for the process to complete.
- Reboot the computer.
The /RestoreHealth option will check for corruption and try to fix any detected problems. Once the process is complete, you can check if the Windows Update 0xc1900200 error has disappeared.
Disconnect all USB devices
If an external hard drive or other USB device is connected to your computer while updating Windows, you may experience the 0xc1900200 update error. Many users have reported the same error occurring when using a USB Bluetooth receiver for a wireless mouse.
In this case, it is better to disconnect all unnecessary external USB devices, such as printers and controllers, for the duration of the update process. After removing all external USB devices, check if error 0xc1900200 has been resolved.
Updating the BIOS
- Press Windows + R on your keyboard to bring up the Run dialog box.
- Type msinfo32 in the Run dialog box, then press Enter.
- Find BIOS Version/Date in the list to check the BIOS version.
- Go to your motherboard manufacturer’s website and find the download or support page for your specific motherboard model.
- When you see a list of available versions of the BIOS, download the version you want to update, usually the latest.
- Unzip and extract the BIOS upgrade file to your computer.
- Read the readme file in the folder where you will find instructions for upgrading to the new BIOS.
- Copy the BIOS update file to an empty USB flash drive on your computer.
- Reboot your PC to access the BIOS screen by pressing a specific key during the boot process.
- Run the BIOS/UEFI firmware update or the BIOS flash tool.
- Select the BIOS file on the USB flash drive to start the BIOS update process.
Expert Tip: This repair tool scans the repositories and replaces corrupt or missing files if none of these methods have worked. It works well in most cases where the problem is due to system corruption. This tool will also optimize your system to maximize performance. It can be downloaded by Clicking Here
Frequently Asked Questions
How to recover 0xc1900200?
- Disconnect all USB devices.
- Check the system requirements for Windows 10 update.
- Deploy the reserved system partition.
- Run a system file check.
- Reset the Windows Update components.
- Run DISM.
- Update your BIOS.
How do I fix a Windows 10 update error?
- Make sure you have enough memory on your device.
- Run Windows Update multiple times.
- Check for third-party drivers and download any updates.
- Disable any additional hardware.
- Check the Device Manager for errors.
- Uninstall third-party security programs.
- Fix the hard drive errors.
- Perform a clean Windows reboot.
How do I fix a corrupted Windows update?
- Download the Windows Update Troubleshooter from the Microsoft website.
- Double-click on the Windows Update diagnostics.
- Select the Windows Update option.
- Click the Next button.
- Click the Try troubleshooting as an administrator option (if applicable).
- Click the Close button.
