Updated April 2024: Stop getting error messages and slow down your system with our optimization tool. Get it now at this link
- Download and install the repair tool here.
- Let it scan your computer.
- The tool will then repair your computer.
When using a computer, there can be many problems, such as: problem with updating, memory problem, applications do not work, etc. Some are just boring, others are serious. One of the serious issues is the problem with Windows 10 font.
You are not the only one who has suffered. According to users, they also experience it. Some report that Windows 10 fonts do not display correctly, that the fonts are out of focus, that they are damaged, etc.
What should I do if my computer displays corrupted fonts? You can try these solutions below to get rid of problems easily.
Rebuild the font cache
To recreate the cache of fonts in Windows 10, follow these steps.
- Press the Win + R hot keys on your keyboard to open the “Run” dialog box. Enter services.msc in the “Run” field.
- The Services Console will open.
- Find the service of Windows cache of fonts in the list.
- Click the Stop button on the toolbar.
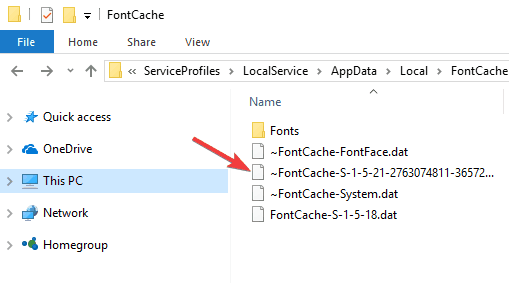
- Open this computer in Explorer.
- Browse to the next folder, looking at one folder at a time. Do not copy or paste the path directly, as some folders are protected and you may need to click Next to navigate to them:
- C: \ Windows \ ServiceProfiles \ LocalService \ AppData \ Local \ FontCache
- Delete the contents of this folder.
- Delete the WinDir% file \ System32 \ FNTCACHE.DAT.
- Now you can start the Windows cache font service that was stopped earlier.
- Reboot Windows 10.
Check your language settings
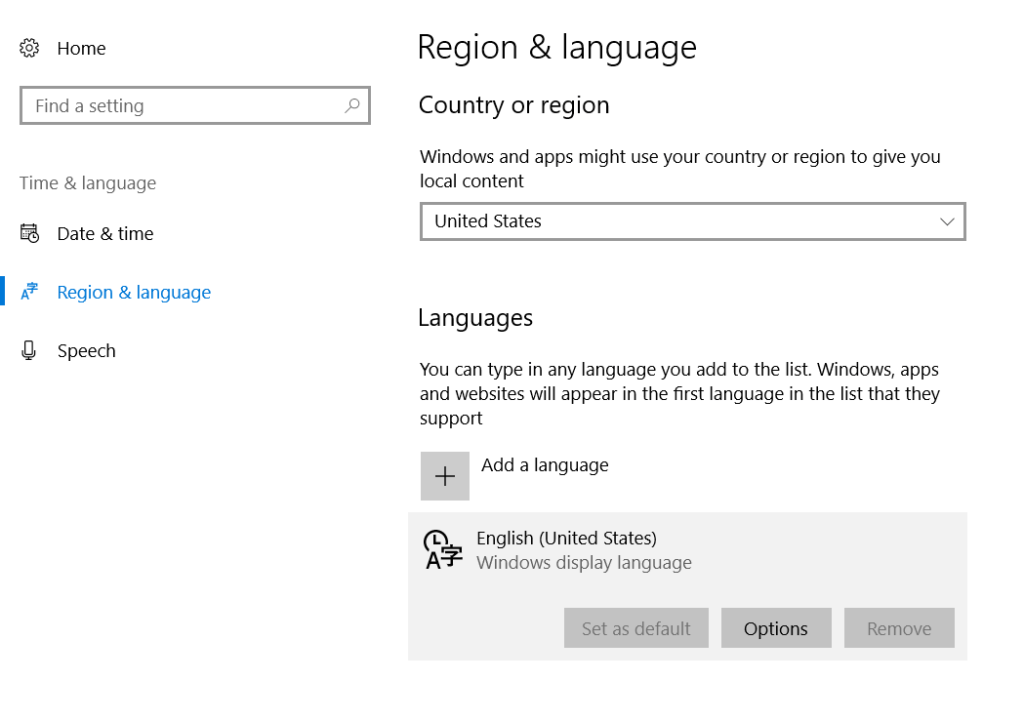
- Enter the editing language in Kortan. Then click on the Change language and keyboard options option.
- Find the “Language” option and check the default language.
- If you want to set a different language, you can change it by clicking the “Add language” option.
- Select your preferred language and click Set as Default.
This is not a good solution, but it may be useful if English is not installed as a preset language. So it’s worth checking.
Disable scaling at high DPI settings

Sometimes font errors are caused by high resolution ads. Thus, the solution is to disable high resolution settings. To do this, proceed as follows:
- Right-click on the executable file with font errors. Select Properties from the context menu.
- Then go to the “Compatibility” tab. Disable the display scaling with high resolution settings and click Apply and OK to save the changes.
- Save your changes and restart the application to see if the problems are resolved.
April 2024 Update:
You can now prevent PC problems by using this tool, such as protecting you against file loss and malware. Additionally it is a great way to optimize your computer for maximum performance. The program fixes common errors that might occur on Windows systems with ease - no need for hours of troubleshooting when you have the perfect solution at your fingertips:
- Step 1 : Download PC Repair & Optimizer Tool (Windows 10, 8, 7, XP, Vista – Microsoft Gold Certified).
- Step 2 : Click “Start Scan” to find Windows registry issues that could be causing PC problems.
- Step 3 : Click “Repair All” to fix all issues.

Reset the default font settings with the Registry Editor

If your font problems are so severe that you can follow the instructions above (in method 1) to reset your font settings to the default values (or if you have already done so, but the same problem persists), you should be able to solve the font corruption problem by creating a .reg file that can be used to reset your font settings to the default values.
Some concerned users have confirmed that this method finally allows them to solve a strange problem that causes their operating system to display strange characters and symbols.
If you want to follow these instructions, follow the instructions below to create a REG file that can be used to reset the rear seat to its default values:
- Click Windows Key + R to open the Run dialog box. Then type “notepad.exe” in the text box and press Ctrl + Shift + Enter to open the editor window with administrative rights.
- When prompted to control user accounts (UAC), click Yes to grant administrator rights.
- When you are in the editor window with elevated rights, enter the following code in the editor window:
Windows Registry Editor Version 5.00
[HKEY_LOCAL_MACHINE\SOFTWARE\Microsoft\Windows NT\CurrentVersion\Fonts]
"Segoe UI (TrueType)"="segoeui.ttf"
"Segoe UI Black (TrueType)"="seguibl.ttf"
"Segoe UI Black Italic (TrueType)"="seguibli.ttf"
"Segoe UI Bold (TrueType)"="segoeuib.ttf"
"Segoe UI Bold Italic (TrueType)"="segoeuiz.ttf"
"Segoe UI Emoji (TrueType)"="seguiemj.ttf"
"Segoe UI Historic (TrueType)"="seguihis.ttf"
"Segoe UI Italic (TrueType)"="segoeuii.ttf"
"Segoe UI Light (TrueType)"="segoeuil.ttf"
"Segoe UI Light Italic (TrueType)"="seguili.ttf"
"Segoe UI Semibold (TrueType)"="seguisb.ttf"
"Segoe UI Semibold Italic (TrueType)"="seguisbi.ttf"
"Segoe UI Semilight (TrueType)"="segoeuisl.ttf"
"Segoe UI Semilight Italic (TrueType)"="seguisli.ttf"
"Segoe UI Symbol (TrueType)"="seguisym.ttf"
"Segoe MDL2 Assets (TrueType)"="segmdl2.ttf"
"Segoe Print (TrueType)"="segoepr.ttf"
"Segoe Print Bold (TrueType)"="segoeprb.ttf"
"Segoe Script (TrueType)"="segoesc.ttf"
"Segoe Script Bold (TrueType)"="segoescb.ttf"
[HKEY_LOCAL_MACHINE\SOFTWARE\Microsoft\Windows NT\CurrentVersion\FontSubstitutes]
"Segoe UI"=-
- Then click “File” (on the ribbon above), and then click “Save as” in the context menu that appears.
- In the “Save As” menu, go to the appropriate place where you want to save the REG file. Then display a drop-down menu associated with the As type in the “Save All Files” section. Finally, give the newly created file any name you want, but end it with the .reg extension.
- Click Save to effectively create the registry file.
- Then browse to the folder where you saved the .reg file, right-click on it and select “Run as administrator” in the context menu that appears.
- Click Yes in the confirmation request and wait for the process to complete.
Expert Tip: This repair tool scans the repositories and replaces corrupt or missing files if none of these methods have worked. It works well in most cases where the problem is due to system corruption. This tool will also optimize your system to maximize performance. It can be downloaded by Clicking Here

CCNA, Web Developer, PC Troubleshooter
I am a computer enthusiast and a practicing IT Professional. I have years of experience behind me in computer programming, hardware troubleshooting and repair. I specialise in Web Development and Database Design. I also have a CCNA certification for Network Design and Troubleshooting.