Updated April 2024: Stop getting error messages and slow down your system with our optimization tool. Get it now at this link
- Download and install the repair tool here.
- Let it scan your computer.
- The tool will then repair your computer.
If you are seeing the error tunnel connection failed message, don’t worry – you’re not alone! This is a common problem that many people experience, and there are a few ways to fix it. In this blog post, we will discuss the different ways to fix this issue and get your tunnel connection working properly again.
What does “Tunnel connection failed” mean?
When you open a web page in Chrome or another browser, your browser sends an HTTP request to get in touch with the source server hosting the web page. If the network administrator or internet service provider blocks the browser request, Chrome displays an ERR_TUNNEL_CONNECTION_FAILED message. Indicates that the requested site cannot be accessed because it is temporarily unavailable or permanently relocated.
What causes the “Tunnel connection failed” error
Before we look at the solution to this problem, we first need to understand what causes the “err_tunnel_connection_failed” error in the Google Chrome browser. In a nutshell, it happens when Chrome fails to create a tunnel to the desired website. Simply put: If Chrome can’t connect to the Internet, this error message is displayed.
There are several other issues that also cause this error message, such as DNS connectivity issues, incorrect site domain, incorrect proxy settings, etc. In some cases, this error may also be caused by incorrect browser data and cookies stored in Chrome. But there is no need to worry about this problem, as you can fix this error by following the methods below.
How to resolve the “tunnel connection failed” error message
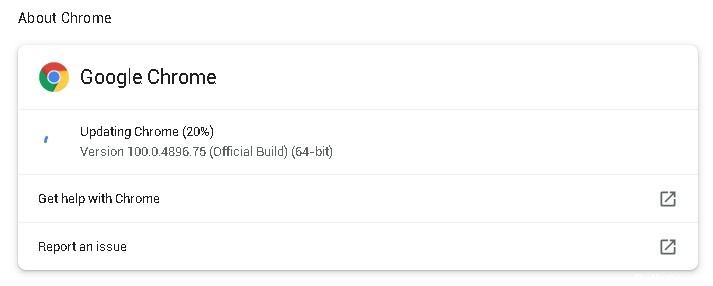
Update Chrome to the latest version
If you’re running an older version of Windows 10, you’ll need to follow a few extra steps to update Chrome.
- First, open the Chrome menu by clicking on the three vertical dots in the top-right corner of the browser.
- Next, click on “About Google Chrome.” This will open a new tab with information about your current version of Chrome as well as any available updates.
- If there is an update available, it will begin downloading automatically. Once the download is complete, you’ll be prompted to restart Chrome to finish installing the update.
- After restarting, you’ll be running the latest version of Chrome.
April 2024 Update:
You can now prevent PC problems by using this tool, such as protecting you against file loss and malware. Additionally it is a great way to optimize your computer for maximum performance. The program fixes common errors that might occur on Windows systems with ease - no need for hours of troubleshooting when you have the perfect solution at your fingertips:
- Step 1 : Download PC Repair & Optimizer Tool (Windows 10, 8, 7, XP, Vista – Microsoft Gold Certified).
- Step 2 : Click “Start Scan” to find Windows registry issues that could be causing PC problems.
- Step 3 : Click “Repair All” to fix all issues.

Clear your browser data and cache
It’s important to regularly clear your browser data and cache to ensure that you’re seeing the most up-to-date version of websites and to help improve your browsing speed. Here’s a quick and easy guide on how to do so in Google Chrome:
- In the upper right-hand corner of the Chrome window, click the three vertical dots icon.
- From the drop-down menu, select “More Tools” and then “Clear Browsing Data.”
- A new window will pop up. From the “Time Range” drop-down menu, select how far back you want to clear data. If you’re not sure, select “All Time.”
- Next, decide which types of data you want to clear by checking the appropriate boxes. Again, if you’re not sure, just check all of them.
- When you’re finished making your selections, click “Clear Data.” Depending on how much data you have, this could take a few minutes.
Now your browser data and cache are clear. You can continue browsing with peace of mind knowing that everything is up-to-date.
Reset Chrome settings
- In the upper-right corner of the Chrome window, click the menu icon (three vertical dots).
- Select “Settings” from the drop-down menu.
- Near the bottom of the page, click the “Advanced” link.
- Scroll down to the “Reset and clean up” section and click “Restore settings to their original defaults.”
- In the confirmation dialog box that appears, click “Reset settings.”
That’s all there is to it. Once you’ve reset your Chrome settings, you’ll be browsing like normal again in no time.
Turn off proxy settings
Windows 10 offers a built-in way to disable proxy settings. This is a quick and easy way to turn off the proxy server, without having to go through the browser settings. Here’s how:
- Press the Windows key + R on your keyboard to open the Run dialog box.
- Type “inetcpl.cpl” and press Enter. This will open the Internet Properties dialog box.
- On the Connections tab, click the LAN settings button.
- Under Proxy server, uncheck the box next to “Use a proxy server for your LAN.”
- Click OK twice to save your changes and close the dialog boxes.
Now that you know how to disable proxy settings in Windows 10, you can browse the internet without having to worry about your connection being routed through a proxy server.
Turn off antivirus
Here are the steps you need to follow to disable antivirus on Windows 10:
- Right-click the icon for your antivirus program in the taskbar.
- Click “Disable.”
- Enter your password if prompted.
- Click “OK.”
- Your antivirus program will now be disabled. You can re-enable it by following the same steps and clicking “Enable.”
Expert Tip: This repair tool scans the repositories and replaces corrupt or missing files if none of these methods have worked. It works well in most cases where the problem is due to system corruption. This tool will also optimize your system to maximize performance. It can be downloaded by Clicking Here
Frequently Asked Questions
What is the error tunnel connection failed?
The error tunnel connection failed is an error that can occur when trying to connect to a VPN or proxy server. This error typically means that the server is down or unavailable, or that your connection is not configured correctly.
What are the causes of the error tunnel connection failed?
There are several possible causes of the error tunnel connection failed. These include server downtime, an incorrect proxy or VPN settings, and antivirus or firewall software that is blocking the connection.
How to fix the error tunnel connection failed?
There are a few different ways to fix the error tunnel connection failed. These include clearing your browser data and cache, resetting Chrome settings, turning off proxy settings, and turning off antivirus software.
