Updated April 2024: Stop getting error messages and slow down your system with our optimization tool. Get it now at this link
- Download and install the repair tool here.
- Let it scan your computer.
- The tool will then repair your computer.
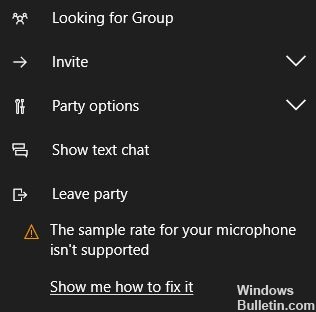
Many Windows users have contacted us with questions after seeing the error “The sampling rate for your microphone is not supported” when they open the Xbox application and try to create a party. All users concerned report that the microphone or headset works properly with any other application. It turns out that the problem is not exclusive to a particular version of Windows, as has been confirmed on Windows 7, Windows 8.1 and Windows 10.
Uninstalling and manually reinstalling your Xbox application
1. Click on Start, then type Windows PowerShell in the search box.
2 Right-click and choose Run as administrator.
3. type the following command to uninstall the Xbox application: Get-AppxPackage *xboxapp* | Remove AppxPackage
4. press the Enter key.
Start the Windows store and download the Xbox application.
Clear the application cache
Let’s start by debugging the application itself. The weak nature of the Windows 10 Xbox application is similar to Windows Live from this point on. The application presents many problems, both in terms of performance and design.
Microsoft seems to be trying to get things in order, but so far not with much success. However, most of the essential characteristics generally work as expected, which is not always the case.
April 2024 Update:
You can now prevent PC problems by using this tool, such as protecting you against file loss and malware. Additionally it is a great way to optimize your computer for maximum performance. The program fixes common errors that might occur on Windows systems with ease - no need for hours of troubleshooting when you have the perfect solution at your fingertips:
- Step 1 : Download PC Repair & Optimizer Tool (Windows 10, 8, 7, XP, Vista – Microsoft Gold Certified).
- Step 2 : Click “Start Scan” to find Windows registry issues that could be causing PC problems.
- Step 3 : Click “Repair All” to fix all issues.

The thing with any application is that it ends up stacking the cache and, once this happens, some problems can occur.
Therefore, as a first step, we recommend that you reset the application services. If this does not help, try resetting the Xbox application to the default values.
![]()
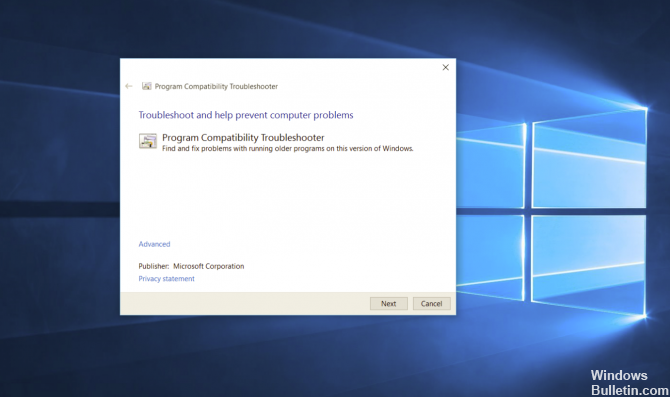
Using compatibility for program problems
The first thing to do is to show where the installation files are located. If you are installing from a USB stick or CD/DVD. Start the File Explorer (Windows key + E) and open the location of the installation files.
- Right-click on the program installation file, it can be called setup.exe or similar. Click on Compatibility in case of problems.
- The Program Compatibility Troubleshooting Wizard starts, which searches for problems.
- Select the “Troubleshooting” option.
- Select a version of Windows known to work with the program. I notice that the program works well under Windows Vista (with Service Pack 2), so I will select this option. Click on Next.
- Continue the program installation procedure by clicking on Test Program.
- Follow the on-screen instructions to install the program as usual.
- If all goes well, click on the option at the end of the “Yes, save these settings for this program” wizard.
- Wait until your settings for the program are saved.
Make sure that your microphone is not turned off in any other way.

It is possible to mute your microphone in another way. If you have a laptop with a built-in microphone, some laptop manufacturers allow you to disable this microphone in your PC’s BIOS or UEFI settings. This option is not available on all laptops, but it is likely to be close to an option that allows you to disable your webcam if it exists.
If you have previously disabled the microphone built into your computer’s BIOS, you will need to return to your BIOS settings and reactivate the microphone.
It is also possible to disable the built-in microphone from the Device Manager on your computer. If you have already done so, you must return to the Device Manager and enable it again.
Troubleshooting the audio recording

Before trying more complex repair strategies, you should start this troubleshooting task by making sure that your version of Windows is unable to solve the problem automatically. It appears that an incorrect recording configuration may result in the “sampling rate for your microphone not being supported”.
In some circumstances, you can easily repair it by troubleshooting the audio recording and asking it to recommend an appropriate repair strategy. Some users have been able to solve the problem by providing this troubleshooting and then restarting the computer.
Here is a quick guide to troubleshooting the audio recording to correct the error “The sampling rate for your microphone is not supported”:
- Open a Run dialog box by pressing Windows + R. Then type ‘ms-settings:troubleshoot’ and press Enter to open the Troubleshooting tab of the Settings application.
- Once in the Troubleshooting tab, go to the right menu and click Audio Recording. Then click on Run Troubleshooting to launch the utility.
- Wait until the analysis is complete, then click Apply this correction if a viable repair strategy is recommended.
- Once the fix is applied, restart your computer and check that the problem is solved the next time you boot your system.
Expert Tip: This repair tool scans the repositories and replaces corrupt or missing files if none of these methods have worked. It works well in most cases where the problem is due to system corruption. This tool will also optimize your system to maximize performance. It can be downloaded by Clicking Here

CCNA, Web Developer, PC Troubleshooter
I am a computer enthusiast and a practicing IT Professional. I have years of experience behind me in computer programming, hardware troubleshooting and repair. I specialise in Web Development and Database Design. I also have a CCNA certification for Network Design and Troubleshooting.