Updated April 2024: Stop getting error messages and slow down your system with our optimization tool. Get it now at this link
- Download and install the repair tool here.
- Let it scan your computer.
- The tool will then repair your computer.
This problem occurs when users attempt to access the NVIDIA control panel but cannot see any areas other than the Manage 3D Settings entry. This is especially done for laptop users, who can often blame the integrated video card for this problem.

This happens when the built-in video card manages certain aspects of your computer’s display settings. Sometimes it’s not really a problem and it’s more of a design flaw. However, sometimes you may want to change some settings on your NVIDIA graphics card, but you may not be able to do so because of this problem. Follow the methods we have prepared to solve this problem.
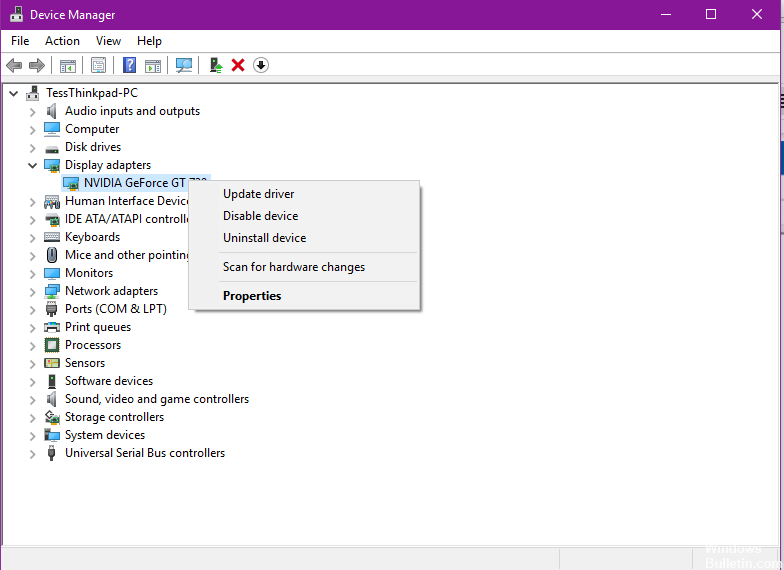
Reinstall the Nvidia drivers
Try reinstalling the Nvidia driver to see if this is the case for you.
You can also use the automatic detection via the GRAPHICS DRIVERS button on the NVIDIA driver download page to see if it suggests the same driver as the one you have already downloaded. This requires Internet Explorer or Java installation for other browsers.
Set your default graphics processor

Setting the preferred graphics processor for all software programs. Optimus technology uses software profiles to enable the use of IGP, GPU, or a global parameter that allows NVIDIA to automatically control the type of GPU. To add or modify a software program profile, do the following.
April 2024 Update:
You can now prevent PC problems by using this tool, such as protecting you against file loss and malware. Additionally it is a great way to optimize your computer for maximum performance. The program fixes common errors that might occur on Windows systems with ease - no need for hours of troubleshooting when you have the perfect solution at your fingertips:
- Step 1 : Download PC Repair & Optimizer Tool (Windows 10, 8, 7, XP, Vista – Microsoft Gold Certified).
- Step 2 : Click “Start Scan” to find Windows registry issues that could be causing PC problems.
- Step 3 : Click “Repair All” to fix all issues.

- Make sure your computer is connected to the Internet.
- Right-click on the Windows desktop background (not the home screen) and select NVIDIA Control Panel.
- In the left menu, select Manage 3D settings, select the Global settings tab, and then select your favorite graphics processor.
- From the list, select the graphics processor setting you want to use.
Disabling the integrated graphics card in the Device Manager
- Turn on your computer and log in with an administrative user account.
- Insert the driver disc provided with the video card and follow the on-screen instructions to install the drivers. Once the process is complete, restart your computer to complete the installation.
- Press Windows R to open the Run tool, type devmgmt.msc in the field, then click OK.
- In the Device Manager window, double-click the Display Adapters category to display its content.
- Right-click on the graphic device called Onboard or Integrated and select Disable.
- Click on “Yes” to confirm the deactivation of your on-board graphics card. Close the Device Manager.
Expert Tip: This repair tool scans the repositories and replaces corrupt or missing files if none of these methods have worked. It works well in most cases where the problem is due to system corruption. This tool will also optimize your system to maximize performance. It can be downloaded by Clicking Here

CCNA, Web Developer, PC Troubleshooter
I am a computer enthusiast and a practicing IT Professional. I have years of experience behind me in computer programming, hardware troubleshooting and repair. I specialise in Web Development and Database Design. I also have a CCNA certification for Network Design and Troubleshooting.