Updated April 2024: Stop getting error messages and slow down your system with our optimization tool. Get it now at this link
- Download and install the repair tool here.
- Let it scan your computer.
- The tool will then repair your computer.
Backspace isn’t working in Google Chrome. You know what that means — you’ve been typing away for hours without realizing you’re actually deleting everything you just typed. If you want to go back one step, you’ll have to hit Ctrl+Z. But if you really want to delete something, you’ll have to use the Delete key. Here are three ways to make sure backspace works again in Chrome.
What causes the ‘backspace not working’ error?
The Backspace key is one of those keys that we use every single day without even thinking about it. When you press the Backspace key, it takes you back to where you were just seconds ago. But recently, there have been some issues with the Backspace key that people keep getting stuck in the middle of typing something into a web form. This happens because the Backspace key doesn’t work anymore. This problem occurs mostly on Windows computers, and the reason why it happens isn’t clear.
This is a very common error, especially since the Internet Explorer browser is no longer supported by Microsoft. So, what causes this problem? Well, it could be anything – from virus infection to hardware failure. And it’s hard to pinpoint exactly what’s wrong.
So, let’s take a look at some possible solutions to fix the “Backspace key does not work” error.
How to troubleshoot the ‘backspace not working in chrome’ error?
Update the google chrome browser
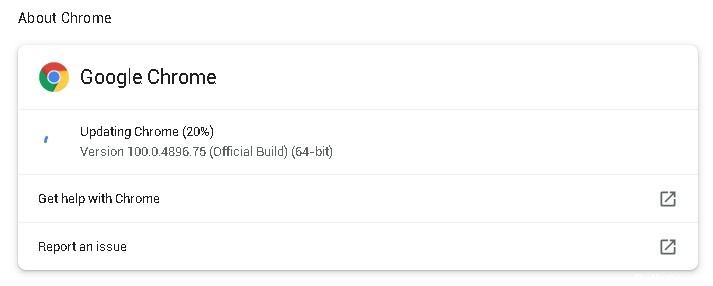
If you’re having trouble updating Chrome, try one of these options.
Check for Updates
- Click the Menu icon in the top-right-hand corner.
- Scroll down to the bottom of the window and make sure “Check for updates…” is selected.
- You’ll see a notification about new versions of Chrome being available. Click the button next to it to download the update.
Use the Beta Channel
The beta channel provides access to the newest features and fixes before they become part of the stable release. To use the beta channel, follow these steps:
- Open the browser menu.
- In the pop-up box, click the More info link.
- Make sure the word ‘beta’ appears next to the Version number.
- Select the option labeled Skip This Site. Press Enter.
- You can now browse the internet using the latest version of Chrome.
April 2024 Update:
You can now prevent PC problems by using this tool, such as protecting you against file loss and malware. Additionally it is a great way to optimize your computer for maximum performance. The program fixes common errors that might occur on Windows systems with ease - no need for hours of troubleshooting when you have the perfect solution at your fingertips:
- Step 1 : Download PC Repair & Optimizer Tool (Windows 10, 8, 7, XP, Vista – Microsoft Gold Certified).
- Step 2 : Click “Start Scan” to find Windows registry issues that could be causing PC problems.
- Step 3 : Click “Repair All” to fix all issues.

Make sure Chrome’s cache is clean
![]()
Chrome’s Cache is like your computer’s memory. You use it to store the information you might want to access later. But over time, it gets filled up with things you don’t need anymore. So you clear out some space by deleting old files. If you’re running Windows 10, there are three different ways to do this. Here’s how to find them:
1. Open the Start menu, type “chrome”, and press Enter.
2. On the bottom row, scroll down until you see “Clear browsing data”.
3. Click on the link.
4. A dialog box appears asking whether you want to delete everything stored in your browser’s cache. Click OK.
5. Your browser will now ask you to confirm the deletion. Follow the instructions.
You need to reset Chrome
If your Chrome profile gets corrupted, or an extension interferes with it, you can reset it to its original state. This includes deleting everything stored in the browser and restoring it to factory settings. To do so, follow these steps:
1. Open up Chrome.
2. PressCtrl + Alt + Delto open Task Manager.
3. Find Chrome in the list and highlight it.
4. Right-click the highlighted item and select delete.
5. Select Yes when prompted to delete the process.
6. Restart the computer.
7. When you log into Chrome again, it’ll load your previous browsing history.
8. You can now browse normally.
9. If you’re having trouble logging in, try clearing your cookies.
10. Finally, you can always use the shortcut Ctrl+Shift+Del to clear your entire browsing history.
Remove the antivirus software
If you’re having problems with your keyboard on Windows 10, it might just be caused by your antivirus software. A few users reported that Kaspersky antivirus could cause this problem on Chrome. They say that when they open up the browser, the keyboard stops working. After uninstalling the antivirus, the keyboard works again.
Some people did report that disabling certain antivirus features or even completely disabling the antivirus helped. However, others had no luck with those solutions. So, if you still want to keep your antivirus installed, here are some steps you can take to fix the issue yourself.
1. Open Control Panel.
2. Select “Programs & Features.”
3. Under the Programs section, select “Turn windows features on or off.”
4. Scroll down to find “Windows Defender Antivirus,” and select it.
5. You’ll see a list of options. Go ahead and choose “Disable.”
Make sure your system is malware-free
There are many ways to protect against malware. You can use antivirus software, keep up to date with patches, avoid clicking on suspicious links, and even scan your computer for malware regularly. But there are also many things you can do to help prevent malware infections in the first place. Here are some tips to help you avoid getting infected:
1. Don’t open email attachments unless you trust them. If you’re unsure whether something came from someone you know, check the sender’s address. If it doesn’t look like it came from someone you recognize, don’t open it.
2. When browsing the web, make sure you’re always logged into a secure site. This way, you’ll be less likely to accidentally download malicious code onto your device.
3. Use a VPN whenever possible. A virtual private network encrypts your data while traveling over the internet, making it harder for hackers to intercept it.
4. Keep your operating system updated. Malware writers frequently target older versions of Windows, Mac OS X, and Linux because those systems are easier to exploit. Updating your software helps ensure that you’re running the latest version of everything.
5. Be careful what apps you install. Apps downloaded from outside sources might contain malware. Make sure you read reviews and ratings carefully before installing anything.
Turn off suspicious extensions
Search for the recently added extensions and toggle the switch off. This way, you can verify whether the extensions are causing the problem.
If disabling the extensions fixes the error, you should try enabling them one by one until you figure out which one causes the problem.
After finding the problematic extension, check if there is an updated version available. You can update the extension or uninstall it altogether.
You need to disable hardware acceleration
Hardware acceleration refers to the process of rendering graphics on a device without having to wait for the CPU to finish processing it. This allows the GPU to do work faster, which helps speed up the overall experience. However, disabling hardware acceleration can impact performance and decrease battery life.
There are many ways to disable software acceleration, and each method varies depending on the browser. Here are some examples:
1. In Chrome, you can access the settings menu by clicking the gear icon () located in the upper right corner of the address bar (). Clicking Settings will open the settings menu where you can change the default setting for Acceleration.
2. Then scroll down to the Performance section and select “Disable accelerated compositing”. You can find similar options in older versions of IE.
3. Select the Appearance category and uncheck Enable hardware acceleration.
4. Uncheck the box next to Enable hardware acceleration.
Install the keyboard driver again
The problem lies within your keyboard or mouse drivers, which are responsible for communicating with your computer. If you don’t have the latest version of those drivers installed, it can cause issues during the setup process. To fix this, you’ll need to reinstall your keyboard or mouse drivers manually.
Steps to resolve the issue:
1. Unplug your keyboard or mouse from the wall outlet.
2. Take out the battery pack from your device.
3. Remove the power adapter from the back of your device.
4. Disconnect the USB cable from your PC.
5. Put your device into safe mode by pressing F8 repeatedly while booting up your system.
Download and reinstall Google Chrome
If none of the solutions above work, then you may want to try reinstalling the Google Chrome web browser. This way, you won’t lose anything important like bookmarks or extensions installed in the previous version of Chrome. To do this, follow these steps:
1. Open the “Start” menu and select “Control Panel”.
2. Click on “Programs and Features”.
3. Locate and open the program called “Chrome”, right-click on it and choose “Properties”.
4. In the window that appears, go to the tab named “Installed Updates”.
5. Check the box next to “Show optional updates”.
6. Choose “Apply changes”.
Expert Tip: This repair tool scans the repositories and replaces corrupt or missing files if none of these methods have worked. It works well in most cases where the problem is due to system corruption. This tool will also optimize your system to maximize performance. It can be downloaded by Clicking Here
Frequently Asked Questions
How do I enable the backspace key in Chrome?
Google has released an official extension: Go Back With Backspace, to reintroduce the Backspace key as a shortcut key for Backspace. Re-enable the Backspace key as the Backspace navigation key (except when writing text). Use the Backspace key to go back!
Why doesn’t the backspace key work on my PC?
A damaged, incorrect, or missing keyboard driver can cause the Backspace key not to work. You can download the latest keyboard driver from the keyboard manufacturer's website or your computer manufacturer's website.
How do I restore my backspace key error?
To enable the Backspace key again, you can change the ''about: config'' parameter ''browser. backspace_action'' to ''0''. You can also use the recommended key combination of the Alt + left arrow instead.
