Updated April 2024: Stop getting error messages and slow down your system with our optimization tool. Get it now at this link
- Download and install the repair tool here.
- Let it scan your computer.
- The tool will then repair your computer.
You may not be able to log in to Tekkit due to a damaged cache or Technic Launcher installation. In addition, an outdated Minecraft installation may also cause a current connection failure. The affected user has an error when trying to participate in a multiplayer game or trying to connect to the server. The problem may occur on Windows, Mac and Linux. In some cases the user has encountered a problem after updating his Tekkit server. The error affected most users who have migrated accounts.

Before troubleshooting, make sure that all Minecraft servers are enabled and working to remove the error message. Also make sure that your internet connection is working correctly. Also make sure that Java is updated to the latest version.
Causes of this error
- Your current authentication session has expired
- You are connected to Minecraft’s second startup installation, which started a new authentication session. Therefore, the session of the first installation is invalid.
- You are using the current official Minecraft startup program to connect to Minecraft server version 1.6.4 or earlier.
- There may be a problem with Mojang authentication servers.
Reboot your Computer and Minecraft client
For some reason your computer or network may have problems connecting to the Minecraft.net server. The best way to solve this problem is just to start over. Open and close the Minecraft client and reboot your computer if it doesn’t work. Hopefully this should prevent the “Login Error: Incorrect Login” error from happening again.
Re-authenticate
- Get out of Minecraft.
- Close Minecraft, Technic Launcher, FTB Launcher or any launch program you use.
- Open Minecraft again.
- Enter your login, password, and username.
- Try to connect to your server again.
- If this does not work, skip to the next section.
- Check for problems with Minecraft authentication servers.
Disable online mode on the Minecraft server
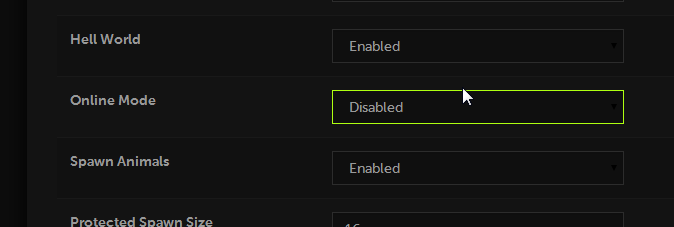
Disabling online mode on the Minecraft server prevents the server from communicating with the Mojang authentication server. However, it also means that players with compromised Minecraft clients can join, and their identities cannot be trusted. This can allow players to maintain the status of a combat operation on your server and wreak havoc.
- Open the Minecraft control panel.
- In the manual on the left, click Files, then click Customize Files.
- At the top of the list, click Server Properties.
- Look for online mode
- Set it to Off (if it is a text field, enter false).
- Click Save at the bottom of the page.
- Reboot the server
April 2024 Update:
You can now prevent PC problems by using this tool, such as protecting you against file loss and malware. Additionally it is a great way to optimize your computer for maximum performance. The program fixes common errors that might occur on Windows systems with ease - no need for hours of troubleshooting when you have the perfect solution at your fingertips:
- Step 1 : Download PC Repair & Optimizer Tool (Windows 10, 8, 7, XP, Vista – Microsoft Gold Certified).
- Step 2 : Click “Start Scan” to find Windows registry issues that could be causing PC problems.
- Step 3 : Click “Repair All” to fix all issues.

Sign in with your email
If you have recently migrated your Minecraft account to a Mojang account, logging in with your username will no longer work. Instead, you will need to use the email address that you assigned to your Mojang account.
Run Minecraft from ATLauncher

You can set up an instance of the Vanilla Minecraft client in ATLauncher.
- Open AT Launcher
- Click the Packages button in the right menu.
- Find it in the Vanilla Minecraft list
- Click New copy
- Select the version of Minecraft that you want to install
- Optional: change the instance name (you can add the version number).
- Click Install
- In the Select mods to install window, click Install again.
- This version of Minecraft will be installed. Then click OK.
- In the right menu click the button “Instances”.
- Find your new instance in the list and press Play
Clear the Cache of Technic Launcher
Like many other applications, Technic Launcher uses the cache to improve user experience and convenience. An error may occur if the launch module cache is damaged and not all modules work properly. In this case, cleaning the startup module cache will solve the problem.
- Open the Launcher and go to its parameters.
- Now click “Clear cache” and exit the Launch Module.
- Then open the Explorer and go to the next path:
- %APPDATA%
- Now open the .technic folder.
- Then open the folder with the cache and delete all its contents.
- Go back to the APPDATA% folder and open the .techniclauncher folder.
- Now open the cache folder and delete all of its contents. Open the startup panel and see if the connection error has been fixed.
Expert Tip: This repair tool scans the repositories and replaces corrupt or missing files if none of these methods have worked. It works well in most cases where the problem is due to system corruption. This tool will also optimize your system to maximize performance. It can be downloaded by Clicking Here

CCNA, Web Developer, PC Troubleshooter
I am a computer enthusiast and a practicing IT Professional. I have years of experience behind me in computer programming, hardware troubleshooting and repair. I specialise in Web Development and Database Design. I also have a CCNA certification for Network Design and Troubleshooting.