Updated April 2024: Stop getting error messages and slow down your system with our optimization tool. Get it now at this link
- Download and install the repair tool here.
- Let it scan your computer.
- The tool will then repair your computer.
Many artists and graphic designers love to use Adobe Illustrator to create their designs like logos, illustrations, and icons. There comes a time when new fonts need to be added to decorate their designs.
How do I add fonts to Illustrator? Is it as easy as adding fonts in InDesign?
Adding fonts to Illustrator is a snap. No special knowledge or much time is required.
Here are the step-by-step instructions for adding fonts in Illustrator.
How to add fonts to Illustrator on Windows 10 computers
April 2024 Update:
You can now prevent PC problems by using this tool, such as protecting you against file loss and malware. Additionally it is a great way to optimize your computer for maximum performance. The program fixes common errors that might occur on Windows systems with ease - no need for hours of troubleshooting when you have the perfect solution at your fingertips:
- Step 1 : Download PC Repair & Optimizer Tool (Windows 10, 8, 7, XP, Vista – Microsoft Gold Certified).
- Step 2 : Click “Start Scan” to find Windows registry issues that could be causing PC problems.
- Step 3 : Click “Repair All” to fix all issues.

Adding new fonts to Adobe Illustrator is done through the computer operating system, not through Illustrator. The advantage of this is that it maintains a central repository of installed fonts that all programs on the computer can access, instead of maintaining separate repositories.
First, download the new font collection to your hard drive. A quick Google search finds thousands of free collections on the Internet, as well as many specialized websites with professional fonts. Most of these fonts are in a compressed file format, so you need to unpack (or “unzip”) them first.
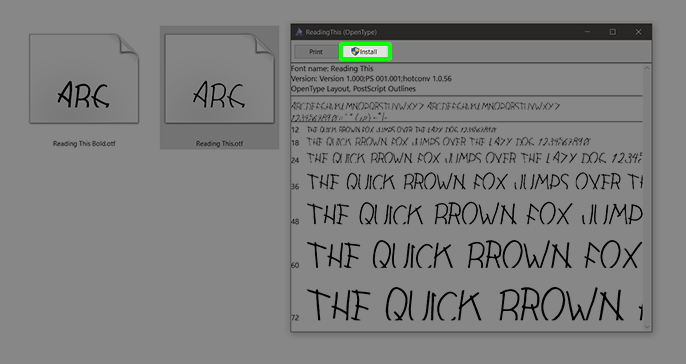
If you are using Windows, you can press Ctrl + click to select multiple font files. Then right-click it and select Install. Fonts are automatically added to your font library and Illustrator will recognize them the next time you use the program. In the meantime, Mac users can copy the downloaded font files to their Fonts folder located at / Users / / Library / Fonts.
Finally, launch Illustrator and press T to select the text tool. Then click and drag on the artboard to draw a new text box. On the top options bar, you will see a Character drop-down menu with a complete list of installed fonts in alphabetical order. You can also access these fonts by choosing Type> Font from the top menu bar. Click on your new font and start typing.
You can now reopen Adobe Illustrator to view and use the font you just installed. Hope the above step-by-step tutorial helps you easily add fonts to Illustrator and create even more eye-catching designs.
Expert Tip: This repair tool scans the repositories and replaces corrupt or missing files if none of these methods have worked. It works well in most cases where the problem is due to system corruption. This tool will also optimize your system to maximize performance. It can be downloaded by Clicking Here

CCNA, Web Developer, PC Troubleshooter
I am a computer enthusiast and a practicing IT Professional. I have years of experience behind me in computer programming, hardware troubleshooting and repair. I specialise in Web Development and Database Design. I also have a CCNA certification for Network Design and Troubleshooting.