Updated April 2024: Stop getting error messages and slow down your system with our optimization tool. Get it now at this link
System recovery is a widely used recovery method for Windows users. If there is a sudden problem with your Windows operating system, System Restore allows you to return your operating system to its last working state. But what to do if you can’t create a system restore point at all? This article discusses such a problem when Windows cannot create a system restore point.
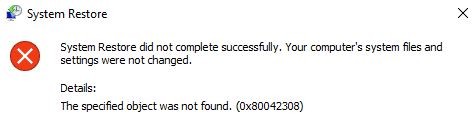
When you create a system restore point manually, you may get the following error message:
The restore point could not be created for the following reason:
The specified object was not found. (0x80042308)
Please try again.
If you are in the same situation and are facing this problem on Windows 10 or earlier, you can try the following very effective steps to solve this problem.
What is the cause of system restore point error code 0x80042308?
Before we move on to the solutions, let’s first understand the main causes.
- Bad sectors on the hard drive
- Damaged Volume Shadow Copy Service or VSS
- Not enough disk space on the disks
- Third-party security software changing authorization.
How to eliminate system restore point error code 0x80042308?
You can now prevent PC problems by using this tool, such as protecting you against file loss and malware. Additionally it is a great way to optimize your computer for maximum performance.
The program fixes common errors that might occur on Windows systems with ease - no need for hours of troubleshooting when you have the perfect solution at your fingertips:
April 2024 Update:


Add more usage value on the disk space
Your operating system’s disk space usage is probably set to 0 instead of 3 or 5%. The easiest way to solve this problem is to increase the disk space usage value.
- Type Create Restore Point in the search bar and click Open.
- Click on the System Protection tab and select Local hard drive (C:) (System).
- Click Configure to continue.
- In the next window, check the Maximum Use slider and drag it to 3%.
- Then click Apply to save your changes and click OK.
- Finally, restart your computer.
Deleting previous restore points
- Type Create Restore Point in the search bar and click Open.
- Click on the System Protection tab and select the local (C:) drive (System).
- Now click Configure to change the settings.
- Click the circle next to Disable System Protection to enable the option, and select Apply to save the changes you just made.
- When a window appears to confirm the action, click Yes. This will delete all previous Windows restore points, including corrupted ones.
- After deleting the previous restore points, you will need to enable this option again in order to create new points in the future.
- Follow the first 3 steps again, but this time click on the circle next to Enable system protection.
- Select Apply to save your changes and restart your computer.
If the problem is caused by corrupted system restore points, you can delete them to fix the problem. You should now be able to create new points and use them without any problems.
Launch the CHKDSK scan
- Type cmd in the search bar and click Run as administrator to run the extended command line.
- At the command prompt, type the command below and press Enter.
chkdsk / r - Wait for the scan to complete, and then restart your computer.
If the problem is caused by an error on your hard disk drive, you can solve it by following the steps above.
Restarting volume shadow copying
- Type services in the search box and click Open.
- In the Services window, find Volume Shadow Copying and right-click on it.
- Select Stop to temporarily disable the service.
- Now right-click Volume Shadow Copy again and this time select Start.
- Then select Properties by right-clicking on the same service.
- On the General tab, click the drop-down menu under Startup Type and select Manual.
- Also, make sure that the status of the service is running.
- Finally, click OK to save the changes you just made and make sure that the problem is resolved.
Expert Tip: This repair tool scans the repositories and replaces corrupt or missing files if none of these methods have worked. It works well in most cases where the problem is due to system corruption. This tool will also optimize your system to maximize performance. It can be downloaded by Clicking Here
Frequently Asked Questions
How do I fix a restore point error?
- Check that system restore is enabled.
- Use a special recovery tool.
- Try creating a restore point manually.
- Disable your antivirus software.
- Run the system restore in safe mode.
- Check your hard drive for errors.
- Run an SFC scan.
- Run the SFC scan before you start Windows.
How do I fix a failed system restore?
- Go to Select Options -> Troubleshooting -> Advanced Options -> Boot Options -> Reboot.
- Press F6 to select Enable Safe Mode with a command line to run system recovery.
- Run the rstrui.exe file to open it if necessary.
How do I restore Windows 10 if there is no restore point?
- Make sure System Restore is enabled.
- Create restore points manually.
- Check your hard drive with Disk Cleanup.
- Check the state of your hard drive using the command line.
- Restore the previous version of Windows 10.
- Reboot your computer.
Why did system restore fail?
System recovery may fail because some programs on your computer do not understand or respect system recovery. Virus and malware protection products are usually the culprits, as well as other programs that are usually loaded to perform some background service.
