Updated April 2024: Stop getting error messages and slow down your system with our optimization tool. Get it now at this link

The Windows Time Service (W32Time) is a time synchronization service provided by Microsoft for Windows that automatically synchronizes the correct time for your system. The time is synchronized through a Network Time Protocol (NTP) server, such as time.windows.com. Every PC running the Windows Time Service uses this service to get the correct time on your system.
What causes the Windows Time Service not to start?

- Missing Windows time service
- Faulty Windows time service, etc.
- A faulty system file associated with the Windows Time Service.
Normally, the Windows Time Service starts automatically when you start Windows, but it may not start due to an error or malfunction. Even if the Windows Time Service is not configured to start automatically, this problem may occur.
How to troubleshoot the Windows Time Service not starting?
You can now prevent PC problems by using this tool, such as protecting you against file loss and malware. Additionally it is a great way to optimize your computer for maximum performance.
The program fixes common errors that might occur on Windows systems with ease - no need for hours of troubleshooting when you have the perfect solution at your fingertips:
April 2024 Update:

Performing SFC and DISM scans
- Press the Windows + X key to open the Win + X menu.
- Now select Command Prompt (Admin) or Powershell (Admin) from the menu.
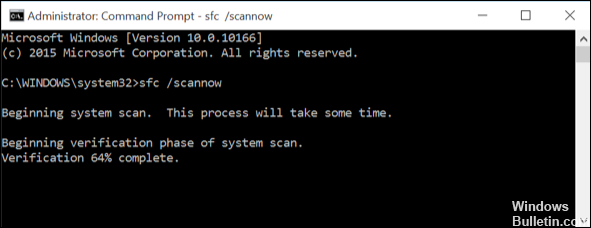
- When the command prompt opens, type sfc /scannow and press Enter to run.
- The SFC scan will now begin. This scan can take up to 15 minutes, so do not disturb or interrupt it.
If the problem persists, the next step is to run the DISM scan. To do this, run the command line as administrator and run the command DISM /Online /Cleanup-Image /RestoreHealth.
After the DISM scan is complete, check to see if the problem persists. If the problem persists, repeat the SFC scan and see if that solves the problem.
Verify that the local system account is running the Windows Time service
- Open the Services window.
- Scroll to Windows Time -> double-click it.
- Select the Connection tab -> enable the Local System account -> click Apply -> OK.
Utilize a different time server
- Open the Control Panel and go to Date and Time.
- Go to Internet Time -> click Change Settings.
- Select time.nist.gov as the server -> click Update Now.
- Click OK to save your changes.
Examine your motherboard battery
Sometimes time and date problems can be caused by your motherboard battery. The battery powers your computer and allows it to maintain an accurate time. If your clock is not working properly, it may be due to a faulty motherboard battery.
However, you can solve the problem simply by replacing the battery. To do this, turn off your computer and disconnect all the cables. Now open the computer case and find the battery on the motherboard. Carefully remove the battery and replace it with a new one.
After replacing the battery, the problems with the clock and Windows time service should be corrected. Remember that opening the computer case may void the warranty. Therefore, it is best to take your computer to an authorized repair center if it is still under warranty.
Expert Tip: This repair tool scans the repositories and replaces corrupt or missing files if none of these methods have worked. It works well in most cases where the problem is due to system corruption. This tool will also optimize your system to maximize performance. It can be downloaded by Clicking Here
Frequently Asked Questions
How can I fix the fact that Windows could not start the Windows Time service on the local computer?
- Run SFC and DISM scans.
- Use a different time server.
- Save the W32Time file again.
- Set the Windows Time service to automatic mode.
- Check the Windows Time Service in the task scheduler.
- Make sure that your local system account is running the Windows Time service.
How do I start the Windows Time service?
From the Start menu, select Programs -> Administrative Tools -> Computer Management. Select Services and Applications. Select Services and highlight Windows Time. Right-click to stop or start the service.
How do I reinstall the Windows Time service?
- Press the Windows + r key, type services. MSC and press Enter.
- Right-click Windows Time and select Properties to check the status of the service.
- Restart the Windows Time service.
- Click OK.
- Reboot your computer.
How do I know if Windows Time is running?
To check if w32time is running, do the following: Go to Control Panel > Administrative Tools > Services. Scroll down to "Windows Time" and check its "Status", which should be "Running". Also, check the "Startup Type" and, if possible, set it to "Automatic" or "Manual".


