Updated April 2024: Stop getting error messages and slow down your system with our optimization tool. Get it now at this link
- Download and install the repair tool here.
- Let it scan your computer.
- The tool will then repair your computer.
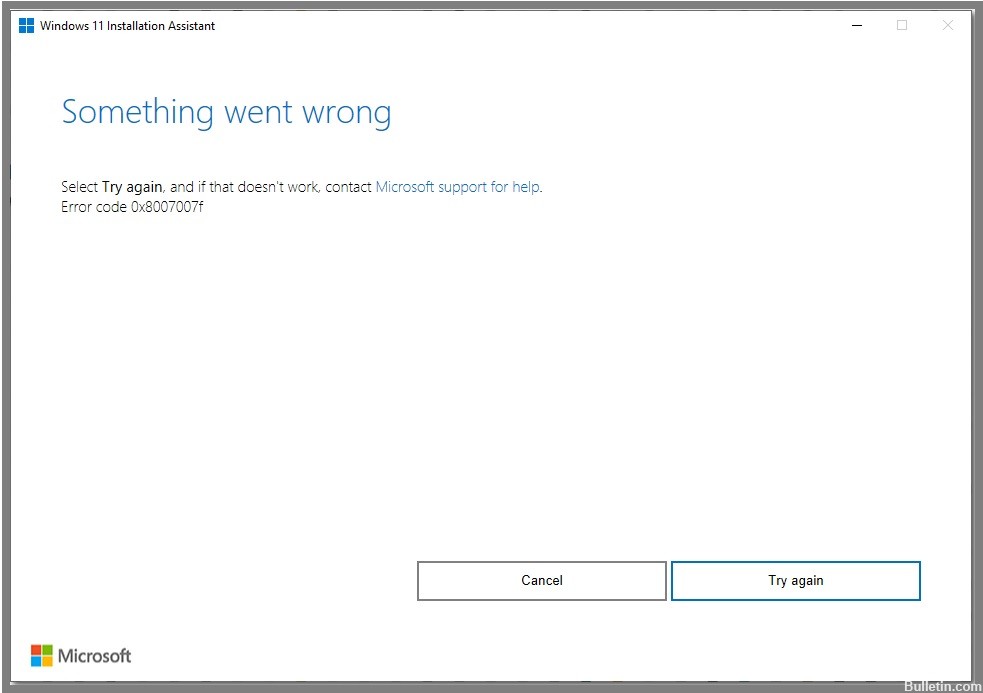
Windows 11 is finally available, and Windows users are rushing to experience Microsoft’s latest operating system. While many users have successfully upgraded to Windows 11, others have reported an error 0x8007007f when upgrading with the Windows 11 installation wizard.
Errors are relatively common during a major Windows upgrade, so you shouldn’t be overly concerned about the Windows 11 upgrade error. Read on to find out what this error means, how to fix it, and how to upgrade to Windows 11.
What is error code 0x8007007f?

This error code only appears in users who have tried to use the Windows 11 setup wizard. The error code does not allow the user to successfully upgrade to Windows 11.
Users have reported that when using the setup wizard, the upgrade process stops for about 70% of the data. After a while, a message appears, “Something went wrong,” followed by another text: “Try again, and if that doesn’t work, contact Microsoft support for help. Error code 0x8007007f”.
What causes error code 0x8007007f?
Before discussing solutions to fix this error, let’s try to understand the causes and scenarios that can cause it. Here are some of the possible causes of this error:
- Not enough disk space: The reason why you might encounter the specified error code is that you don’t have enough free space on your system disk. The system disk is where Windows is installed, and obviously, that’s where Windows 11 is installed. If you have too little disk space, the error code appears and you need to free up space.
- Outdated GPU drivers: In some cases, the problem may occur if the system has outdated graphics drivers installed.
- Corrupted system files: Another reason for the above error code may be corrupted system files on your computer.
- Insufficient permissions: If you run the Windows 11 setup wizard without administrator rights, the problem may also occur. This can happen when a third-party service or application interferes with the installation process.
How to resolve error code 0x8007007f
Perform an SFC scan

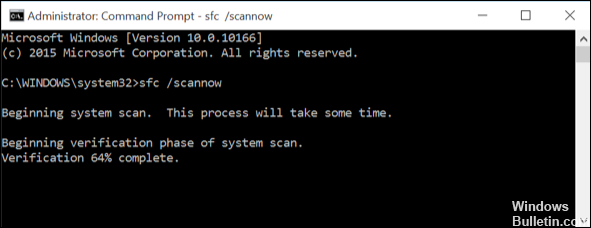
Microsoft’s System File Checker is a handy tool that can help you fix corrupt files on your Windows 10 computer. If you’re having trouble with your PC, running an SFC scan could help fix the problem. Here’s how to do it:
- Type ‘Command Prompt’ into the search box on the taskbar and select the ‘Command Prompt’ app from the results.
- In the Command Prompt window, type ‘sfc /scannow’ and press Enter.
- The scan will take a few minutes to complete. Once it’s done, restart your PC and see if the problem has been fixed.
If you’re still having trouble with your PC after running an SFC scan, you can try running a DISM scan. For more information on how to do this, check out Microsoft’s support page.
Use a DISM scan
This tool can be used to repair and fix a number of different issues with your system, and it’s important to know how to use it. Here are the steps you need to follow:
- First, you need to open the Command Prompt as an administrator. To do this, search for “Command Prompt” in the Start menu and then right-click on the result and select “Run as administrator.”
- Once the Command Prompt is open, type in the following command and hit Enter: Dism /Online /Cleanup-Image /ScanHealth
- This will scan your system for any issues that could be causing problems. If no errors are found, you can proceed to the next step. If errors are found, you’ll need to fix them before continuing.
- To actually fix the problems that were found in the previous step, you need to run the following command: Dism /Online /Cleanup-Image /RestoreHealth
- Once that’s finished running, you should reboot your system and then check to see if the problem has been fixed.
If you’re still having trouble, you can try running the Windows 11 setup wizard again. If that doesn’t work, you may need to contact Microsoft support for further help.
April 2024 Update:
You can now prevent PC problems by using this tool, such as protecting you against file loss and malware. Additionally it is a great way to optimize your computer for maximum performance. The program fixes common errors that might occur on Windows systems with ease - no need for hours of troubleshooting when you have the perfect solution at your fingertips:
- Step 1 : Download PC Repair & Optimizer Tool (Windows 10, 8, 7, XP, Vista – Microsoft Gold Certified).
- Step 2 : Click “Start Scan” to find Windows registry issues that could be causing PC problems.
- Step 3 : Click “Repair All” to fix all issues.
Update graphic driver
- Download the latest drivers from the manufacturer’s website. You’ll need to know what model of graphics card you have, so you can download the correct drivers. To do this on a Windows 10 computer, open the Device Manager and look under Display Adapters. The model name will be listed next to the word “Intel.” If you see more than one adapter listed, then you have multiple graphics cards installed on your computer. Repeat this process for each card.
- Uninstall the current drivers. Once you’ve downloaded the new drivers, you’ll need to uninstall the old ones. Again, open the Device Manager and expand Display Adapters. Right-click on each adapter and select “Uninstall.” Confirm that you want to uninstall the drivers when prompted by clicking “OK.”
- Install the new drivers. Now that the old drivers are uninstalled, you can install the new ones. Double-click on each driver file that you downloaded and follow any prompts that appear. If you’re asked to restart your computer, do so.
- Reboot your computer. After the new drivers are installed, you’ll need to reboot your PC for the changes to take effect. Once you’ve rebooted, check to see if the problem has been fixed.
Disable third-party antivirus programs
Windows 10 offers built-in protection against malware. But sometimes you need to uninstall an antivirus program, whether it’s because you want to switch to another one, or the program is interfering with something else on your computer. Here’s how to do it:
- First, open up the Control Panel. You can do this by searching for it in the Start menu, or by pressing the Windows key+R and typing “control panel” into the Run dialog box.
- Next, go to Programs and Features. Under Programs and Features, you should see a list of all the programs installed on your computer. Find your antivirus program in the list and select it.
- Finally, click on the Uninstall button. This will bring up a wizard that will guide you through the uninstallation process. Just follow the prompts and your antivirus program will be uninstalled.
Run the Windows 11 setup wizard as an administrator
If you need to run the Windows 11 setup wizard as an administrator, there are a few simple steps you’ll need to follow.
- First, open the Control Panel and click on the “User Accounts” icon.
- Next, click on the “Change User Account Control settings” link.
- Then, move the slider to the “Never notify” position and click on the “OK” button.
- Once you’ve done that, restart your computer.
- After your computer has restarted, double-click on the “Windows11Setup.exe” file to launch the setup wizard.
- When prompted, enter your administrator username and password.
- Finally, follow the on-screen instructions to complete the setup process.
By following these steps, you’ll be able to run the Windows 11 setup wizard as an administrator without any problems.
Expert Tip: This repair tool scans the repositories and replaces corrupt or missing files if none of these methods have worked. It works well in most cases where the problem is due to system corruption. This tool will also optimize your system to maximize performance. It can be downloaded by Clicking Here
Frequently Asked Questions
What is the meaning of error code 0x8007007f?
Error code 0x8007007f is an error that can occur when you're trying to install or upgrade to the Windows 11 operating system. The error can also occur when you're trying to run the Windows 11 setup wizard.
What are the causes of error code 0x8007007f?
There are a few different things that can cause error code 0x8007007f. One of the most common causes is a conflict with an antivirus program. Another common cause is outdated or corrupt drivers.
How can I fix error code 0x8007007f?
There are a few different ways you can fix the error code 0x8007007f. One way is to uninstall your antivirus program and then install the new drivers. Another way is to disable your antivirus program and then run the Windows 11 setup wizard as an administrator.


