Updated April 2024: Stop getting error messages and slow down your system with our optimization tool. Get it now at this link
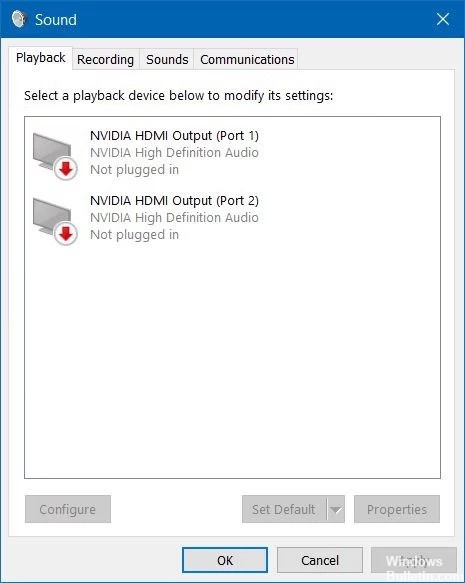
Some NVIDIA users complain about the problem when they see the “Not Connected” message on the soundbar for NVIDIA highlighted outputs. If you also encounter a similar problem on your computer, just follow these simple solutions to resolve the issue. This problem can either be caused by a corrupted graphics driver or disconnected sound ports.
What causes the NVIDIA output not to connect?
![]()
This problem can be caused either by outdated drivers that don’t work well with your device, or by newer drivers, as some users have reported.
If the correct settings have not been made in the NVIDIA control panel, your HDMI port may be set to have no audio transmission, causing the NVIDIA audio output to appear unconnected when displaying playback devices connected to your computer.
How to troubleshoot problems with a disabled NVIDIA output?
You can now prevent PC problems by using this tool, such as protecting you against file loss and malware. Additionally it is a great way to optimize your computer for maximum performance.
The program fixes common errors that might occur on Windows systems with ease - no need for hours of troubleshooting when you have the perfect solution at your fingertips:
April 2024 Update:

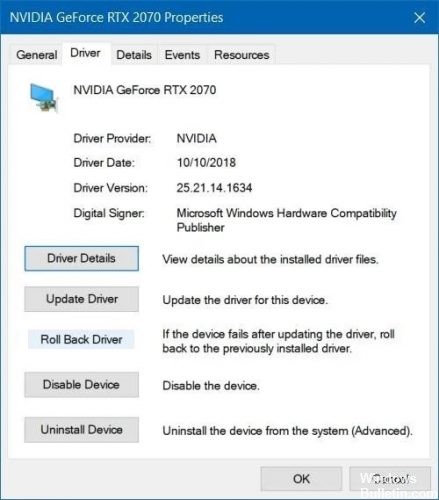
Use the Reset driver option
- Uninstall the current driver.
- Press Windows + R to open Run, type devmgmt.MSC, and click OK.
- Navigate to Display Adapter and select the adapter you want to reset.
- Select Properties, open the Driver tab, and click Reset Driver.
- Follow the steps necessary to complete the rollback process.
Update the NVIDIA graphics driver
- Press the Windows +R key to open Run.
- Then type devmgmt.MSC and click OK.
- Go to the Display Adapter section, click on the graphics card, and select Uninstall Device.
- Complete the uninstall process and visit the NVIDIA website.
- Enter your card and operating system information here and click Search.
- Check the list of available drivers, click on the name of your driver, and select Download.
- Save the file to your computer, open it, and install the driver.
- On the Installation Options screen, select Selective (Advanced) and click Next.
- Select the Perform a clean installation checkbox, click Next, and install the necessary driver.
Enable the NVIDIA output device in the Control Panel
- Right-click on your desktop and select NVIDIA Control Panel.
- In the Display section, click the + button.
- Select Configure Digital Audio.
- Navigate under the name of your video card and look for HDMI.
- Right-click the volume icon in the lower right corner of the screen.
- Set the display to Large Icons, then click the Audio and Playback tab.
- On the Playback tab, right-click to select the checkboxes.
- Click on the new device and select Set Default.
Expert Tip: This repair tool scans the repositories and replaces corrupt or missing files if none of these methods have worked. It works well in most cases where the problem is due to system corruption. This tool will also optimize your system to maximize performance. It can be downloaded by Clicking Here
Frequently Asked Questions
Why does it say that my Nvidia output is not connected?
If you have not made the correct settings in the NVIDIA control panel, the HDMI port may be configured to not output audio. When viewing playback devices connected to your computer, you will see an NVIDIA Output not plugged in error. You can try enabling the NVIDIA output port in the NVIDIA control panel to resolve this error.
How do I fix the “Output not plugged in” error?
- Update your audio driver.
- Reconnect your sound card.
- Try using headphones/speakers on another computer.
- Re-enable any devices that are not plugged in.
- Turn off the HDMI audio.
- Disable front panel connector detection.
- Run the Sound Troubleshooter program.
- Restart the Windows Audio service.
What does it mean that the NVIDIA output is not connected?
If you haven't made the correct settings in the NVIDIA control panel, your HDMI port may not be configured for audio. In this case, the NVIDIA audio output will appear as disconnected when you view playback devices connected to your computer.
How do I fix the situation when NVIDIA does not connect?
- Right-click on your desktop and select NVIDIA Control Panel.
- Go to View -> Configure Digital Audio.
- Click the Open Windows Audio Settings button.
- On the Playback tab, right-click an empty area and select the Show disabled devices and Show disabled devices check boxes.
- Select a device and set it to Default.
