Updated April 2024: Stop getting error messages and slow down your system with our optimization tool. Get it now at this link
- Download and install the repair tool here.
- Let it scan your computer.
- The tool will then repair your computer.
Error 0xC1900101 – 0x20017 is a Windows 10 installation error that occurs when the upgrade/installation of Windows 10 fails. The message it displays is beyond the user’s normal understanding and makes the user scratch their head in search of a solution. It reads: “The installation failed in the SAFE_OS phase with an error during BOOT operation”. This error can also occur when trying to upgrade from Windows 7 to Windows 8. After trying to solve the problem using different methods, I will suggest the methods that worked for me and hopefully for you.

Creating a Restore Point on your Windows PC
Before continuing, you must create a restore point in case something goes wrong. You should be able to bring the system back to the point where it worked. To create a system restore point, hold down the Windows key and press the R key on your keyboard. In the Run dialog box that opens, type SystemPropertiesProtection.exe.
Then click Create, type the name of a restore point, click OK, and then click OK. Wait for the dialog box to confirm the creation of a restore point.
Find the Offending Driver
The error occurs during an upgrade where the operating system cannot migrate the driver because it causes illegal operation. It causes the operating system to roll back. This is a SafeOS boot error, usually caused by non-Microsoft drivers or hard drive encryption software. During the SAFEOS phase, the system checks that everything, including the drivers, behaves as expected. Any operation that is not secure or lacks signatures will cause a problem in terms of system stability. I have noticed that a forced upgrade of an incompatible system often leads to a BSOD.

It’s essential that you find the driver causing the problem, and it’s fairly easy.
Go to the %windir%\Panther directory, then locate and open the files Setuperr.log and Setupact.log. Of these two files, the Setupact.log file is created specifically when an upgrade fails. You must search the log file for a reference to the error and find the driver responsible.
Modifying your Windows 10 Installation
This solution is somewhat complex because you will need to modify the Windows 10 installation files. This solution is useful for some users, but be sure to follow the instructions carefully to avoid damage and unwanted problems.
The main cause of this error is updating the firmware of the Intel processor KB3064209. If you are not using the Intel processor, this does not apply to you.
This has been proven to work on Gigabyte GB BXi3 4010 motherboards with an Intel i3 4010U processor installed, but we assume that it should work with any other motherboard with an Intel processor.
KB3064209 updates the file C:Windowssystem32mcupdate_genuineintel.dll, and to install Windows 10 you need to remove this file. To do this, follow these steps:
We use X: as the USB key, C: as the operating system letter, and User as the user profile name. If you use this solution, be sure to change it according to your settings.
- Download Windows 10 ISO and copy the contents to your USB stick.
- Run the command prompt as an administrator. Simply search for the command prompt, right-click it and select Run as administrator.
- Create a new folder on your desktop and name it “Mount”.
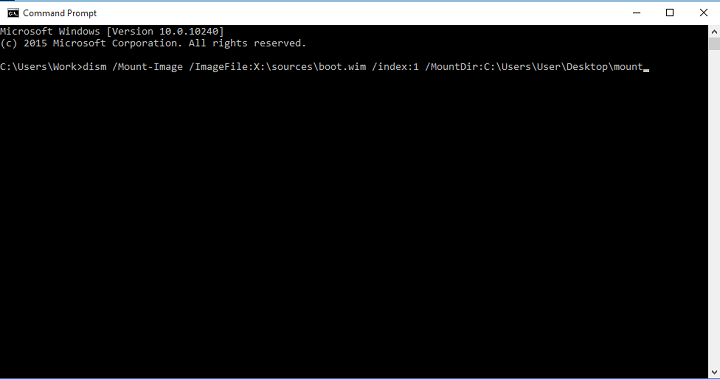
- Mount and edit WIM (image file:boot.wim, index 1) by typing at the command prompt :
- dism /Mount-Image /ImageFile:X:sourcesboot.wim /index:1 /MountDir:C:UsersUserDesktopmount
April 2024 Update:
You can now prevent PC problems by using this tool, such as protecting you against file loss and malware. Additionally it is a great way to optimize your computer for maximum performance. The program fixes common errors that might occur on Windows systems with ease - no need for hours of troubleshooting when you have the perfect solution at your fingertips:
- Step 1 : Download PC Repair & Optimizer Tool (Windows 10, 8, 7, XP, Vista – Microsoft Gold Certified).
- Step 2 : Click “Start Scan” to find Windows registry issues that could be causing PC problems.
- Step 3 : Click “Repair All” to fix all issues.

- Use Windows Explorer and navigate to:
- C:UsersUserDesktopmountWindowsSystem32mcupdate_GenuineIntel.dll
- Right-click on mcupdate_GenuineIntel.dll and select Properties.
- Go to the Security tab and click Advanced.
- Then change the owner of your user account. Enter your user account and click on the Check Names button. Click OK to save the changes.
- On the Security tab, click on Edit and then click Add to add your user account. Be sure to select the Full Control option for maximum permissions. Click Apply and then click OK to save the changes.
- Now delete mcupdate_GenuineIntel.dll.
- Close all open Windows Explorer windows, return to the command prompt and separate the image by typing:
- dism /Unmount-Image /MountDir:C:UsersUserDesktopmount /commit
- You must now repeat steps 4 to 11 for the following files:
- boot.wim /index:2
- install.wim /index:1
- install.wim /index:2
- If you are confused, simply replace boot.wim /index:1 with the values from the list above.
- Delete the mount folder from your desktop, remove the USB stick and start the installer.
Resetting Windows Update Components
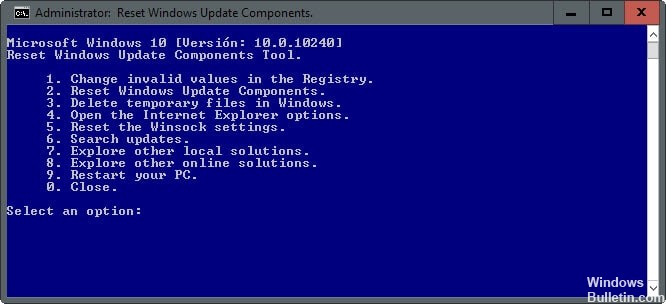
- Click the “Win” + X button and select “Command Prompt” (Admin).
- Disable BITS, cryptography, MSI installer and Windows update services. To do this, type the following commands at the command prompt and press Enter after each command: net stop wuauserv, net stop cryptSvc, net stop bits, and net stop msiserver.
- Then type these commands to rename the Software Distribution and Catroot2 folders. Don’t forget to type Enter after each of these commands: ren C:\Windows\N SoftwareDistribution SoftwareDistribution.old and ren C:\Windows\N System32\N Catroot2 Catroot2.old
- Then enable the BITS, Cryptographic, MSI Installer and Windows Update services. This can be done by typing the following commands followed by the Enter key: net start wuauserv, net start cryptSvc, net start bits, and net start msiserver.
- Finally, close the command prompt window and restart your PC.
If none of these fixes resolve the problem, you should also try disabling your antivirus program or installing the update manually using a media creation tool.
Expert Tip: This repair tool scans the repositories and replaces corrupt or missing files if none of these methods have worked. It works well in most cases where the problem is due to system corruption. This tool will also optimize your system to maximize performance. It can be downloaded by Clicking Here

CCNA, Web Developer, PC Troubleshooter
I am a computer enthusiast and a practicing IT Professional. I have years of experience behind me in computer programming, hardware troubleshooting and repair. I specialise in Web Development and Database Design. I also have a CCNA certification for Network Design and Troubleshooting.