Updated April 2024: Stop getting error messages and slow down your system with our optimization tool. Get it now at this link
- Download and install the repair tool here.
- Let it scan your computer.
- The tool will then repair your computer.
If you try to move emails from an old Gmail account to a new one using POP forwarding, you may be one of the unfortunate people who encounter this error message:
Server denied POP3 access for the given username and password.
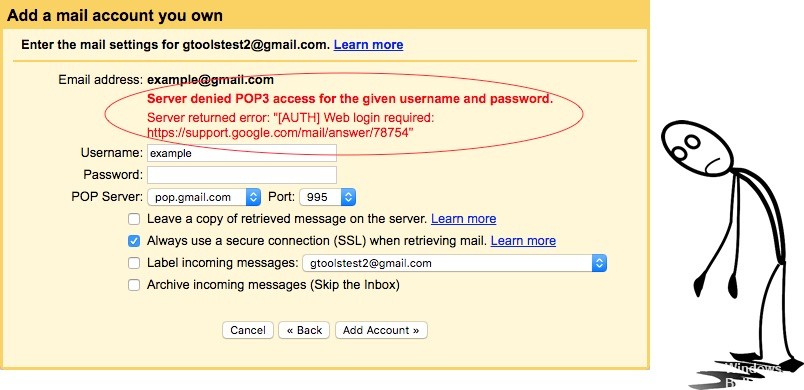
You may ask yourself: “Why doesn’t POP forwarding work in my gmail account” or “Why is POP3 access denied”?
Unfortunately, it is one of the Google bugs with which many people have problems for many different reasons.
If you’re tired of searching for solutions on the Internet, think of VaultMe, a new Google to Google migration service that you can use for Gmail, Contacts, Google Drive, Calendar and more.
Log out and log in again
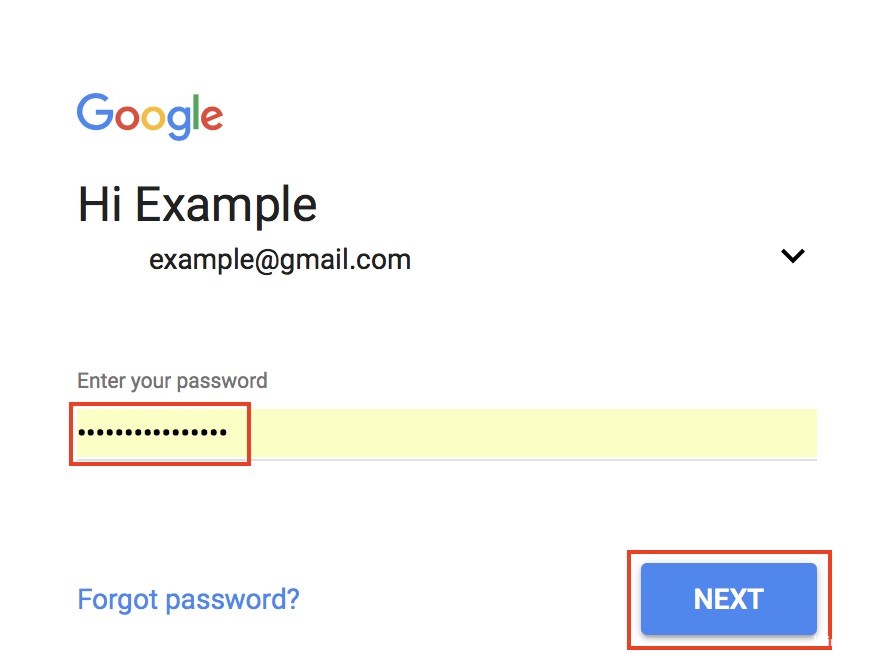
- Log out of the account you wanted to add.
- Log back into the same account in another browser.
- When you reconnected, there was a red bar at the top telling you that it was a “suspicious connection attempt, was it you?
- Click on the “Did you do this?” link and allow access to gmail to retrieve your email.
- Go back to your main account and repeat the adding process and it should work.
April 2024 Update:
You can now prevent PC problems by using this tool, such as protecting you against file loss and malware. Additionally it is a great way to optimize your computer for maximum performance. The program fixes common errors that might occur on Windows systems with ease - no need for hours of troubleshooting when you have the perfect solution at your fingertips:
- Step 1 : Download PC Repair & Optimizer Tool (Windows 10, 8, 7, XP, Vista – Microsoft Gold Certified).
- Step 2 : Click “Start Scan” to find Windows registry issues that could be causing PC problems.
- Step 3 : Click “Repair All” to fix all issues.

Enable POP forwarding
It is important that POP forwarding is enabled for both email accounts before attempting to forward messages. Therefore, we will enable POP redirection in this step. For that:
- Start your browser and open a new tab.
- Once you have entered your account credentials, log in to Gmail.
- Click on the speed preference in the upper right corner.
- Select “Settings” and click on the “Forward and POP/IMAP” button.
- Select “Enable POP for all emails” or “Enable POP for emails that now arrive” according to your needs.
- Click on the “Save Changes” button to configure your settings.

Use a device-specific password
If you have configured two-factor authentication for the e-mail, the normal password may not work for verification in the new e-mail. Therefore, in this step, we will generate a device-specific password to bypass security. For that:
- Log in to your “Zoho Mail” account.
- Click on the “My Account” button at the top of the page to see the current Zoho accounts.
- Select the Two-Factor Authentication button and the Manage Application-Specific Password option.
- Enter the device name and the current password.
- Click Generate and a password is displayed.
- Use this new password in the new email to access the POP redirection of the old account.
https://ph.godaddy.com/community/Managing-Email/Error-setting-up-POP3-account-in-gmail/td-p/69556
Expert Tip: This repair tool scans the repositories and replaces corrupt or missing files if none of these methods have worked. It works well in most cases where the problem is due to system corruption. This tool will also optimize your system to maximize performance. It can be downloaded by Clicking Here

CCNA, Web Developer, PC Troubleshooter
I am a computer enthusiast and a practicing IT Professional. I have years of experience behind me in computer programming, hardware troubleshooting and repair. I specialise in Web Development and Database Design. I also have a CCNA certification for Network Design and Troubleshooting.