How to Troubleshoot Camera Error Code 0xa00f4243 in Windows 10

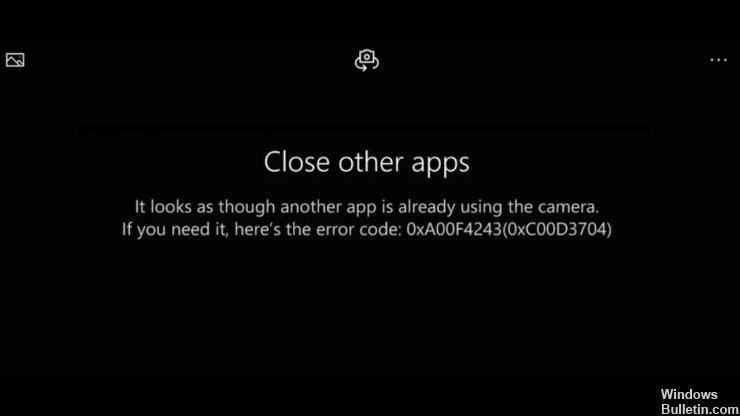
Error code 0xA00F4243(0xC00D3704) is a Windows camera error that causes users to get confused on phones, laptops, and other devices. As you can see, the error prevents users from using the camera app by restricting access to video recording, photos, and other features.

In most cases, the occurrence of the error indicates that there is a break in communication between the two programs that use the built-in camera on the Windows device. Typically, the error code 0xA00F4243(0xC00D3704) is displayed with the following message, which appears when you try to use the webcam: read more

How to Repair “This update is not applicable to your computer” Error Message

Installing Windows Update using the offline (or “offline”) installer is a very convenient process because it gives users choices, download and installation times, etc. However, when installing the latest Windows update, you may get the message “Update not applicable to your computer”. This problem causes the update process to stop on your system.

What causes the “Update not applicable to your computer” message?

In general, the error can be caused by an unsuitable update package, an already installed update, a problem with Windows Updater, an uninstalled update, corrupt system files, etc. read more

How to Troubleshoot Limited Connectivity on Windows PC

This error is a common sign of problems with your Wi-Fi adapter or router. It does not mean that your wireless adapter is disabled, but that the device cannot communicate with the router as it should. If other wireless devices are already connected to the Wi-Fi router, the problem is the computer getting this error.

However, before you try any of the following methods, try rebooting the router. Wait 5-6 minutes for the router to initialize and then try connecting again. If the “Connection Restricted” error still occurs, follow these steps. read more

Troubleshooting ‘No Audio Output Device is Installed’ Error Message on Windows 10

If you see the message “Sound output device not installed” when you hover your mouse over the sound icon, your sound problem is probably related to one of these problems. You probably don’t need to try them all; just start at the top of the list and work your way down.

What causes the “Sound output device not installed” message?

A major Windows 10 update is out: You won’t guess, but one of the main causes of Windows 10 errors is the updates themselves. While they bring a lot of new features, security fixes, and other goodies, they can also mess up your system. read more

Troubleshooting: Wi-Fi Connection Error “No Internet Secured”

You’re having fun browsing the Web when suddenly an error message appears: “No Internet, safe.” It’s a strange and cryptic message, but it’s pretty clear that your Internet connection has stopped working.

Web pages don’t open and you can’t download anything! What is going on? It’s actually much simpler than you think.

What causes the “No Secure Internet Connection” error when connecting to a Wi-Fi network?

  • A problem that many Windows 10 users face is the inability to connect to the Internet after downloading and installing new operating system updates.
  • You may see an error message on the screen saying there is no internet, which is usually due to a misconfigured IP address.
  • One culprit could be that recently installed Windows updates have changed the configuration settings. Therefore, we have listed below some methods that can help you solve this problem.

How to repair the “No Secure Internet Connection” error when connecting to a Wi-Fi network?

Set up a new DNS server

  1. Open the settings screen by clicking on the Wi-Fi connection icon in the taskbar, then click on Network and Internet Settings.
  2. Here, click Change Adapter Settings, right-click on the appropriate connection, and then click Properties.
  3. Select Internet Protocol version 4 (TCP/IPv4) > Properties.
  4. Activate the Use the following DNS server addresses option and enter them:
    Preferred DNS server: 9.9.9.9.9
    Alternate DNS server: 1.1.1.1.1.
  5. Click OK.

Start troubleshooting your network

Windows 10 has several troubleshooters – sets of software tools that automatically check for errors and perform (or suggest) repairs. read more

Troubleshooting a Slow and Lagging Windows 10 System

What’s the best way to speed up your computer when the system slows down and unresponsiveness and long boot times become the norm? Fixing lag problems on your computer may seem like a daunting task, but it’s not. Our guide will show you how to fix a slow and sluggish PC, with steps you can follow in a few minutes and get immediate and lasting results.

What are the causes of slow and sluggish Windows 10?

Damaged or insufficient RAM: Damaged or insufficient RAM can affect computer performance, cause random reboots, blue screens, etc. If the RAM is damaged or defective, the system memory cannot process processes and services properly. This causes your computer to slow down. read more

How to Resolve File System Error (-2018375670) in Windows 10 PC

File system errors are essentially disk-related errors that can be caused by corrupted files, bad sectors, disk integrity issues, file execution policies, etc. These errors can prevent you from accessing or opening files. These errors may prevent you from accessing or opening files. They can appear in files such as PDFs, images, documents, movies, etc. This can manifest as error messages such as C:\Test Program\Test.exe file system error (-2018375670).

In this article, we will look at some ways to fix this error. read more

Troubleshooting: SysMenu.dll Issues on Windows 10 Startup

SysMenu.dll is part of an advertising program that displays pop-up ads and advertisements on sites you visit. These ads are displayed as blocks with various available coupons, underlined keywords, pop-up ads, or banners.

The adware that runs the SysMenu.dll process appears as a program that displays coupons for the sites you visit and low prices when you visit product pages on sites such as Amazon. Although seemingly a useful service, the SysMenu.dll program can be intrusive and show ads whether you like it or not. read more

Troubleshooting: Cannot Change Screen Resolution on Windows 10 PC

In general, you can easily change the screen resolution of your Windows 10 computer if you want to. If you find that you can’t change the resolution in Windows 10, you can check out the solutions below to solve this problem. We offer various computer solutions and tools to help you manage your computer better.

What is the reason for not being able to change the screen resolution?

The main reason for this problem is incorrect driver configuration. Sometimes drivers are incompatible and a lower resolution is chosen as a safety measure.

How to resolve the inability to change the screen resolution?

Update your monitor driver

  1. Press Windows + R, type “devmgmt.msc” (without the quotes) and press Enter to open the Device Manager.
  2. Then expand the Display Adapters entry, right-click on the Nvidia video card and select Activate.
  3. Then right-click on the video card again and select Update Driver Software.
  4. Select “Automatically check for updated drivers” and let the process complete.
  5. If the above step solved your problem, that’s fine, if not, keep going.
  6. Select “Update Driver Software” again, but this time select “Search for Driver Software on Computer” on the next screen.
  7. Now select “Select from the list of drivers on my computer”.
  8. Finally, select the driver that is compatible with your Nvidia video card from the list and click Next.
  9. Allow the process to complete and restart your computer to save your changes.

Installing drivers in compatibility mode

  1. Right-click the video card driver configuration file and select Properties.
  2. Click the Compatibility tab and make sure that “Run this program in compatibility mode for” is checked.
  3. Then select Windows 7 or Windows 8 from the drop-down list.
  4. Then click Apply and OK.
  5. Right-click on the installation file again, select Run as administrator and continue with the installation.
  6. Once the installation is complete, restart your computer.
  7. Now press the Windows + I keys to open Settings, and click on System.
  8. Click on Advanced Display Settings under Display Settings.
  9. Select the new value under Resolution.
  10. Then click Apply and close everything.
  11. Restart your computer.

Make sure that Windows has been updated

  1. Press the Windows + I keys, then select Update and Security.
  2. Then click Check for updates and make sure all pending updates are installed.
  3. After installing the updates, restart your computer to resolve the “Can’t change screen resolution” issue.

Installing the Microsoft Basic Display driver

  1. Press the Windows + R keys, type “devmgmt.msc” and press Enter to open the Device Manager.
  2. Expand the display adapter, right-click on the video card driver, and select “Update Driver Software”.
  3. Then select “Automatically check for updated drivers.
  4. If no update is found, right-click the video card driver again and select “Update Driver Software”.
  5. This time, however, select “Search for driver software on your computer.
  6. On the next screen, select “Select from the list of device drivers on my computer”.
  7. Then select Microsoft Basic Display Adapter and click Next.
  8. Allow the above process to complete, then restart your computer.

=&0=&