This tutorial is based on Rore’s Split-toning tutorial from gimp’s flicker group and also on one of meetthegimp.org podcasts . its a neat effect where you can have a cretin colour for highlights and another for shadows.
Getting started
The image i’m going to use for this example is off sxc.hu but you can use your own if you wish.
Download the photo: http://www.sxc.hu/photo/738279

Step 1
Open up the image in GIMP and go to your Layers dialog, then click on the duplicate icon button so that we have two copies of our image.

Step 2
Now we need to transform our colourful photo into a black and white photo, to do that go the menu and click on Colors>Desaturate.

Step 3
Create a new layer, and fill with the colour blue 2bc6ff using the bucket fill tool.

Step 4
Once you have filled the new layer with blue go to the Layers dialog and change the mode from normal to overlay.

Step 5
Now Merge down the two layers by right clicking on the blue layer and in the menu go to Merge down.

Step 6
Now we will repeat what we did in the previous steps but this time use an orange ffc600 fill instead of blue.

Step 7
Now that we have two of our colours we can start the split-toning process. right click on our orange layer and go to Add Layer mask. in the Add layer mask window select grayscale copy of layer and hit the Add button.
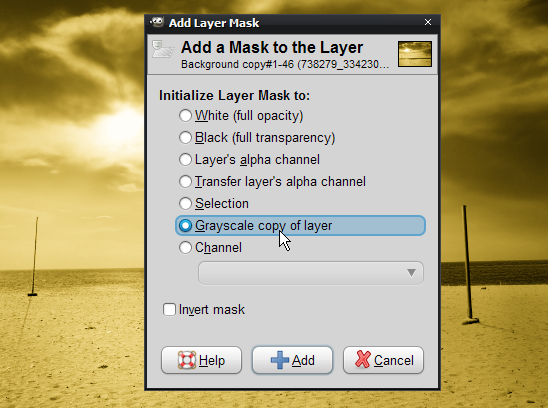
Notice how the highlights in the image are now yellowish.

Step 8
Now right click on our blue photo, and like the previous post go to Add layer mask, but this time have invert mask ticked.

Step 9
In this final step we will lower the opacity of the Orange layer to 75 so we get more of the blue shade, this step is optional and it would differ from photo to photo.

I hope you found this tutorial useful, if you need any help feel free to ask in the forum section. a
s always the XCF source file is attached below.