Updated April 2024: Stop getting error messages and slow down your system with our optimization tool. Get it now at this link
- Download and install the repair tool here.
- Let it scan your computer.
- The tool will then repair your computer.
This manual explains the installation procedure for the Kodi Gen-X Add-on Gen-X and Kodi Leia 18.1. It can be used on all platforms supported by Kodi, such as Amazon FireStick, FireStick 4K, FireStick TV Cube, Mac, Linux, Windows, etc.

Gen X is an all-in-one Kodi complement with movies, TV shows, live TV and more. It uses Auto-Play for those who like this feature, which means you don’t need to choose working links. Instead, the title starts automatically after selection.
Enable unknown sources so that Kodi can download third-party add-ons.
The Gen-X add-on is a third-party add-on. Therefore, we must enable the unknown sources option on the Kodi for Windows settings page. The procedure is as follows:
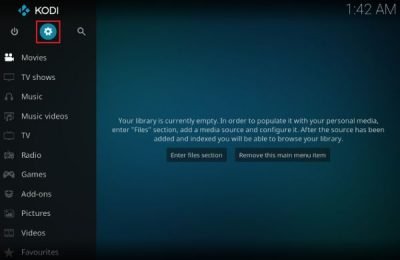
1] Start the Kodi application.
2] Click on the gearwheel icon in the upper left corner of the screen to open the Settings menu.
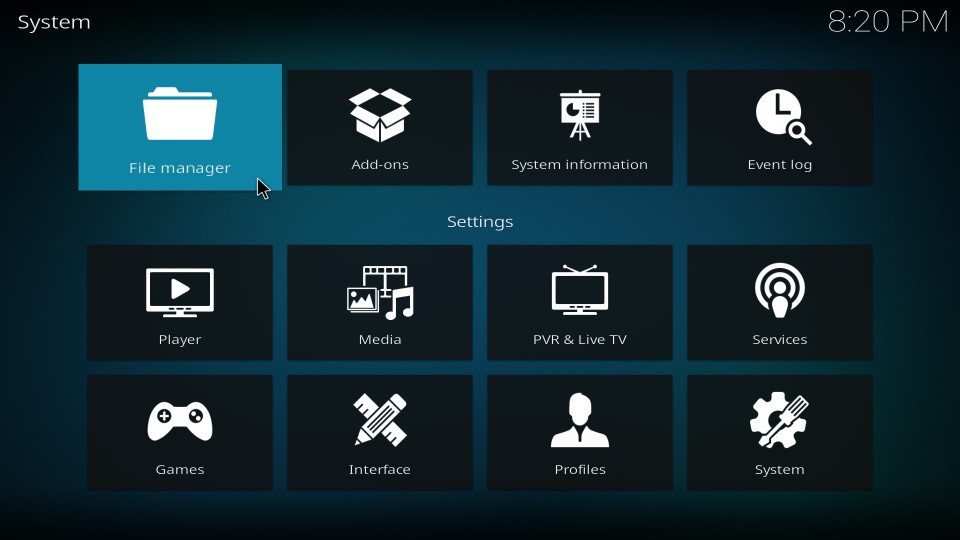
3] Select System in the lower right corner of the menu.
4] Select Add-ons from the list on the left.
5] Turn on the switch from an unknown source.
Installation of Gen-X Addon on Kodi
April 2024 Update:
You can now prevent PC problems by using this tool, such as protecting you against file loss and malware. Additionally it is a great way to optimize your computer for maximum performance. The program fixes common errors that might occur on Windows systems with ease - no need for hours of troubleshooting when you have the perfect solution at your fingertips:
- Step 1 : Download PC Repair & Optimizer Tool (Windows 10, 8, 7, XP, Vista – Microsoft Gold Certified).
- Step 2 : Click “Start Scan” to find Windows registry issues that could be causing PC problems.
- Step 3 : Click “Repair All” to fix all issues.

We now come to the main part of the installation process. The process is simple and general, that’s what you’re going to do:
- Add the source link to Kodi
- Install Maverick Repo using the source link.
- Install Gen X from the Maverick Repo.
The following steps cover everything. Here’s what you need to do now:
#1: Click again on the Kodi settings on the Home screen.
#2: Select the file manager
#3: Select and open Add a source (left or right, it doesn’t matter)
#4 : Now click on None>None>None>None>None>.
#5: In the next full screen window, carefully enter the following source/URL link: http://mavericktv.net/mavrepo
Click OK to continue.
#6: In this window, select the text box labeled “Enter a name for this media source” and enter the name of the source you want to identify it with. I’ll leave it at the default mavrepo setting.
#7: You now want to return to the Kodi home screen by pressing the Back button several times. Select Add-ons on the left.
#8: Click on the package installer icon in the upper left corner. I am referring to the object that looks like an open box.
#9: Click on Install from Zip file.
#10: Open mavrepo or another source name you added earlier in step 6.
#11: Click on repository.maverickrepo-x.x.zip.
#12: Wait until you see the installation confirmation entitled MaverickTV Repo Add-on installed.
Once you see the notification about the installed extension, it is ready to use and will be available in your extension area.
https://www.youtube.com/watch?v=mBpTyDAM1kY
Expert Tip: This repair tool scans the repositories and replaces corrupt or missing files if none of these methods have worked. It works well in most cases where the problem is due to system corruption. This tool will also optimize your system to maximize performance. It can be downloaded by Clicking Here

CCNA, Web Developer, PC Troubleshooter
I am a computer enthusiast and a practicing IT Professional. I have years of experience behind me in computer programming, hardware troubleshooting and repair. I specialise in Web Development and Database Design. I also have a CCNA certification for Network Design and Troubleshooting.