Updated April 2024: Stop getting error messages and slow down your system with our optimization tool. Get it now at this link
- Download and install the repair tool here.
- Let it scan your computer.
- The tool will then repair your computer.
Since you have thousands of documents in SharePoint’s document libraries, you are not supposed to open documents just to see what they are. Wouldn’t it be a good idea to save time and view the contents of a document without clicking on each of them?

SharePoint is actually a platform and this is very, very important. SharePoint is a platform on which you can create your own show. While this in itself is great, there are issues that can affect the documents or files you are working on. One of these problems occurs when you try to edit a document in a classic MS Word application. This happens when you upload a document to your system and try to edit it from a desktop application.
It turns out that the document may not load / display all the pages that you see or have in the online version of the document. This means that you only see part of the entire page, not the entire document. This can now happen for a number of reasons, such as: incompatible versions and more.
Check your credentials used in the client
If you are like me, you are logged into SharePoint, your computer or tablet and Office applications, sometimes all with different accounts. Personal, professional demo accounts, etc. E. Your problem may probably be in this confusing area of accounts.
Make sure that your Office account (in the client) matches the account you use in SharePoint to open the document. If the permissions differ for different accounts, Word / Excel will not open the document through a browser in the client. In this case it can be read-only and your changes will be saved locally only.
- Click the name of your account in the upper right corner of the Microsoft Office client application:
- From there you have three options. “Disable” is usually a good first step to ensure a clean start (1st asterisk). You may also have “registered” other accounts which you can change by clicking (2nd asterisk). The third option is to add another account which can simply add an additional address to your current login (3rd asterisk). I had good and bad results with this third option, but it is worth a try. In theory an account with the highest credentials will be used to try and open your document.
- If you log off you will need to log on again.
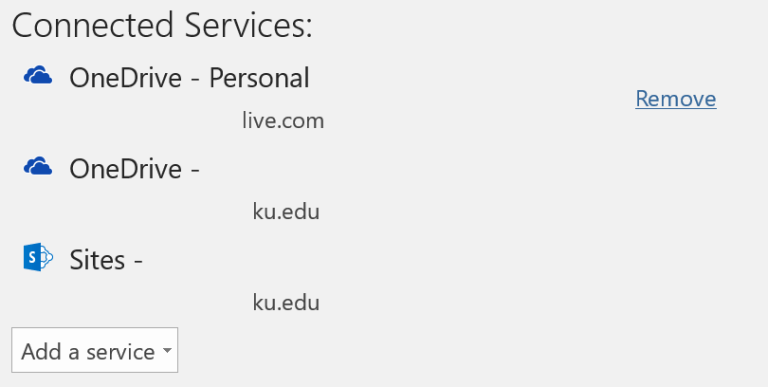
- You can also check your connected services by going to File -> Account in your client. You should see something like this where you can delete all connected services that you are afraid to interfere with by clicking “Delete” to the right of them. Depending on the account that you use to sign in to the Microsoft client, you will not be able to remove the service until you log in with those credentials.
April 2024 Update:
You can now prevent PC problems by using this tool, such as protecting you against file loss and malware. Additionally it is a great way to optimize your computer for maximum performance. The program fixes common errors that might occur on Windows systems with ease - no need for hours of troubleshooting when you have the perfect solution at your fingertips:
- Step 1 : Download PC Repair & Optimizer Tool (Windows 10, 8, 7, XP, Vista – Microsoft Gold Certified).
- Step 2 : Click “Start Scan” to find Windows registry issues that could be causing PC problems.
- Step 3 : Click “Repair All” to fix all issues.

Upgrade Microsoft Word in Windows 10
To update your Office suite of applications to the latest version, follow these steps:
Note. The user interface may vary slightly depending on the Office version you use, but the steps remain the same.
- Open Word.
- Create a new blank document.
- Click File.
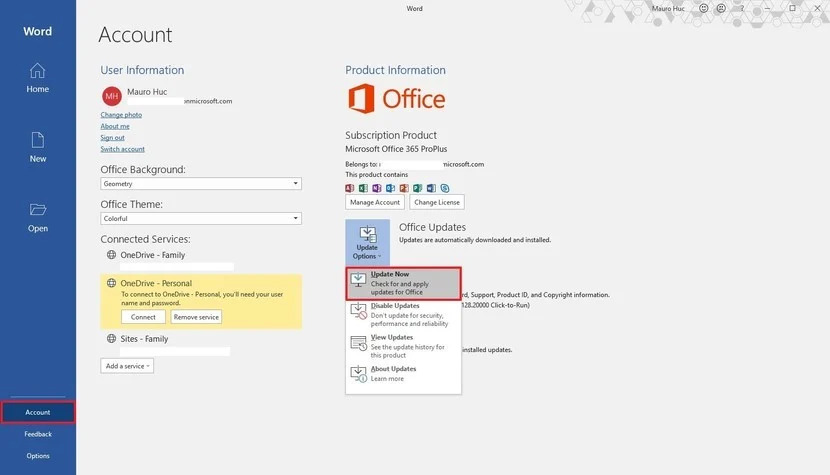
- Click Account.
- Click the update options menu on the right.
- Click the Update Now option.
- Follow the on-screen instructions to apply the new updates (if applicable).
After these steps, Office will download and install all available updates for your application.
Change the DOCX file
One of the ways to solve the problem is to change the file extension of the document. If the file with the problem is a DOC document, you need to change the extension to DOCX. Both extensions are used for Microsoft Word. The only difference is that docx is more efficient as a successor than the doc extension.
Delete markup information in Microsoft Word

Uncheck the “Track changes” box to finish adding changes to your document. You can temporarily hide existing tracked changes by selecting No annotation in the Show for verification field. This way, you can see what the final document will look like. However, the changes will be displayed again the next time you open it. Prepare your document for approval by permanently accepting or rejecting the changes to be tracked and deleting comments.
- To view the changes individually, click “Browse” and then click “Accept” or “Reject”. Click Accept All Changes or Reject All Changes to complete the document at a time.
- On the “Review” tab in the “Comments” group, click the arrow under “Delete” and select “Delete all comments from the document”.
- To use Document Inspector to search for changes, comments, and other information you may not want to share, click “Find Problems” on the Browse tab, and then click “Check Document”.
Expert Tip: This repair tool scans the repositories and replaces corrupt or missing files if none of these methods have worked. It works well in most cases where the problem is due to system corruption. This tool will also optimize your system to maximize performance. It can be downloaded by Clicking Here

CCNA, Web Developer, PC Troubleshooter
I am a computer enthusiast and a practicing IT Professional. I have years of experience behind me in computer programming, hardware troubleshooting and repair. I specialise in Web Development and Database Design. I also have a CCNA certification for Network Design and Troubleshooting.