Updated April 2024: Stop getting error messages and slow down your system with our optimization tool. Get it now at this link
- Download and install the repair tool here.
- Let it scan your computer.
- The tool will then repair your computer.
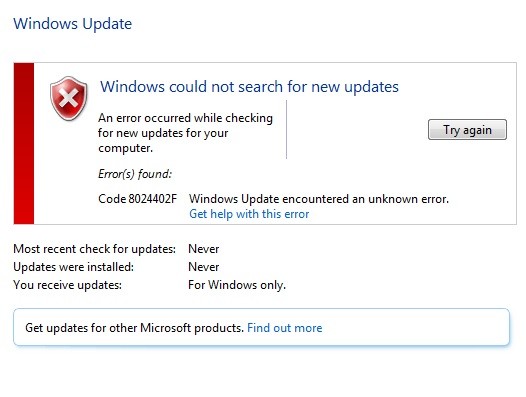
The Windows update error code 80244o2f is one of the most common problems faced by PC owners. This problem occurs due to improper configuration of Windows Updates settings. If you are facing this issue, it is recommended that you follow the steps mentioned below to fix the problem.
Windows Update Error 80244o2f is one of those errors that you don’t want to see. This error occurs when there is something wrong with the operating system files and it prevents Windows 10 from updating itself properly. In some cases, the problem might even cause Windows 10 to stop working altogether.
The error 80244o2f appears due to an invalid registry entry. This error code usually occurs because of a corrupted registry file. To resolve this issue, you must delete the corrupt registry entries manually. If you’re experiencing this issue, follow our step-by-step guide to fix it.
Launch the windows update troubleshooter
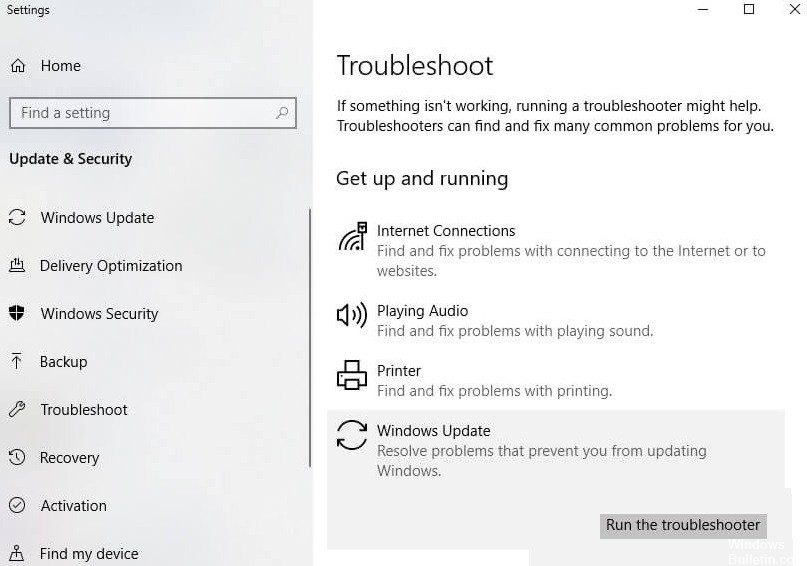
If nothing works till now then it is recommended that you run Windows Update Troubleshoot Tool from Microsoft Website itself and check whether you are able to fix Windows update error 8024402F. You can follow the steps mentioned here to troubleshoot Windows update errors.
1. First open Control Panel and search for “Troubleshooting”.
2. Click on the “View all” button next to the option named “Troubleshooting” under System and Security section.
3. Now, select “Windows Update” from the list of options.
4. In the following screen, you’ll find the “Windows Update” tab. Select it and press OK.
5. Here, you’ll find three options namely “Check for Updates”, “Install Updates” and “Remove Selected Updates”. Choose one of them according to your requirement.
6. After selecting the option, wait for some time. Your computer will start downloading the required files and installing them. Once done, restart your PC and check again for any error messages related to Windows update.
April 2024 Update:
You can now prevent PC problems by using this tool, such as protecting you against file loss and malware. Additionally it is a great way to optimize your computer for maximum performance. The program fixes common errors that might occur on Windows systems with ease - no need for hours of troubleshooting when you have the perfect solution at your fingertips:
- Step 1 : Download PC Repair & Optimizer Tool (Windows 10, 8, 7, XP, Vista – Microsoft Gold Certified).
- Step 2 : Click “Start Scan” to find Windows registry issues that could be causing PC problems.
- Step 3 : Click “Repair All” to fix all issues.

The date and time on Windows should be updated
Windows 10 has some great features that are easy to miss. One of those features is how you change the date and time. When you open up the Taskbar, there’s a little clock icon on the bottom left corner. You can use it to set the date and time automatically. Here’s how.
1. Open Control Panel.
2. Select Clock & Region.
3. On the next screen, click Change system defaults.
4. Scroll down to Set automatic updates and check the box next to Turn off auto setting changes.
5. Click OK.
That’s it! Now, whenever you boot up your PC, it will update your computer’s local time. This method works well if you don’t want to manually adjust the date and time every day.
Component for Windows Update needs to be reset
This method works even if there is no Internet connection. You just have to follow the steps carefully.
1. Click the Start button and type cmd in the Search box. Press Enter key.
2. A black window appears on the screen.
3. Right-click on the black window and select Run As Administrator.
4. Now open Notepad and paste the following code into the Notepad text editor.
5. Save the file as “Reset_WindowsUpdate.bat”. Double-click on the Reset_WindowsUpdate.bat file to run the batch script.
6. When prompted, enter the administrator password.
Start the System File Checker scanner and DISM tool
In case you don’t know how to resolve “Windows Update Error Code 800705b3”, it’s simple. Just follow the instructions given here.
1. Open Command Prompt.
2. Type sfc /scannow and press Enter.
3. Wait for the process to complete.
4. Reboot your PC.
5. Enjoy the new look.
6. If you still face issues, try another method.
Turn off your antivirus and firewall temporarily
Sometimes the Antivirus program causes errors while running in Windows 10. In such cases, disabling the antivirus software temporarily can help resolve the issue. To do this, follow the steps given below.
1. Click the Start button and type “MSConfig”.
2. A window will open where you can see the Startup tab. Select it.
3. Now scroll down and find the entry named “Antivirus” and double-click on it.
4. You’ll now be able to choose whether to enable or disable the antivirus software. If you want to turn it off, simply uncheck the box next to “Enable.”
5. Once you’re done, close the dialog box and restart your computer.
6. After booting up again, run the antivirus software once again and try opening some files/programs. If there are no problems, you can safely reenable the software.
Ensure that the Windows Update Services are running
If you’re having trouble updating Windows 10, it could be because Windows Update Services isn’t working properly. If you run into issues while attempting to install a major version upgrade, try restarting the computer and opening up Windows Update again.
You might see an error message like the one shown above. To fix this issue, open the Start menu and type “services.msc”. Click on the Microsoft Windows Update Service item under Startup Type, and make sure it says Automatic. Then press Enter. Restart the computer, and check out if the problem persists.
Check your proxy and uncheck it
1. Press Windows + R, type “inet.cpl” and press Enter to open Internet properties.
2 . Then go to the “Connections” tab and select “LAN Settings”.
3. uncheck Use the proxy server for the local network and make sure that the “Automatically detect settings” option is activated.
4. Click Ok, then Apply and restart your computer.
Expert Tip: This repair tool scans the repositories and replaces corrupt or missing files if none of these methods have worked. It works well in most cases where the problem is due to system corruption. This tool will also optimize your system to maximize performance. It can be downloaded by Clicking Here
Frequently Asked Questions
How can I fix code 8024402F?
- Temporarily disable antivirus and firewall software.
- Update the Windows date/time.
- Check the update logs.
- Make sure that Windows update services are running.
- Run the system file checker and DISM tool.
- Run Windows Update troubleshooting.
- Turn off your proxy server.
How to fix a Windows Update service error?
If you get an error code when downloading and installing Windows updates, the Update Troubleshooter can help you solve the problem. Select Start -> Settings -> Update and Security -> Troubleshooting -> Advanced Troubleshooting.
What is causing the Windows Update error?
Your system files may have been recently corrupted or deleted, causing Windows Update to fail. Outdated drivers. Drivers are needed to manage components that are not initially compatible with Windows 10, such as video cards, network cards, etc.
