Updated April 2024: Stop getting error messages and slow down your system with our optimization tool. Get it now at this link
- Download and install the repair tool here.
- Let it scan your computer.
- The tool will then repair your computer.
Google Chrome is known for being very stable software. However, sometimes it does encounter some errors such as the ‘profile error occurred’ issue. If you are facing such problems, here is how you can fix them easily without having to reinstall the entire program.
- Open up the Windows Control Panel.
- Find out what application is causing the error.
- Right-click on the name of the app, select Delete and press OK.
- Restart the computer.
This process might work for you. Let us know if it did help you otherwise follow the rest of our guide here.
What causes ‘profile error occurred’ on Google Chrome?
If you are getting the following error while trying to open Chrome, there could be several reasons behind it. Here we discuss how to fix the issue.
- The most common reason for this error code is that you have installed an unwanted browser extension. If you find anything suspicious, uninstall it immediately.
- Another possible cause of this error is that you have installed a malicious program. Check your PC for viruses and malware. You can also try clearing out all local cache files and cookies.
Clear the cache and cookies
![]()
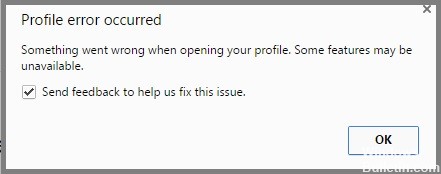
If you are getting “Profile Error” while opening chrome, it might be due to some problems in your system. You must clear all cache and cookies. You can do this by following the given instructions.
- Open the Chrome browser.
- Click on the menu icon present at the top left corner of the screen.
- Now select the Settings option from the drop-down menu.
- In the next window, scroll down to find the ‘Show Advanced Settings’ option.
- Now tap on it.
- Under the Privacy section, there is a toggle button named ‘Content settings’. Tap on it.
Restart the Chrome processes
Chrome is one of the most popular web browsers in the world. However, it is not immune to problems. If you are experiencing slow browsing speed, there could be several reasons behind this issue. One of those reasons could be due to the fact that there might be too many processes running in the background. This can cause issues like increased memory consumption, slower response times, and even crashing. In such cases, restarting the browser process is the best way to resolve the issue. Here are some steps to do just that.
- Open the Task Manager. You can find the option under the Windows button. Alternatively, you can press Ctrl+Shift+Esc keys together to launch the same window.
- Select the tab named Processes. Once you open the Task Manager, select the tab called Processes. A list of all the processes running on your system will be displayed here.
- Find out the name of the process that consumes more RAM. In case you see multiple instances of chrome.exe listed in the Processes section, choose the instance that uses the highest amount of RAM. Then, right-click on that instance and select End Process. After doing this, the browser will close down.
April 2024 Update:
You can now prevent PC problems by using this tool, such as protecting you against file loss and malware. Additionally it is a great way to optimize your computer for maximum performance. The program fixes common errors that might occur on Windows systems with ease - no need for hours of troubleshooting when you have the perfect solution at your fingertips:
- Step 1 : Download PC Repair & Optimizer Tool (Windows 10, 8, 7, XP, Vista – Microsoft Gold Certified).
- Step 2 : Click “Start Scan” to find Windows registry issues that could be causing PC problems.
- Step 3 : Click “Repair All” to fix all issues.

Rename the default folder
If you are having trouble finding your files in Windows 10, you might want to rename the default folder. To do that, follow these steps:
- Open File Explorer.
- Click the small arrow next to the name of the current drive to open up the navigation pane.
- Select the “This PC” option.
- Right-click on the folder named “Users” and choose “Properties.”
- On the General tab, change the Name field to something else like “My Documents,” “Downloads,” or whatever you prefer.
- Now, close out the Properties window and reopen File Explorer. You’ll notice that the file structure has changed.
Turn off the extensions
To find out what extension is causing the problem, you must disable each extension individually. Go through the list of disabled plugins and enable them one by one until the error disappears. If it does not work, try disabling another plugin. This process might take some time.
You can remove any recent extensions if they are causing the problem.
- Open the Chrome browser.
- Click on the menu icon present near the address bar.
- Here, you will see an option for removing extensions.
- Select it and then confirm.
End all Google chrome processes
If you are facing issues while opening the Chrome browser due to some error messages like “Google Chrome could not start because it is already running”, “Google Chrome could not find the specified registry key”, or “The process cannot access the file because it is being used by another process” etc., then follow the steps mentioned below to end all the processes related to Google Chrome.
Steps To End All Google Chrome Processes :
- Open Command Prompt window.
- Type ‘taskkill /F /IM chrome.exe’ without quotes and press Enter.
- Type ‘chrome.exe’ again and press enter.
- Press Ctrl+C to stop the command prompt.
- Restart your computer.
Reinstall the Chrome browser and delete the cache folder
If you are having trouble with Chrome crashing, try uninstalling it and reinstalling it. You might have some old files left over from a previous installation. Deleting those files could help solve the issue. Here’s how to do it:
- Open up Windows Explorer.
- In the address bar type %appdata% and hit enter.
- This will open up your local app data folder where most applications store their settings and preferences.
- Inside this folder, there will be a folder named Local Data.
- Go ahead and delete everything inside this folder.
- Scroll down to the bottom of the window and look for something called Clear Browsing Data. Click on that button.
- Restart your computer and rerun Chrome.
Turn off the antivirus software
Your antivirus software can cause problems with Chrome’s profile. If you receive an error message saying something like “The application cannot run because it is being used by another process,” you might want to try disabling the antivirus program.
Locate the name of the antivirus program and double-click it. This will bring up a window where you’ll find an option to disable the program. If you’re still having trouble, there are some ways to fix the issue. You can uninstall the program completely or simply delete the files associated with it. To do this, follow these steps:
- Open the Start menu and type “Control Panel.”
- Click on the icon labeled “Programs and Features.”
- In the left pane, locate the name of the antiviral program and select “Uninstall.”
- A list of installed programs will appear.
- Select the program and press “Uninstall.”
- Wait while the program uninstalls.
- Once complete, restart your computer.
Reboot your PC
Restarting your computer is one of those things you do without thinking about it. You just turn off your device, press the power button, wait for it to shut down, and then start up again. But sometimes, restarting your computer isn’t enough to fix some issues. In fact, sometimes restarting your computer doesn’t even help. So what else can you try? Well, there are a few tricks you can use to make sure your computer starts up properly every time. Here are three ways to reboot your computer.
- The first thing you want to do is make sure your battery is fully charged. If you’re running low on juice, your laptop might not boot up correctly. Also, plug in your charger because you don’t want to accidentally unplug it while your computer is starting up.
- Next, check to see whether your hard disk is working. Your computer won’t start unless your hard disk is functioning properly. To test your hard disk, hold down the shift key while turning on your machine. If you hear a grinding sound, your hard disk needs to be replaced.
- Finally, go into your BIOS settings. This is where you’ll find information about how your computer boots up. Check out your motherboard manual to learn how to access your BIOS settings. Once you’ve done that, look for something called “boot sequence.” This tells your computer exactly how to load programs and start-up. Make sure to change the setting to “automatically detect,” otherwise you could end up having to manually select each program you’d like to run.
Now that you know how to reset your computer, why not give it a shot? Just remember to keep your charger plugged in and your battery full. And if you still aren’t able to figure out what’s wrong, take your laptop to a repair shop. They’re usually pretty helpful.
Update your Google Chrome browser
Google Chrome gets updated about once a month, and it’s important to keep up with the latest versions. If you don’t, you could miss out on some security fixes and improvements. To make sure you’re always running the most recent version, here are three ways to check what version of Google Chrome you’re running.
- First, open the “Help” section of your browser.
- Click on the link titled “About Google Chrome.” A pop-up box should appear, asking you to confirm that you want to view the page. Click “OK.”
- Second, click on the tab at the top of the screen that says “More tools.” Underneath the word “Chrome,” you’ll see an option labeled “Version.” Click on this to see which version of Google Chrome you have installed.
The URL will tell you which version of Google Chrome is currently being used. If you notice any problems or errors when using your browser, visit the official website for more information.
Expert Tip: This repair tool scans the repositories and replaces corrupt or missing files if none of these methods have worked. It works well in most cases where the problem is due to system corruption. This tool will also optimize your system to maximize performance. It can be downloaded by Clicking Here
Frequently Asked Questions
What are the causes of a Google Chrome Profile error?
Google Chrome Profile Error appears when you try to open a specific website. This problem occurs when the browser tries to load a profile file that doesn't exist. The most common reason for this error is when you delete a profile file manually.
How do I fix a 'profile error occurred' in Google Chrome?
This happens when you delete a profile folder by mistake. You may also accidentally delete a profile folder when trying to remove extensions. In either case, you need to restore the deleted folder back to its original location. Here's how to do so:
- Open your Start menu and search for "Recovery" (without quotes).
- Select "Recovery Console" under "Advanced options" and then press Enter.
- Press Ctrl+L to highlight the entire list of profiles.
- Right-click on the profile name you wish to restore and choose "Restore Selected Profiles...".
- Choose the desired profile and click OK.
- Restart your computer.
How do I clear all cookies from my Google Chrome browser?
If you're trying to clear all cookies from your Google Chrome browser, follow these steps:
- Open the Google Chrome menu by clicking on the button located at the top left corner of your browser window.
- Scroll down until you reach Privacy & Security.
- Click on Content settings.
- Choose Cookies.
- Uncheck the box next to "Accept cookies from sites".
- Close the dialog box.
- Restart your browser.
