Updated April 2024: Stop getting error messages and slow down your system with our optimization tool. Get it now at this link
- Download and install the repair tool here.
- Let it scan your computer.
- The tool will then repair your computer.
To address the issue of automatic sound level control in Windows 10, there are several solutions and helpful instructions you can follow:
Normalize Sound Volume Using Loudness Equalization
This feature helps maintain a consistent sound level across applications and web browsers. It’s particularly useful when you’re experiencing varying volume levels while streaming music or watching videos.
- Open Settings: Start by opening the Windows Settings app.
- Access Sound Settings: Navigate to System > Sound.
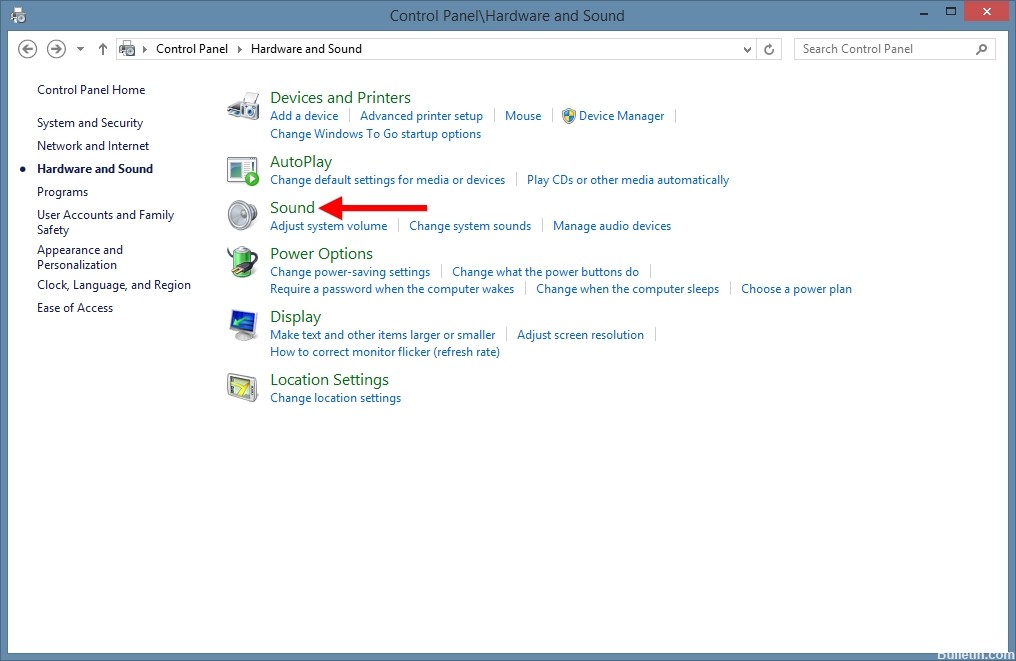
- Sound Control Panel: In the “Related Settings” section, click on the “Sound Control Panel” option.
- Select Playback Device:
- Click on the Playback tab.
- Select the speaker or headphones currently set as the default (indicated by a green checkmark).
- Device Properties: Click the Properties button for your default device.
- Enable Loudness Equalization:
- Go to the Enhancements tab.
- Check the “Loudness Equalization” option.
- Apply the changes and click OK.
Disable Allow Applications to Take Control Option
Prevent applications from automatically controlling the sound device to avoid unexpected volume changes.
- Run Command: Press Windows key + R, type
mmsys.cpland press Enter. - Default Sound Device: Right-click on your default sound device (Speaker or Headphone) and select Properties.
- Advanced Tab: Go to the Advanced tab in the device properties.
- Disable Control: Uncheck “Allow applications to take control of this device” and click OK.
Edit Sound Control Panel Settings
Adjust settings in the sound control panel to ensure your computer doesn’t automatically adjust the volume during communications.
- Open Sound Settings: Press Windows key + R, type
mmsys.cpland hit Enter. - Communications Tab: Click on the Communications tab.
- Adjust Settings:
- Select “Do nothing” under “When Windows detects communications activity”.
- Click Apply and OK to save changes.
Disable All Enhancements
Turning off sound enhancements can help in resolving issues with automatic volume changes, especially if these enhancements are conflicting with other software or settings.
- Run Command: Use the shortcut Windows key + R, enter
mmsys.cplin the run box, and press Enter. - Access Sound Properties: Right-click on the default sound device (Speaker or Headphone) and select Properties.
- Enhancements Tab: Navigate to the Enhancements tab.
- Disable Enhancements:
- Check the option “Disable all enhancements” or “Disable all sound effects.”
- Click Apply, then OK to confirm the changes.
Update the Audio Driver
Outdated or corrupted audio drivers can cause various sound issues, including automatic volume changes. Updating them can resolve these problems.
- Open Device Manager: Press Windows key + R, type
devmgmt.msc, and hit Enter. - Locate Audio Drivers: In the Device Manager, find the “Audio inputs and outputs” section.
- Update Drivers:
- Right-click on each audio driver listed and select “Update driver.”
- Choose “Search automatically for updated driver software.”
- Restart Your PC: After updating the drivers, restart your computer to apply the changes.
Run the Audio Troubleshooter
The built-in audio troubleshooter in Windows can automatically detect and fix many common sound problems.
- Access Settings: Click on the Start button, then the gear-like symbol to open the Settings menu.
- Troubleshoot: Navigate to Update & Security > Troubleshoot.
- Run the Troubleshooter:
- Select “Playing Audio” from the options.
- Click “Run the troubleshooter” and follow the on-screen instructions.
- Restart Your PC: Once the troubleshooting process is completed, restart your computer to see if the issue is resolved.
Check for Windows Updates
Updating Windows can resolve many issues, including sound problems, as updates often include fixes for known bugs and compatibility issues.
- Open Settings: Click on the Start button and then the gear-like symbol to open the Settings page.
- Go to Updates: Select Update & Security.
- Check for Updates:
- Click on “Check for updates”.
- If updates are available, follow the prompts to download and install them.
- Restart Your PC: After installing any updates, restart your computer to ensure all changes take effect.
April 2024 Update:
You can now prevent PC problems by using this tool, such as protecting you against file loss and malware. Additionally it is a great way to optimize your computer for maximum performance. The program fixes common errors that might occur on Windows systems with ease - no need for hours of troubleshooting when you have the perfect solution at your fingertips:
- Step 1 : Download PC Repair & Optimizer Tool (Windows 10, 8, 7, XP, Vista – Microsoft Gold Certified).
- Step 2 : Click “Start Scan” to find Windows registry issues that could be causing PC problems.
- Step 3 : Click “Repair All” to fix all issues.

Rollback Windows Updates
If the automatic volume change issue started after a recent Windows update, rolling back to a previous version may resolve the problem.
- Access Update History: Open the Settings menu, go to Update & Security, and click on “View update history”.
- Uninstall Updates: Select “Uninstall updates”.
- Select Recent Update: Find the most recent update that you suspect may be causing the issue.
- Uninstall:
- Right-click on the update and choose “Uninstall”.
- Follow the prompts to complete the uninstallation process.
- Restart Your PC: After uninstalling the update, restart your computer to apply the changes.
Expert Tip: This repair tool scans the repositories and replaces corrupt or missing files if none of these methods have worked. It works well in most cases where the problem is due to system corruption. This tool will also optimize your system to maximize performance. It can be downloaded by Clicking Here