Updated April 2024: Stop getting error messages and slow down your system with our optimization tool. Get it now at this link
- Download and install the repair tool here.
- Let it scan your computer.
- The tool will then repair your computer.
If you try to make changes to an Excel file but encounter an error indicating that the file is marked as read-only, there are several ways to get around the limitation. Marking a file as read-only is useful when you send files to colleagues or friends and want to prevent any changes to the content, but in some cases it is an obstacle. The method you use to solve a Microsoft Excel read-only problem depends on how the file was made read-only, but in any case, it is simple.

Excel is Made Read Only by “Mark as Final”
One of the reasons why the Excel document you have is write-protected is because the editor marked it as final. If this is the case, you should see the message “Marked as final” at the top of the document.
When a document is marked as final, it is essentially impossible to make any changes to it. In this state, you cannot enter, modify, or even view the document. However, it can be easily removed. Just click on the “Edit Anyway” button at the end of the message and you can disable the read-only function in Excel.
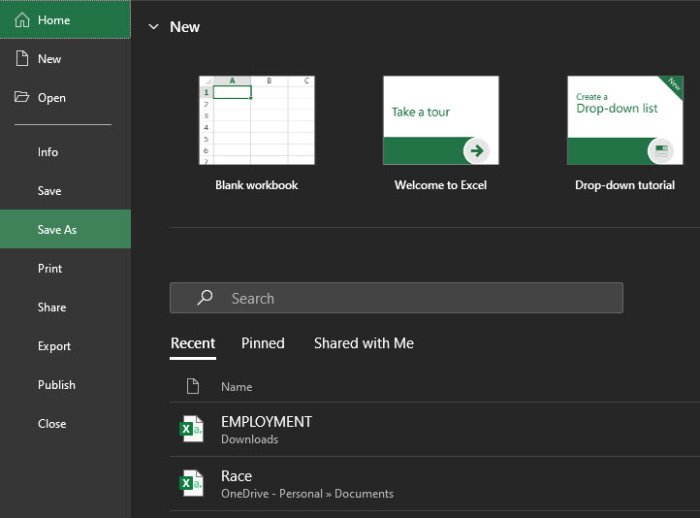
Excel File Becomes Read Only Recommended by “Save As”

Another situation where you should be aware that an Excel document is in read-only mode is that you will be prompted to open the document in read-only mode unless you need to make changes. If you don’t want to make any changes to the document, just click “Yes”, and if you want to modify the document, just click “No” to open it.
To unlock the Excel file from read-only mode, follow these simple steps:
April 2024 Update:
You can now prevent PC problems by using this tool, such as protecting you against file loss and malware. Additionally it is a great way to optimize your computer for maximum performance. The program fixes common errors that might occur on Windows systems with ease - no need for hours of troubleshooting when you have the perfect solution at your fingertips:
- Step 1 : Download PC Repair & Optimizer Tool (Windows 10, 8, 7, XP, Vista – Microsoft Gold Certified).
- Step 2 : Click “Start Scan” to find Windows registry issues that could be causing PC problems.
- Step 3 : Click “Repair All” to fix all issues.

- When you open the Excel document for the first time and receive a message telling you that you have three options for opening the document in read-only mode, simply click “Yes” to open the file in read-only mode.
- If you make changes to the content of the document and try to save them, a new message will appear asking you to save and rename a copy of the file. Click OK to open the Save As dialog box, and then click Tools > General Options.
- In the General Options dialog box that appears, uncheck “Recommended read-only” and then click OK.
- Back in the Save As dialog box, click Save. This creates a copy of the original Excel file. The copied file will not be read-only, and you can continue to edit it as you wish.
Have you set a password?
If the program asks you for a password and you can’t remember it, it’s probably bad, but it’s fixable if you know what to do.
As soon as the password is requested, click on the “Read Only” button. The table opens; click on File in the taskbar. Now click on “Save As”, click on “Browse”, and then click on “Tools”.
In this window, click on the General tab; delete the password and press Enter.
You can then delete the old file and open a new one.
Unlocking Password-Protected Excel Files with Read-Only
Sometimes the Excel workbook you are trying to open is password protected. If this is the case, a window appears when you open the workbook with a warning and a place to enter the password. Without the password, you cannot edit the file. Here are instructions on how to work around this problem:
- When the password dialog box appears, select the read-only opening option.
- Go to File and select Save As, then Browse.
- From there, click Tools and select General Options.
- Delete the entry in the Password to change field and click OK.
- Open the new Excel file instead of the old one.
- To remove the password completely, you could download a third-party utility, but that’s a bit crude, especially if you crack someone else’s password. Instead, ask the person who sent you the document for an editable version.
Expert Tip: This repair tool scans the repositories and replaces corrupt or missing files if none of these methods have worked. It works well in most cases where the problem is due to system corruption. This tool will also optimize your system to maximize performance. It can be downloaded by Clicking Here

CCNA, Web Developer, PC Troubleshooter
I am a computer enthusiast and a practicing IT Professional. I have years of experience behind me in computer programming, hardware troubleshooting and repair. I specialise in Web Development and Database Design. I also have a CCNA certification for Network Design and Troubleshooting.