Updated April 2024: Stop getting error messages and slow down your system with our optimization tool. Get it now at this link
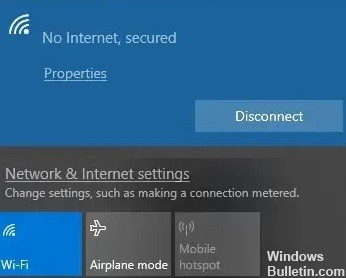
You’re having fun browsing the Web when suddenly an error message appears: “No Internet, safe.” It’s a strange and cryptic message, but it’s pretty clear that your Internet connection has stopped working.
Web pages don’t open and you can’t download anything! What is going on? It’s actually much simpler than you think.
What causes the “No Secure Internet Connection” error when connecting to a Wi-Fi network?
- A problem that many Windows 10 users face is the inability to connect to the Internet after downloading and installing new operating system updates.
- You may see an error message on the screen saying there is no internet, which is usually due to a misconfigured IP address.
- One culprit could be that recently installed Windows updates have changed the configuration settings. Therefore, we have listed below some methods that can help you solve this problem.
How to repair the “No Secure Internet Connection” error when connecting to a Wi-Fi network?
You can now prevent PC problems by using this tool, such as protecting you against file loss and malware. Additionally it is a great way to optimize your computer for maximum performance.
The program fixes common errors that might occur on Windows systems with ease - no need for hours of troubleshooting when you have the perfect solution at your fingertips:
April 2024 Update:

Set up a new DNS server
- Open the settings screen by clicking on the Wi-Fi connection icon in the taskbar, then click on Network and Internet Settings.
- Here, click Change Adapter Settings, right-click on the appropriate connection, and then click Properties.
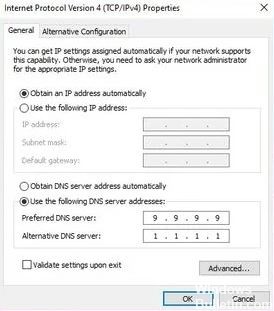
- Select Internet Protocol version 4 (TCP/IPv4) > Properties.
- Activate the Use the following DNS server addresses option and enter them:
Preferred DNS server: 9.9.9.9.9
Alternate DNS server: 1.1.1.1.1. - Click OK.
Start troubleshooting your network
Windows 10 has several troubleshooters – sets of software tools that automatically check for errors and perform (or suggest) repairs.
- Press Windows + I to open Settings, then Network and Internet > Network Troubleshooting.
- Follow the steps in the tool to restore your network connection.
Update the network driver
- Right-click on Start and select Device Manager.
- Here, expand Network Adapters, select your network device, right-click and select Update Driver.
- Wait for the device driver to be updated, then restart Windows. If all went well, Windows 10 should automatically connect to the network as usual.
- If that didn’t work, try disconnecting the device, restarting your computer, and then turning the device back on.
Check your computer’s connection properties
- Open the settings screen by clicking on the Wi-Fi connection icon in the taskbar, then click on Network and Internet Settings.
- Here, click on Change Adapter Settings, right-click on the appropriate connection, and then select Properties.
- Make sure that the following items are enabled:
- Client for Microsoft Networks
- File and printer sharing for Microsoft networks
- Internet Protocol version 4 (TCP/IPv4)
- Internet Protocol version 6 (TCP/IPv6)
- Topology discovery receiver at the data link layer
- Click OK to confirm. If you have made any changes, restart Windows when prompted.
Expert Tip: This repair tool scans the repositories and replaces corrupt or missing files if none of these methods have worked. It works well in most cases where the problem is due to system corruption. This tool will also optimize your system to maximize performance. It can be downloaded by Clicking Here
Frequently Asked Questions
How do you safely eliminate the lack of internet?
- Disable your VPN.
- Update your Windows 10 IP configuration.
- Reset Winsock.
- Check your PC's connection properties.
- Disable IPv6.
- Install a new DNS server.
- Update the network driver.
- Run the Windows 10 network troubleshooter.
What does “No Secure Internet” mean for WiFi?
The "No Internet, Secure" status message means that your WiFi connection to your router is correct and properly encrypted ("Secure"), but there is no Internet connection between your home router and the outside world ("No Internet").
Can’t back up the Internet?
Before you touch your Windows 10 computer, you should first unplug your router, leave it off for a few minutes, and then plug it back in. In our experience, this simple trick solves most "No Internet, Backup" errors. Also, take this opportunity to reboot your computer.
What does “No Internet Secured” mean in Windows 10?
In Windows 10, there may be a conflict between your router driver and your wireless network driver, which can result in the "No Internet, secured" error message. To resolve this conflict, open Network Adapters. Uncheck "Microsoft Network Adapter Multiplexer Protocol" and all other items related to WiFi sharing.
